Table of Contents >> Show >> Hide
- What Does It Mean to Oxide Concrete?
- Before You Start: Safety, Testing, and Color Planning
- Way 1: Use Integral Oxide Pigment in the Concrete Mix
- Way 2: Apply a Dry-Shake Oxide Color Hardener
- Way 3: Oxide Existing Concrete with Stains, Tinted Sealers, or Color Washes
- Which Oxide Concrete Method Should You Choose?
- Common Mistakes When Oxiding Concrete
- Maintenance Tips for Oxide Concrete
- Real-World Experience: What Actually Helps When You Oxide Concrete
- Conclusion
Note: In concrete work, “oxide concrete” usually means coloring concrete with iron oxide pigments or creating an oxide-style finish with stains, color hardeners, or tinted sealers. It does not mean encouraging destructive rust inside reinforced concrete. Rebar rust is not a design feature; it is a repair bill wearing a tiny orange hat.
Plain gray concrete is dependable, affordable, and about as visually exciting as a parking ticket. That is why oxide concrete has become such a popular choice for patios, walkways, garden edging, countertops, stamped concrete, fire pits, stepping stones, and decorative slabs. With the right coloring method, concrete can shift from dull gray to warm terra cotta, deep charcoal, rusty red, sandy buff, weathered brown, or stone-like earth tones that look intentional instead of “I forgot to finish this project.”
The secret is choosing the right method before you begin. Some oxide concrete techniques color the entire slab from the inside out. Others concentrate color at the surface for a richer decorative finish. A third group works best on existing concrete, where you want to update, stain, or revive a slab that already has a life story and possibly a few barbecue stains.
This guide explains three practical ways to oxide concrete: integral oxide coloring, dry-shake oxide color hardener, and surface staining or tinted sealing. Each method has strengths, limitations, and “please do not skip this step” moments. Whether you are coloring a small DIY stepping stone or planning a decorative patio, the goal is the same: durable color, consistent results, and concrete that looks like it belongs in a design magazine instead of behind a warehouse.
What Does It Mean to Oxide Concrete?
To oxide concrete means to add color using mineral-based pigments, especially iron oxide pigments. These pigments are popular because they are stable in cement-based materials and can create earthy colors that feel natural outdoors. Red, yellow, brown, black, buff, charcoal, and terra cotta shades are common because they pair well with stone, brick, wood, landscaping, and modern exterior design.
Iron oxide pigments are different from ordinary paint. Paint sits on the surface. Integral oxide pigment becomes part of the concrete mixture. A dry-shake color hardener bonds into the top layer of fresh concrete. Acid stains and penetrating stains react with or soak into the surface, creating a more variegated look. Each option changes the concrete in a different way, so choosing the method matters.
Here is the easiest way to think about it: integral oxide color is like baking cocoa into a cake, dry-shake hardener is like adding a richly colored crust, and stain is like glazing the cake after it has cooled. All three can be beautiful. Only one should be eaten, and unfortunately, it is not the concrete.
Before You Start: Safety, Testing, and Color Planning
Concrete color is influenced by cement type, sand color, aggregate, water amount, curing conditions, finishing technique, surface porosity, and sealer choice. That means the same pigment can look slightly different from one batch to the next. If you need perfect color consistency across a large project, make a sample panel first. Actually, make two. Concrete has a mischievous sense of humor when you skip samples.
Always wear gloves, eye protection, long sleeves, and a dust mask or respirator when working with dry cement, pigments, color hardeners, or powdered products. Cement dust can irritate skin, eyes, and lungs. Wet concrete is alkaline and can burn skin with prolonged contact. If you are using stains, cleaners, etchers, or sealers, follow the product label for ventilation, protective gear, drying times, and disposal.
Also plan your color before mixing. Oxide colors are often subtle when wet, then shift as the slab cures and dries. Sealers can deepen the color, add gloss, or leave a more natural matte appearance. A charcoal oxide may look smoky and modern with a satin sealer but flatter and softer with a penetrating matte sealer. A red oxide may look rustic outdoors but surprisingly bold on a small indoor countertop. Color is not just chemistry; it is lighting, texture, and context.
Way 1: Use Integral Oxide Pigment in the Concrete Mix
Best for: New slabs, pavers, stepping stones, countertops, curbs, and projects where color should run throughout the concrete
Integral oxide coloring is the most straightforward way to oxide concrete. You add pigment to the concrete mix before placement, so the color becomes part of the entire batch. If the surface chips or wears slightly, the color is still present below the surface. That makes integral color a practical choice for driveways, patios, walkways, garden borders, molded concrete pieces, and other projects that need long-lasting color.
Integral pigments are usually available as liquid colors, powdered pigments, or pre-measured dissolving bags for ready-mix concrete. For small DIY projects, liquid cement color is often easiest because it can be mixed into the measured water before being added to the dry concrete. Powdered iron oxide pigments are also common, but they need careful measuring and thorough blending to avoid streaks or little pigment comets floating through your slab.
How to do it
Start by choosing a pigment made specifically for concrete, mortar, or cement-based mixes. Do not grab random craft pigment and hope for the best. Concrete is alkaline, abrasive, and unforgiving. Use a product designed to survive inside cement.
Measure your water consistently for every batch. This is one of the biggest keys to even color. Too much water can lighten the final color, weaken the concrete, and increase the chance of blotchiness. Mix the pigment into the water first if the manufacturer recommends that method. Then add the colored water to the concrete mix and blend until the color is uniform throughout.
For larger jobs, use the same concrete mix design, same pigment dosage, same water ratio, and same finishing method from start to finish. If you change cement brands halfway through the project, the color can change. If one batch gets extra water because someone decided the mix “looked thirsty,” the color can change. Concrete loves consistency. Treat it like a very heavy bread recipe.
Pros of integral oxide color
The biggest advantage is depth. Because the color runs through the concrete, normal wear is less obvious than it would be with a thin surface coating. Integral oxide color also produces a natural, understated look. It is excellent for earth-tone projects where you want the slab to look like colored concrete, not painted concrete.
Integral color is also relatively low maintenance once sealed properly. It does not peel because it is not a film sitting on top. It works well with broom finishes, stamped concrete, exposed aggregate, troweled finishes, and molded concrete forms.
Limitations to know
Integral color can be more expensive on large slabs because you are coloring the entire volume of concrete, not just the surface. It can also look less intense than surface-applied color hardeners. If you want dramatic brick-red stamped concrete or a bold slate finish, integral color alone may be too subtle. Many contractors use integral color as the base tone and then add release color, stains, or sealers for more depth.
Another limitation is that changes are difficult after placement. Once the slab is poured, you cannot “just add a little more brown” unless you own a time machine and a concrete truck. Test first, document your mix, and work in controlled batches.
Way 2: Apply a Dry-Shake Oxide Color Hardener
Best for: Fresh concrete surfaces, stamped concrete, patios, pool decks, walkways, and decorative hardscapes
Dry-shake color hardener is a cement-based powder blended with pigments, fine aggregates, and hardening materials. Instead of coloring the entire slab, you broadcast the material over fresh concrete and work it into the top surface during finishing. The result is a dense, colored wear layer that can be more vivid than integral color.
This method is especially popular for stamped concrete because it creates strong surface color and improves abrasion resistance. If integral pigment is the quiet professional, dry-shake color hardener is the showy cousin who arrives wearing sunglasses indoors. It can be bold, rich, and highly decorative when used correctly.
How to do it
Place and screed the concrete as usual. Wait until bleed water has disappeared from the surface. This step matters. If you broadcast color hardener too early, the material can absorb excess water and become weak or blotchy. If you wait too long, it may not bond properly into the surface.
Broadcast the color hardener evenly by hand or with a suitable spreader, depending on the size of the job. Most installers apply it in two passes. The first pass covers most of the surface. After the powder absorbs moisture from the slab and darkens, it is floated into the concrete. A second lighter broadcast can fill thin spots and build color intensity. Then the surface is floated and finished according to the desired texture.
For stamped concrete, the stamping process usually happens after the color hardener is worked in and the concrete reaches the proper firmness. Release agents, accent colors, stains, and sealers may be added later to create stone, brick, tile, or slate-like effects.
Pros of dry-shake oxide color hardener
Dry-shake color hardener can produce stronger surface color than integral pigment. Because the color is concentrated near the top, you often get richer tones with less pigment than it would take to color the entire slab. It can also create a harder, denser surface, which is useful for decorative flatwork exposed to foot traffic, weather, and outdoor use.
This method gives finishers creative control. They can blend colors, create highlights, pair color hardener with stamped patterns, and use sealers to enhance the final look. For patios and walkways, this can produce a professional decorative finish that feels custom rather than ordinary.
Limitations to know
Dry-shake color hardener is technique-sensitive. It is not the easiest method for a first-time DIYer because timing, broadcasting, floating, and finishing all affect the final result. Uneven application can create streaks, weak spots, or patchy color. Wind can also blow powder where it should not go, including onto walls, windows, plants, and the neighbor’s suspiciously white dog.
This method also colors primarily the top layer. If the surface is deeply chipped, the gray concrete underneath may show. Proper curing and sealing are essential for durability and appearance.
Way 3: Oxide Existing Concrete with Stains, Tinted Sealers, or Color Washes
Best for: Existing patios, garage floors, walkways, basement floors, concrete furniture, and decorative refresh projects
If the concrete already exists, integral pigment and dry-shake hardener are no longer practical. That is when surface coloring methods enter the chat. Existing concrete can be updated with acid stains, water-based stains, concrete dyes, tinted sealers, or oxide-style color washes. These products do not all work the same way, so the look and durability vary.
Acid stains are reactive. They penetrate the surface and chemically interact with minerals in the concrete, often creating mottled, translucent, stone-like color. Traditional acid stain colors tend to be earth tones such as browns, tans, reddish browns, greens, and blue-greens. Water-based stains and dyes are usually more predictable and available in wider color ranges, but they may not have the same chemical variegation as acid stains.
Tinted sealers are another option. They can slightly alter, deepen, or even out existing concrete color while adding protection. They are useful for refreshing faded stamped concrete, blending minor discoloration, or giving a patio a warmer oxidized tone without fully recoloring the slab.
How to do it
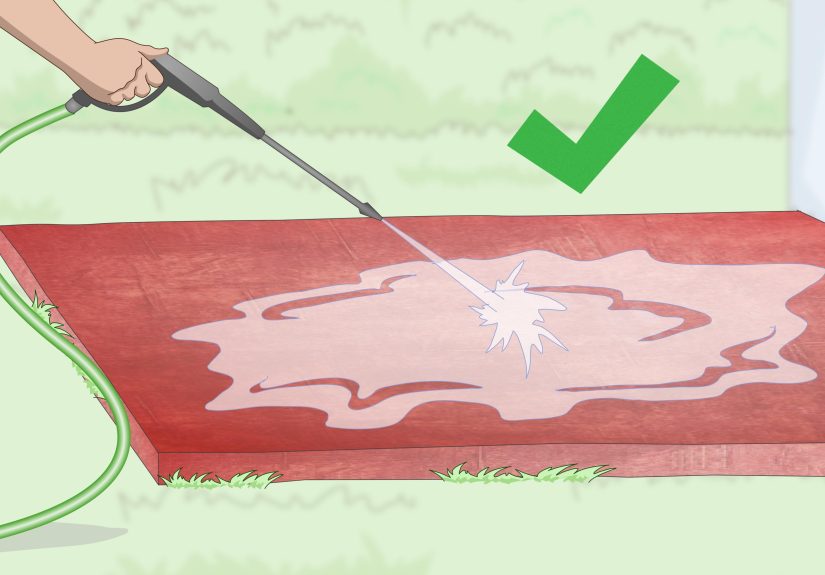
Begin with surface preparation. The concrete must be clean, sound, dry, porous, and free of sealers, paint, oil, grease, curing compounds, dirt, and loose material. Sprinkle a few drops of water on the slab. If the water absorbs, the surface is likely open enough for many stain systems. If it beads up, a sealer or coating may be blocking penetration.
Clean the surface thoroughly. Degrease oily areas. Remove old coatings if needed. Repair cracks and spalling before staining, but remember that patches often absorb stain differently than original concrete. That can be charming if you like rustic character and annoying if you wanted a flawless showroom floor.
Apply the stain or tinted sealer according to the manufacturer’s instructions. Many semi-transparent stains are sprayed in small sections and feathered to avoid lap marks. Acid stains usually require dwell time, neutralization, rinsing, drying, and sealing. Dyes may dry quickly and often need careful control to avoid overlap marks. Tinted sealers should be applied thinly and evenly; too much sealer can lead to bubbling, whitening, or slippery buildup.
Pros of surface oxide-style coloring
The biggest advantage is that it works on existing concrete. You can update an old slab without demolishing it. Stains and tinted sealers can create beautiful depth, especially on textured or stamped concrete. Acid stains can deliver natural variation that looks like stone, leather, rust, or aged metal. Water-based stains can create softer blends or more controlled decorative effects.
This method is also flexible. You can test a small hidden area, adjust color intensity with multiple coats, add accent colors, and choose a matte, satin, or gloss sealer depending on the final style.
Limitations to know
Surface coloring depends heavily on the condition of the concrete. Old sealers, oil stains, curing compounds, patch materials, dense troweled surfaces, and moisture problems can all affect the final color. Acid stains are famously unpredictable, which is part of their beauty and part of why they can make perfectionists twitch.
Surface-applied color also needs maintenance. Sealers wear over time, especially outdoors or in high-traffic areas. A stained patio may need cleaning and resealing periodically to keep the color looking fresh.
Which Oxide Concrete Method Should You Choose?
Choose integral oxide pigment when you are pouring new concrete and want reliable, long-lasting color throughout the slab. It is the best all-around choice for simple durability, subtle earth tones, and projects where small chips should not reveal a totally different color underneath.
Choose dry-shake oxide color hardener when you are working with fresh concrete and want stronger surface color, decorative stamping, or added surface density. This method is excellent for patios, walkways, pool decks, and decorative hardscapes, but it rewards skill and good timing.
Choose stains, tinted sealers, or color washes when the concrete is already cured and you want to change or refresh the look. This is the best option for renovation projects, old patios, basement floors, and decorative updates. Surface preparation is everything. If prep is boring, that is because it is quietly saving the entire project.
Common Mistakes When Oxiding Concrete
Using too much water
Extra water makes concrete easier to move, but it can weaken the mix and wash out color. Keep water consistent from batch to batch. If the mix feels stiff, use proper mixing technique rather than turning the wheelbarrow into soup.
Skipping a sample panel
Color charts are helpful, but they are not magic mirrors. Your cement, sand, aggregate, finishing method, and sealer will affect the final color. A small test panel can prevent a large regret.
Applying stain over sealed concrete
Stains need access to the concrete surface. If water beads on the slab, many stains will struggle to penetrate. Remove coatings and prep properly before staining.
Sealing too soon or too heavily
Sealer can enhance color and protect concrete, but heavy coats can trap moisture, create bubbles, or make the surface slippery. Follow coverage rates and drying times. More sealer is not always more better. Yes, that grammar is terrible. So is over-sealed concrete.
Maintenance Tips for Oxide Concrete
Keep oxide concrete clean with regular sweeping and gentle washing. Avoid harsh chemicals unless the sealer or stain manufacturer approves them. For outdoor slabs, remove leaves, fertilizer, oil, and metal objects that can stain the surface. Furniture pads can help prevent scratches on sealed patios and floors.
Reseal decorative concrete as needed. The schedule depends on traffic, weather, sun exposure, sealer type, and surface texture. A patio in full sun with frequent foot traffic may need attention sooner than a shaded garden path. When water no longer beads or the color looks faded and dry, it may be time to clean and reseal.
Real-World Experience: What Actually Helps When You Oxide Concrete
The biggest lesson from oxide concrete projects is that color consistency begins before the pigment touches the mix. Many beginners focus only on the pigment amount, but the real troublemakers are water, timing, and surface preparation. Two batches with the same oxide pigment can dry into noticeably different shades if one batch has more water or is finished later in hotter sun. On small projects, this may look handmade and charming. On a large patio, it can look like the slab had a mood swing.
For small DIY items such as stepping stones, planters, garden blocks, or concrete bowls, integral oxide pigment is usually the friendliest method. It is forgiving, easy to test, and does not require expert finishing. A useful habit is to write the recipe directly on a piece of tape: concrete weight, water amount, pigment amount, mixing time, and curing conditions. That tiny note can save you later when you want to make six matching pieces and cannot remember whether you used one teaspoon of pigment or “a confident sprinkle.”
For patios and walkways, think about texture before color. A broom finish will scatter light and make the color appear softer. A smooth troweled finish can make the color look deeper but may become slippery when sealed. Stamped concrete adds shadows, which can make oxide colors look more natural. A warm brown integral color with a darker surface accent can mimic aged stone beautifully, while a charcoal oxide finish can create a clean modern look next to white walls, black metal railings, or drought-tolerant landscaping.
Dry-shake color hardener delivers some of the richest results, but it also exposes weak technique quickly. Broadcasting evenly is harder than it looks. If you throw handfuls randomly, the finished slab may show heavy and light patches. The best results come from controlled passes, proper timing after bleed water disappears, and careful floating. On windy days, dry-shake powder can become airborne, so protect nearby surfaces and wear proper respiratory protection. Decorative concrete can be stylish, but inhaling dust is never part of the aesthetic.
For old concrete, staining is often the most satisfying transformation. A tired slab can look completely different after cleaning, staining, and sealing. However, existing concrete has history. Oil spills, old sealers, patch repairs, fertilizer marks, and dense trowel areas can all change how the stain absorbs. Instead of fighting every variation, many successful projects lean into it. Layering warm brown, rust, and amber tones can turn imperfections into character, especially outdoors where a perfectly uniform floor may look less natural anyway.
One practical trick is to view your test sample after sealing, not before. Unsealed stain can look dull, chalky, or underwhelming. A sealer may deepen the tone dramatically. Gloss sealers often make colors look richer and wetter, while matte sealers keep the appearance softer and more natural. If the project is outdoors, test the surface when dry and when damp. Some sealers can increase slip risk, especially around pools, steps, and sloped patios. Beauty is wonderful; falling dramatically in front of guests is less wonderful.
Another experience-based tip is to manage expectations. Oxide concrete is not printed vinyl or factory tile. It has movement, variation, and personality. That is part of the appeal. The best projects look intentional because the color, texture, joints, landscape, and sealer all work together. Choose earth tones that complement the home, repeat colors from brick or stone nearby, and use control joints as design lines when possible. Concrete will always be concrete, but with the right oxide method, it can become the handsome, low-maintenance foundation of an outdoor space.
Conclusion
Oxide concrete is one of the most practical ways to turn ordinary gray concrete into a decorative surface with warmth, depth, and personality. Integral oxide pigment is best when you want color throughout new concrete. Dry-shake oxide color hardener is ideal for rich decorative surfaces and stamped work. Stains, tinted sealers, and color washes are the go-to choices for existing concrete that needs a second act.
The best method depends on the project stage, desired color intensity, traffic level, skill level, and maintenance expectations. Whatever method you choose, success comes down to consistent mixing, careful surface preparation, realistic samples, proper curing, and the right sealer. Concrete may be tough, but decorative concrete rewards patience. Treat the process with respect, and your slab can go from “plain sidewalk energy” to “custom hardscape masterpiece” without losing the durability that made concrete famous in the first place.