Table of Contents >> Show >> Hide
- What Makes Kid Art Perfect for Decoupage?
- Best Types of Boxes for Decoupaging
- Supplies You Will Need
- Should You Use Original Kid Art or Copies?
- How to Prepare the Box
- How to Prepare the Kid Art
- Design Ideas Before You Glue
- Step-by-Step: Decoupaging A Box With Kid Art
- How to Avoid Common Decoupage Problems
- Creative Uses for a Kid Art Decoupage Box
- How to Preserve the Original Artwork
- Kid-Friendly Ways to Involve Children
- Experience Notes: What I Learned From Decoupaging A Box With Kid Art
- Conclusion
Some parents save kid art in neat folders. Some frame it. Some quietly “archive” it in the recycling bin after bedtime and hope nobody asks where the glitter dinosaur went. But if you have a few favorite masterpieces that deserve more than a life sentence in a drawer, decoupaging a box with kid art is a wonderfully practical solution.
Decoupage is the art of cutting, arranging, gluing, and sealing paper designs onto a surface. In this project, the surface is a plain box, and the paper is your child’s artworkscribbles, handprints, rainbow houses, mysterious purple blobs, and all. The result is a custom keepsake box that stores memories while being a memory itself. That is efficiency. Marie Kondo would probably nod respectfully.
Whether you are making a memory box, a toy storage box, a gift box for grandparents, or a decorative container for school supplies, this guide walks you through the process in a simple, beginner-friendly way. You do not need to be a professional crafter. You just need a box, some kid art, decoupage medium, patience, and the emotional strength to cut into a drawing your child may suddenly declare “the best one ever.”
What Makes Kid Art Perfect for Decoupage?
Kid art has something store-bought decorative paper can never fake: personality. The wobbly lines, wild color choices, oversized suns, and cheerful chaos give a decoupaged box a handmade charm that feels warm and real. A floral scrapbook sheet may be pretty, but can it capture the exact moment your child discovered orange markers and emotional intensity? No, it cannot.
Decoupaging with children’s artwork also solves a familiar household problem. Kids produce art at a speed that suggests they are being paid by the page. You want to keep the meaningful pieces, but keeping every single drawing can quickly turn your home into a paper-based wildlife preserve. Turning selected pieces into a decorated box lets you preserve the spirit of the art without storing every sheet forever.
Best Types of Boxes for Decoupaging
The easiest boxes to decoupage are unfinished wooden boxes, sturdy cardboard boxes, paper mache boxes, and smooth gift boxes. Wood is especially forgiving because it can be sanded, painted, and sealed well. Paper mache is lightweight and craft-friendly. Cardboard works too, but it needs a lighter hand because too much wet glue can cause warping.
Avoid flimsy boxes that bend when you press on them. Decoupage works best when the surface stays stable. If the box already has a glossy coating, lightly scuff it with fine sandpaper so the glue has something to grip. If the box has dust, oil, stickers, or mystery residue from the craft closet, clean it first. Decoupage is magical, but it is not a miracle worker.
Supplies You Will Need
Basic Materials
To decoupage a box with kid art, gather these supplies:
- A wooden, paper mache, or sturdy cardboard box
- Children’s artwork, preferably copied or scanned first
- Mod Podge, decoupage medium, or a homemade glue-and-water medium
- Foam brush or soft craft brush
- Scissors or a craft knife for adult use only
- Fine sandpaper, around 220 grit
- Acrylic paint for the base coat
- Wax paper or parchment paper
- Soft cloth or brayer for smoothing
- Clear acrylic sealer for extra durability
For projects involving younger children, choose art materials with an ACMI AP Non-Toxic Seal when possible. The AP seal indicates that the product has been evaluated for safety when used as intended. Adults should still handle craft knives, spray sealers, and sanding, because “kid-friendly” should not mean “tiny person with a blade and big confidence.”
Should You Use Original Kid Art or Copies?
Here is the honest answer: use copies unless you are completely comfortable transforming the original. Decoupage permanently glues and seals paper. Once the artwork is attached to the box, it is no longer a loose sheet you can store flat or frame later.
A smart approach is to scan or photograph the original artwork, then print copies on regular copy paper or matte presentation paper. This lets you resize the designs, repeat favorite sections, and preserve the original safely. If the original is made with washable marker, watercolor, or crayon, copying it also helps prevent smearing during the decoupage process.
If you do use originals, test a small corner first. Some inks and markers bleed when they meet moisture. A light spray sealer can help stabilize delicate drawings before gluing, but always test before coating the entire piece. Nothing says “craft drama” like watching a smiling stick figure dissolve into modern art soup.
How to Prepare the Box
Step 1: Sand and Clean
If you are using a wooden box, sand rough edges and surfaces lightly. Wipe away dust with a dry or slightly damp cloth. A smooth surface helps the paper lie flat and reduces bubbles. If your box is cardboard or paper mache, skip heavy sanding and simply remove loose fibers or bumps.
Step 2: Paint a Base Coat
Acrylic paint gives the box a finished look and prevents bare wood or brown cardboard from showing between pieces of artwork. White, cream, pastel blue, or soft gray are good background colors because they let the child’s art stand out. For a bold look, choose a color that appears in the artwork.
Let the paint dry completely before adding paper. If the surface still feels tacky, wait longer. Rushing dry time is the craft equivalent of pulling cookies out before they are baked: technically possible, emotionally disappointing.
How to Prepare the Kid Art
Choose artwork with strong colors, fun lines, or meaningful details. You do not need to use the entire page. Sometimes the best decoupage pieces come from small sections: a corner full of stars, a handwritten name, a tiny flower, or a wildly confident dinosaur with seven legs.
Cut the artwork into shapes before gluing. You can use squares for a patchwork look, strips for a collage style, or carefully cut shapes for a more polished design. For young children, let them help choose the art and point out favorite details. Adults should do precise cutting when sharp tools are needed.
Design Ideas Before You Glue
Patchwork Memory Box
Cut the artwork into squares or rectangles and arrange them like a quilt. This is the easiest layout for beginners and works beautifully when you have many small drawings or colorful scraps.
Feature Art on the Lid
Use one special drawing as the main design on the lid, then decorate the sides with smaller cutouts. This works well for birthday gifts, keepsake boxes, or a box meant to store school memories.
Name-and-Date Box
Add the child’s name, age, grade, or year somewhere on the box. A handwritten signature or a scanned note such as “I made this” adds personality and turns the box into a time capsule.
Color Theme Box
Select artwork in similar colors, such as blues and greens or pinks and yellows. This makes the final box look intentional, even if the art itself was created during a juice-box-fueled burst of inspiration.
Step-by-Step: Decoupaging A Box With Kid Art
Step 1: Plan the Layout
Before opening the glue, arrange the paper pieces on the box. Move them around until the balance feels right. Take a quick photo of the layout so you can remember where everything goes. This prevents the classic craft moment where you had a perfect design, sneezed, and suddenly everything looks like a paper tornado.
Step 2: Apply a Thin Layer of Decoupage Medium
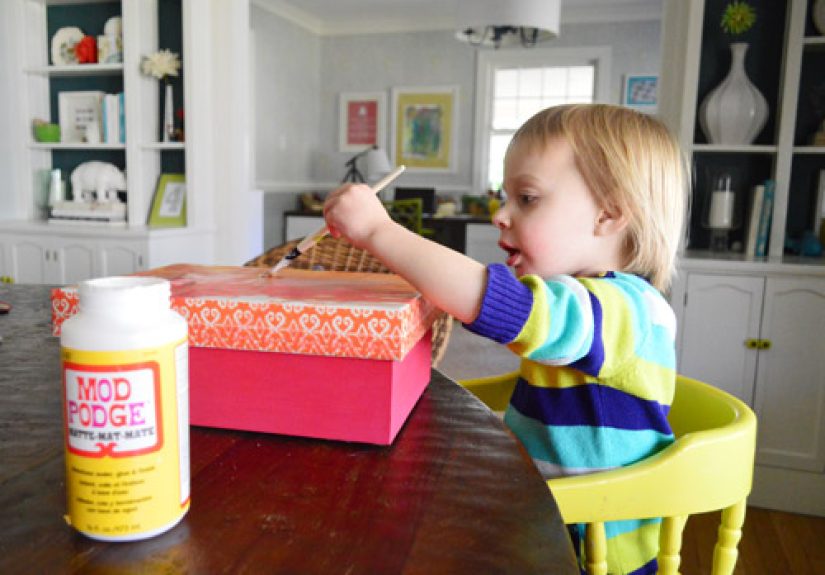
Use a foam brush to apply a thin, even coat of decoupage medium to a small section of the box. Do not coat the entire box at once. Work in sections so the glue stays wet while you position the paper.
Step 3: Place the Artwork
Lay the paper onto the glued area. Start at one edge and gently smooth it down. Use your fingers, a soft cloth, a brayer, or a piece of wax paper to push air bubbles outward. Be gentle, especially with thin paper.
Step 4: Smooth From the Center Out
Bubbles and wrinkles are common in decoupage, especially for beginners. The secret is not brute force. Smooth from the center toward the edges, pressing lightly. If a tiny wrinkle remains, do not panic. With kid art, a few wrinkles usually look charming, not catastrophic.
Step 5: Add More Pieces
Continue gluing one section at a time. Slightly overlap paper pieces if you want a collage look. For a cleaner design, leave small painted borders between pieces. Wipe away excess glue before it dries.
Step 6: Seal the Top
Once all paper pieces are attached and dry, brush a thin coat of decoupage medium over the top. Let it dry fully. Add two or three more thin coats, allowing each coat to dry before adding the next. Thin coats are better than one thick coat. Thick coats can dry cloudy, sticky, or uneven.
Step 7: Sand Lightly Between Coats
For a smoother finish on a wooden box, lightly sand between dry coats with fine sandpaper. Do not sand so hard that you damage the artwork. The goal is to smooth tiny ridges, not excavate a tunnel.
Step 8: Add a Final Protective Finish
If the box will be handled often, add a clear acrylic sealer after the decoupage layers have dried. For a memory box that sits on a shelf, regular decoupage medium may be enough. For a toy box, desk box, or gift box that will see more action, extra sealing helps protect the surface.
How to Avoid Common Decoupage Problems
Wrinkles
Use thin layers of glue and avoid soaking the paper. Thicker paper wrinkles less than tissue-thin paper, but it may need more smoothing at the edges. If you are using printed copies, let the ink dry fully before applying glue.
Bubbles
Bubbles usually happen when air gets trapped under the paper. Smooth slowly from the center outward. If a bubble appears while the paper is still wet, lift the edge gently and press it down again.
Bleeding Ink
Markers, inkjet prints, and watercolors may bleed when wet. Use laser copies when possible, or seal the paper lightly before decoupaging. Always test first, especially if the artwork is emotionally priceless and the artist is standing nearby with suspicious eyes.
Sticky Finish
A sticky surface usually means the coats are too thick, the project has not cured long enough, or the finish is not durable enough for heavy use. Let the box dry in a dust-free area and avoid stacking items on it until it has fully cured.
Creative Uses for a Kid Art Decoupage Box
A decoupaged kid art box can be much more than decoration. Use it as a school memory box for report cards, photos, certificates, and tiny notes. Turn it into a toy storage box for small cars, blocks, stickers, or pretend jewelry. Make a holiday gift box for grandparents and fill it with cookies, letters, or printed photos. Create a desk organizer for crayons, pencils, and erasers. Or use it as a bedtime treasure box for rocks, shells, friendship bracelets, and other objects children classify as “very important.”
You can also make one box each year. Label it with the child’s age or grade, then add a few art pieces from that stage. Over time, the boxes become a visual timeline of creativity. The preschool box may be mostly handprints and blobs. The second-grade box may feature hearts, superheroes, and suspiciously detailed dragons. The middle-school box may contain fewer rainbows and more opinions. That is growth.
How to Preserve the Original Artwork
If you scan and copy the artwork for decoupage, store the original properly. Keep important paper art flat in acid-free folders or boxes when possible. Avoid long-term exposure to direct sunlight because light can fade paper and pigments. Store special pieces in a cool, dry, stable place rather than an attic, garage, or damp basement.
For very sentimental pieces, photograph or scan them at high resolution. Digital copies give you more flexibility for future projects: photo books, calendars, framed prints, greeting cards, and yes, more decoupage boxes. Once you start, every plain container in your house may begin to look nervous.
Kid-Friendly Ways to Involve Children
Children can help choose the artwork, pick the paint color, arrange the cutouts, and smooth larger pieces with clean hands. Older kids can brush glue with supervision. Younger kids can point, approve, and provide artistic direction with the confidence of a gallery owner.
Keep the process relaxed. The goal is not perfection. The goal is to make something meaningful together. If the paper overlaps unevenly or the lid has a tiny wrinkle, that is part of the handmade story. Kid art is not supposed to look factory-made. That is exactly why it works.
Experience Notes: What I Learned From Decoupaging A Box With Kid Art
The first thing I learned is that children become deeply attached to drawings approximately seven seconds after you ask, “Can I cut this one?” A page that was previously lying under a chair suddenly becomes a historic document. To avoid negotiations that feel like international diplomacy, I now scan or photograph the artwork first. That way, the original stays safe, and the copy can be trimmed, layered, and glued without anyone clutching their pearlsor their crayons.
The second lesson is that not all kid art behaves the same way. Crayon drawings are usually sturdy and cheerful. Marker drawings can be dramatic. Watercolor paintings are beautiful but may react to moisture. Inkjet prints can smear if they are not sealed or fully dry. My best results came from using copied artwork printed on regular paper with a laser printer. The colors stayed put, the paper was thin enough to smooth easily, and I could resize favorite drawings to fit awkward corners of the box.
I also learned to stop using too much glue. Beginners often think more glue equals more durability. In decoupage, more glue often equals wrinkles, bubbles, and a surface that looks like it had a complicated day. A thin, even coat works better. I like using a foam brush because it spreads the medium smoothly and does not leave as many brush marks. When I place the paper, I smooth it gently from the center outward with wax paper over my fingers. This keeps the artwork from tearing and keeps my hands from becoming permanently glossy.
Another useful trick is painting the box before adding the art. A plain wooden or cardboard background can make bright kid drawings look dull. A white or light-colored base coat makes the colors pop. If the artwork has lots of warm colors, a soft cream background looks lovely. If the artwork is full of blues, greens, and outer-space adventures, a pale blue or light gray base can tie everything together.
The lid deserves special attention. It is the part people see first, so I like placing one strong piece of art there: a self-portrait, a rainbow, a handprint, or a funny handwritten phrase. The sides can be more playful and collage-like. This gives the box a focal point without making the whole thing feel too busy.
Drying time matters more than expected. I used to rush the second coat because the project looked dry on top. Bad idea. Decoupage medium may feel dry before it has truly settled. Waiting between coats gives a cleaner finish and reduces tackiness. For boxes that will be opened and handled often, I prefer adding a clear protective sealer after the decoupage layers are fully dry.
The sweetest surprise is how useful the finished box becomes. It is not just a craft. It becomes a place for birthday cards, school photos, tiny notes, lost teeth envelopes, friendship bracelets, ticket stubs, and all the miniature treasures that children collect with the seriousness of museum curators. The outside shows their creativity; the inside holds their memories. That combination makes the project feel personal in a way store-bought decor rarely does.
Most importantly, I learned that imperfections make the box better. A slightly crooked star, a wrinkled corner, a hand-drawn cat that may also be a potatothese details are the whole point. Decoupaging a box with kid art is not about creating a flawless object. It is about turning everyday creativity into something useful, visible, and loved.
Conclusion
Decoupaging a box with kid art is one of the best ways to preserve children’s creativity without drowning in paper. It is simple, affordable, and full of personality. With the right box, a few copied drawings, thin coats of decoupage medium, and a little patience, you can create a keepsake that is both decorative and practical.
The process works because it celebrates what kid art does best: it captures a moment. The uneven lines, bold colors, funny shapes, and tiny signatures tell a story no store-bought design can match. A decoupaged kid art box can hold school memories, small toys, craft supplies, family notes, or treasured keepsakes. More importantly, it gives children the joy of seeing their artwork treated as something valuable.
So before you tuck another masterpiece into a folder and forget it exists, consider giving it a second life on a box. The result may not be perfect, but it will be personal, charming, and far more interesting than anything from a home decor aisle.
Note: For best results, use copied artwork when possible, test inks before applying glue, choose child-safe materials, and let each coat dry completely before adding the next one.