Table of Contents >> Show >> Hide
- Why a Twig Trellis Works (Beyond Looking Cute)
- Pick Your Rustic Trellis Style
- Materials and Tools
- Step-by-Step: Build a Diamond-Pattern Rustic Twig Trellis
- Step 1: Choose size and placement
- Step 2: Build a sturdy frame
- Step 3: Sort twigs like you’re casting a movie
- Step 4: Lay the first diagonal “X” pattern
- Step 5: Secure intersections (without turning it into a knot museum)
- Step 6: Add a “spine” and edge trim for strength
- Step 7: Check stability and adjust
- Step 8: Optional finishing touch
- Plant Pairings That Love a Twig Trellis
- How to Train Vines on a Twig Trellis (So They Actually Climb)
- Make Your Rustic Trellis Last Longer
- Fast Variations You Can Build in an Hour
- Troubleshooting: Common Problems and Easy Fixes
- Bonus: of Real-Life Twig Trellis Experience
- Conclusion
If your garden had a personality, a twig trellis would be its “I thrifted this outfit but somehow look expensive” era. A rustic trellis made from twigs is the rare DIY that checks all the boxes: low-cost, low-waste, high-charm, and wildly satisfying to build. It also gives your climbing plants a place to strut their stuff instead of belly-flopping across your mulch like they own the place (because they do, but still).
In this guide, you’ll learn how to build a sturdy DIY rustic trellis using twigsthe kind that looks like it belongs in a cottage garden photo shoot, but is tough enough for real-world beans, peas, and flowering vines. You’ll get practical sizing tips, step-by-step instructions, design variations, plant training advice, and “things I wish someone told me before I tied 97 knots” level experience.
Why a Twig Trellis Works (Beyond Looking Cute)
A good twig trellis isn’t just garden décorit’s a vertical gardening tool. Training vines upward can: improve airflow, make plants easier to harvest, reduce fruit blemishes, and help you use limited space more efficiently. If you’ve ever tried to find cucumbers hiding under a jungle of leaves, you already understand this on a spiritual level.
Benefits you’ll actually notice
- Cleaner, straighter produce: Vining cucumbers, for example, often grow straighter when supported off the ground.
- Better airflow: Air movement can reduce disease pressure and keep foliage from staying damp for too long.
- Easier harvesting: Fruit hangs where you can see it, which means fewer missed “surprise zucchinis.”
- More room to grow: Vertical supports let you grow climbers without sacrificing an entire bed.
Twig trellises also have a sneaky advantage: they’re forgiving. A perfectly symmetrical lattice is pretty, but a slightly wonky, handmade pattern is the point in rustic garden style. Your trellis can be “artisan,” not “engineering exam.”
Pick Your Rustic Trellis Style
Before you start collecting sticks like a cheerful woodland raccoon, decide what shape fits your garden and plants. Here are five twig-friendly trellis styles (from easiest to “wow, you made that?”).
1) Diamond-pattern lattice (classic twig trellis)
This is the iconic look: crisscrossed twigs forming diamonds that vines can climb. It’s decorative and practical, and it works great as a backdrop behind peas, nasturtiums, or clematis.
2) Lean-to fan trellis
A fan shape (wide at the top, narrower at the bottom) is ideal for tight spaces. It visually “frames” a plant and looks especially good with flowering climbers.
3) Twig teepee (aka the bean party tent)
A tripod or teepee structure is fast to build and excellent for pole beans and sweet peas. Bonus: kids will absolutely try to turn it into a fort, which is not a flawit’s a feature.
4) Rustic obelisk
A tall, tapered tower looks fancy, takes up a small footprint, and provides lots of vertical climbing surface. Great for containers or center-of-bed drama.
5) Mini twig ladder for raised beds
Short on space? A small ladder-style trellis can support peas, dwarf cucumbers, or compact flowering vines in a raised bed without shading everything else into despair.
Materials and Tools
The beauty of a rustic twig trellis is that much of it can come from pruning debris. But “free” doesn’t mean “anything that vaguely resembles a stick.” Choose smart so your trellis lasts longer than a weekend.
Twigs and branches: what to look for
- Diameter variety: Thick pieces for the frame/uprights; thinner, flexible twigs for weaving the lattice.
- Length: Longer twigs reduce the number of joints (and the number of times you mutter, “Why won’t you stay?”).
- Condition: Avoid punky, rotting wood. Slightly green branches can be easier to bend; very brittle wood snaps.
- Texture: A mix of smooth and knobby twigs looks more rustic and hides minor irregularities.
Suggested supplies
- 4 sturdy stakes or 1x2s (for a framed trellis) or 2 stakes (for a fan trellis)
- A pile of sorted twigs (straight-ish ones for the pattern, curved ones for accents)
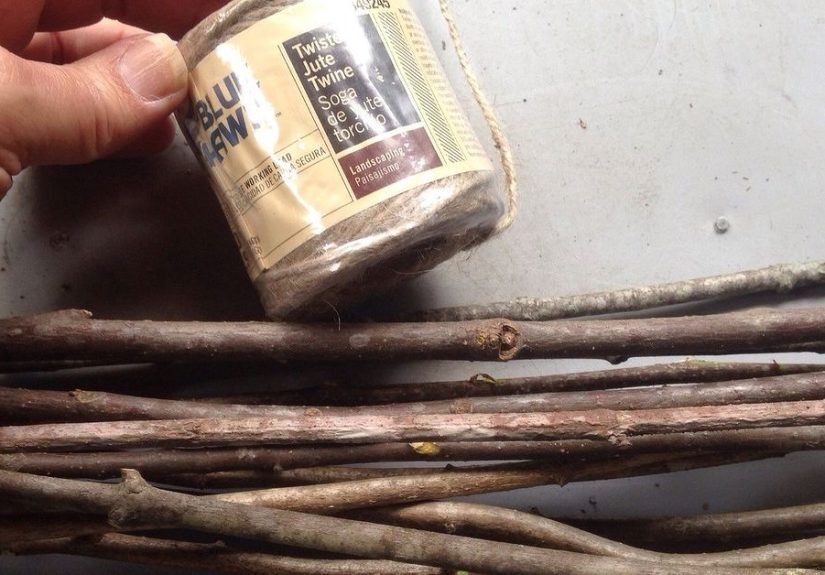
- Garden twine: jute, sisal, hemp, or cotton (compostable options are a nice touch)
- Pruners, loppers, or a small handsaw
- Hammer or mallet (for setting stakes)
- Optional: drill + small bit (for pre-drilling holes in thicker branches), gloves, and a measuring tape
Time and cost vary by design and what you already have. A decorative twig-lattice build can take a few hours and may cost more if you buy hardware and lumber, but it can also be nearly free if you’re using pruned branches and twine.
Step-by-Step: Build a Diamond-Pattern Rustic Twig Trellis
This is the “signature” lookgreat for fences, garden borders, or as a standalone focal point. The method below balances durability with that natural, handmade vibe.
Step 1: Choose size and placement
Match the trellis to the plant. For peas and many flowering vines, 5–6 feet tall is a sweet spot. For beans, you can go taller. Place it where it won’t shade sun-loving neighbors (unless your neighbors are weeds, in which case: shade away).
Step 2: Build a sturdy frame
If you want a freestanding trellis, set two vertical stakes in the ground and add a top and bottom crosspiece. If you’re mounting against a fence, you can still build a simple rectangular frame and attach it to the fence for strength.
- Anchor matters: Drive stakes deep enough that wind and vigorous vines won’t tip the structure.
- Quick sizing idea: A 6-foot stake set about 1 foot into the ground leaves roughly 5 feet above ground for climbing space.
Step 3: Sort twigs like you’re casting a movie
Make three piles:
- Uprights and long diagonals: straight, sturdy, longer pieces
- Secondary lattice: medium thickness, fairly straight
- Fillers and “character twigs”: curved, knobby, decorative pieces for edges
Step 4: Lay the first diagonal “X” pattern
Start with one long diagonal running bottom-left to top-right. Tie it to the frame at the top and bottom, and at least once in the middle. Add the next diagonal parallel to it, then another, keeping spacing consistent.
Then repeat in the opposite direction (bottom-right to top-left). As the two sets cross, diamonds begin to form. Don’t chase perfection; chase consistency. If the diamonds are slightly different sizes, your garden will not call the police.
Step 5: Secure intersections (without turning it into a knot museum)
At each intersection, you have two good options:
- Fast tie: Wrap twine 2–3 times, then a square knot. Trim tails neatly.
- Cleaner look: Use a clove hitch and a tiny dab of outdoor wood glue on thicker joints (optional).
Pro tip: tie the intersections that carry weight first (lower half of the trellis), then fill in the upper area. Vines tend to load the structure from the bottom up.
Step 6: Add a “spine” and edge trim for strength
A rustic trellis looks more finished when you frame the lattice with slightly thicker twigs along the outer edges. You can also add a vertical “spine” down the center backone sturdy branch tied to the framewhich helps prevent bowing.
Step 7: Check stability and adjust
Gently shake the structure. If it wobbles, reinforce the frame corners and add a couple more ties where the lattice meets the frame. If it leans, reset stakes or add a third stake behind the center for support.
Step 8: Optional finishing touch
Leave the wood natural (it will weather into a silvery rustic look), or brush on a plant-safe exterior oil on the frame only. Avoid heavy chemical treatments where edible plants will grow.
Plant Pairings That Love a Twig Trellis
Your trellis is basically a plant gym. Some climbers show up ready to climb; others need a gentle nudge and a pep talk. Here’s how to match plants to a rustic twig support.
Easy climbers for beginners
- Pole beans: fast, enthusiastic, and not shy about grabbing onto twigs
- Garden peas: use tendrils; they appreciate thin twigs and tighter lattice spacing
- Nasturtiums: edible flowers + cheerful chaos
- Sweet peas: fragrant and pretty, especially on a teepee
Cucumbers: trellis winners (with a small caveat)
Vining cucumbers do great on a trellis and are often easier to harvest and keep clean. Start training early so stems don’t kink. If you’ve grown certain long varieties on the ground and watched them curl like a phone cord from 1997, trellising can help.
Melons and heavy fruit: use slings
Some melons can “slip” from the vine when ripe and drop, so supporting developing fruit with fabric slings can prevent premature falls. Larger squash and pumpkins can get too heavy for most backyard trellisessave those for ground sprawl unless you’re building a serious support.
How to Train Vines on a Twig Trellis (So They Actually Climb)
Plants are smart, but they’re not mind readers. A new vine often needs a few days of “orientation” before it figures out the trellis is not an abstract art installation.
Training basics
- Plant at the base of the trellis at normal spacing for that crop.
- Guide the tips every few days: gently weave the growing ends into openings so they learn the route.
- Use soft ties only if needed: plant tape or loose twine loops (never tight wire).
- Prune for airflow when foliage gets denseespecially for cucumbers and other disease-prone vines.
If your vine keeps flopping sideways, don’t force-bend it into position like a stubborn coat hanger. Instead, guide the new growth (the flexible part) and let the plant gradually adopt the climbing habit.
Make Your Rustic Trellis Last Longer
Twig trellises are naturally “temporary-ish,” but you can absolutely get a season (or several) out of one with a few smart choices.
Durability upgrades (still rustic, still cute)
- Use thicker uprights: save the hefty branches for the frame and “load-bearing” parts.
- Keep twigs off constant soil contact: soil moisture speeds decay. Lift the lower lattice slightly above ground.
- Replace ties yearly: natural twine can break down (which is great for compost, less great for mid-season trellis collapse).
- Overbuild for wind: vines catch wind like sails. If your area gets gusty, add a back stake or anchor points.
Also: accept that rustic materials age. A weathered twig trellis doesn’t look “old.” It looks “established.” Like it’s been there forever, blessing your garden with cottage-core credibility.
Fast Variations You Can Build in an Hour
Rustic twig teepee (perfect for beans)
Gather 5–8 long sticks (about 6–8 feet). Tie them together at the top, spread the bottoms into a circle, and push the ends into the soil. Add a few horizontal twig rings tied around the outside for extra climbing grip. If you want a sturdier look, build a tripod and then add extra poles between the three main legs.
Tripod/tripole style (simple, strong, very “garden folklore”)
A tripod configuration is naturally stable. It’s also visually interestinglike a tiny botanical monument. If you’re growing pole beans, this is one of the most reliable rustic structures.
Wall-backed twig lattice (for small patios)
If you have a fence or wall, you can attach a lightweight twig lattice to it, creating a decorative climbing panel. Plan the diamond spacing first, then tie twigs directly onto horizontal supports.
Troubleshooting: Common Problems and Easy Fixes
Problem: My trellis leans after a storm
Solution: Drive stakes deeper, add a third stake behind the center, or brace the back with a diagonal support. Vines add surprising weightespecially when wet.
Problem: The lattice sags in the middle
Solution: Add a vertical “spine” branch behind the lattice and tie intersections more densely in the lower half. Also consider thicker diagonals.
Problem: Vines refuse to climb
Solution: Train early and gently. Some plants need a few guided wraps before they commit. Make sure the lattice openings aren’t too wide for tendrils to grab.
Problem: Twigs are cracking when I bend them
Solution: Use greener, fresher cuttings for curves, or soak brittle twigs in water for a short time before shaping. Otherwise, lean into straight lines and let the “character twigs” be decorative accents instead of structural pieces.
Bonus: of Real-Life Twig Trellis Experience
My first rustic twig trellis taught me a humbling truth: twigs do not care about your vision board. I had a mental image of a perfectly even diamond patternsomething you’d see behind a romantic cottage garden photo. What I built looked more like a polite argument between geometry and a pile of sticks. And honestly? It still looked great once the vines showed up.
Here’s what I learned the hard (and occasionally hilarious) way. First, sorting twigs is not optional. I tried the “grab-and-tie” method, which is optimistic but chaotic. The lattice ended up with thick branches crossing delicate twigs, and the delicate twigs lost every time. The second build went smoother: I made a “frame pile,” a “straight-ish pile,” and a “weird but pretty pile.” The weird pile became the edge trim, and suddenly my trellis looked intentionallike I was an artist, not a person wrestling shrubbery.
Second, I stopped trying to win the war against imperfection. Rustic style is basically permission to be human. If one diamond is a little taller than the others, it’s not “wrong.” It’s “handcrafted.” If a twig has a funky bend, it’s not a defect. It’s a signature flourish from Mother Nature, who clearly has more free time than the rest of us.
Third, wind is a bully. The day my peas hit their growth spurt, my trellis started acting like a sail. I had anchored the stakes “pretty well,” which turned out to mean “not well at all.” The fix was easy: deeper stakes and one extra support behind the middle. After that, the trellis stood firmeven when everything was wet and heavy after rain.
Fourth, training vines is a small habit that pays off big. I used to assume plants would magically find the trellis and climb. Some do. Others… wander. A quick check every few daysgently weaving the growing tips into the latticekept the plants vertical and made harvesting so much easier. It also prevented that moment where you discover a cucumber shaped like a question mark because it grew around a twig at the wrong angle.
Finally, I learned that twig trellises are excellent conversation starters. Friends will ask where you bought it. Neighbors will give you the “that’s cute, but is it sturdy?” look. And you get to say, with full confidence: “I made it from twigs.” Then pause. Let the silence do the bragging for you.
Conclusion
A DIY rustic trellis using twigs is one of those rare garden projects that feels wholesome, practical, and just a little bit magical. You turn pruning scraps into structure, give climbing plants a better life, and add instant character to your yardwithout needing a big budget or a workshop.
Build a diamond lattice for classic charm, a twig teepee for beans and peas, or a compact panel for patios. Anchor it well, tie it neatly, guide vines early, and you’ll have a trellis that looks like it belongs in a magazine even if it started as a pile of sticks you found while “just tidying up.”