Table of Contents >> Show >> Hide
- What Is the “Carved in Stone” Valentine Craft?
- Why This Valentine’s Day Craft Works So Well
- Supplies You’ll Need
- Choosing the Best Rocks
- How to Make a Carved in Stone Valentine Rock
- Design Ideas for “Carved in Stone” Valentine Rocks
- Tips for Better Results
- Ways to Use Your Finished Valentine Stones
- Kid-Friendly Version
- Adult Craft Night Version
- Common Mistakes to Avoid
- Why Handmade Valentine Gifts Matter
- Experience: Making the “Carved in Stone” Valentine Craft at Home
- Conclusion
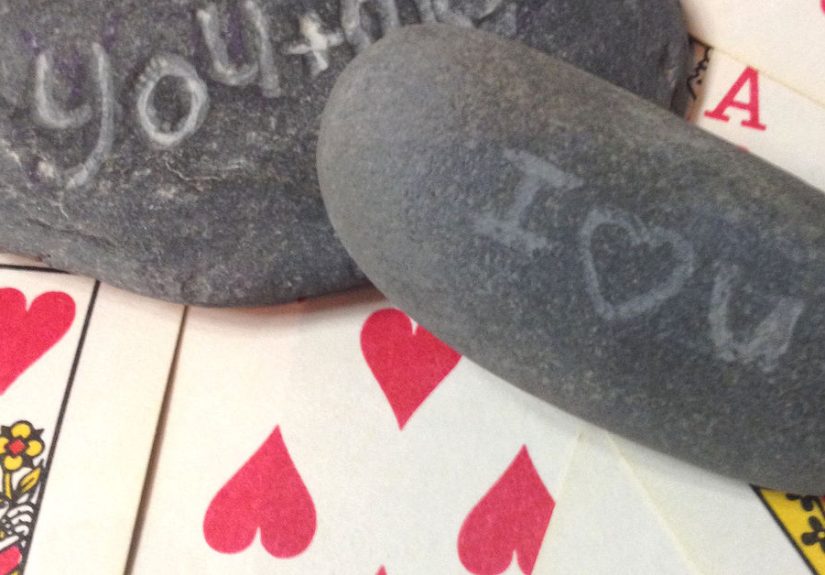
Some Valentine’s Day crafts whisper, “I made this with love.” Others scream, “I panic-bought glitter at 9:47 p.m.” This easy Valentine’s Day craft lands beautifully in the first category. Carved in Stone is a sweet, simple painted-rock project that turns ordinary stones into tiny keepsakes with hearts, initials, messages, and a faux-carved lookno chisels, no power tools, and no need to explain why there is red paint on the kitchen chair.
The idea is charmingly old-fashioned: love notes that feel permanent, like initials carved into a tree or a heart etched into a garden stone. But instead of actually carving anything, you create the illusion with paint, paint pens, shading, and sealing. The result is a Valentine’s Day craft that works for kids, teens, adults, classrooms, date nights, Galentine’s gatherings, or anyone who wants a handmade gift that will not wilt by February 15.
Painted rocks have stayed popular because they are affordable, personal, and wonderfully forgiving. A slightly wobbly heart still looks handmade in the best way. A crooked initial becomes “rustic.” A smudge can become a shadow. This is crafting with emotional support built in.
What Is the “Carved in Stone” Valentine Craft?
The Carved in Stone Valentine craft is a decorative rock-painting project designed to look as if a romantic message has been carved into stone. Smooth rocks are cleaned, painted, lettered, shaded, and sealed. The finished stones can be used as paperweights, table decorations, garden accents, gift toppers, classroom valentines, or small keepsakes for someone special.
Unlike traditional carving, this version is safe, simple, and beginner-friendly. You are not cutting into the rock. You are using contrast, outlines, and highlights to create depth. A gray stone with a white “engraved” heart and a tiny dark shadow instantly looks like it has been etched by Cupid’s very practical cousin, the one who owns a craft drawer.
Why This Valentine’s Day Craft Works So Well
Valentine’s Day crafts can sometimes feel too sugary, too flimsy, or too complicated. This one hits a nice balance. It is sentimental without being over-the-top. It is inexpensive without looking cheap. It is easy enough for beginners but still satisfying for people who enjoy details.
It Feels Personal
A stone with someone’s initials, a tiny heart, or a short message like “You Rock” feels more thoughtful than a generic card. It says, “I made this for you,” which is basically the craft-world version of a standing ovation.
It Uses Simple Supplies
You do not need a fancy machine, specialty paper, or a mysterious tool that only exists in craft videos. Smooth rocks, acrylic paint, paint pens, brushes, and a sealer are enough. Many families already have some of these supplies at home.
It Lasts Longer Than Paper Crafts
Paper hearts are adorable, but they can bend, tear, or mysteriously vanish into the school backpack abyss. Painted stones feel sturdy and gift-worthy. With proper sealing, they can become long-lasting keepsakes.
Supplies You’ll Need
Gather everything before you begin so you do not have to sprint through the house with wet paint on your fingers. Here is a practical supply list for this easy Valentine’s Day craft:
- Smooth, clean stones or river rocks
- Mild soap and water
- Paper towels or a clean cloth
- Acrylic craft paint in gray, white, black, pink, red, and optional metallic shades
- Fine-tip paint pens or permanent paint markers
- Small paintbrushes
- Pencil or chalk pencil for sketching
- Clear acrylic sealer or outdoor craft sealer
- Newspaper, cardboard, or a craft mat to protect your table
- Optional: Mod Podge, glitter paint, heart stickers, stencils, or transfer paper
For younger crafters, choose larger stones that are easy to hold and avoid tiny pebbles. If children are involved, use non-toxic, age-appropriate art supplies and supervise sealing, especially if using spray products. The craft is supposed to create warm memories, not a living room that smells like a hardware aisle.
Choosing the Best Rocks
The best rocks for this project are smooth, flat, and large enough to hold a short message. River rocks are ideal because their rounded surfaces look naturally polished. Garden centers, craft stores, and home improvement stores often sell bags of decorative stones. You can also use found rocks, but check local rules before collecting from parks, beaches, or protected areas.
Look for stones with an oval, heart-like, or rounded shape. A flat surface makes writing easier. If the rock is bumpy, save it for a simpler design, such as a painted heart or a single initial. Not every stone is destined to become a masterpiece. Some are born to be background actors, and that is okay.
How to Make a Carved in Stone Valentine Rock
Step 1: Wash and Dry the Stones
Rinse each stone with water and a little mild soap. Scrub away dirt, dust, or grit. Let the stones dry completely before painting. Paint sticks better to a clean, dry surface, and rushing this step can lead to peeling or patchy coverage.
Step 2: Paint the Base Coat
For a realistic carved-stone effect, start with a gray, charcoal, cream, or soft beige base coat. These colors mimic natural stone and make red or pink hearts pop. Apply one thin coat of acrylic paint, let it dry, then add a second coat if needed.
If you want the natural stone to show, skip the full base coat and paint only the design. This gives the craft an earthy, handmade feel. For a cleaner look, paint the entire stone first.
Step 3: Sketch the Design
Lightly sketch your Valentine design with a pencil or chalk pencil. Keep it simple: a heart, initials, a short phrase, or a tiny arrow. Good message ideas include:
- You Rock
- Be Mine
- Love You
- Forever-ish
- XOXO
- Our Love Rocks
- Best Buds
Short messages work best because rocks are not billboards. Trying to fit a full romantic speech onto a two-inch stone may result in emotional sincerity and unreadable lettering.
Step 4: Create the Faux-Carved Effect
To make the design look carved, use a fine brush or paint pen to draw the main shape in white, cream, or pale gray. Then add a thin dark line along the lower right edge of the heart or letters. This dark line acts like a shadow. Add a tiny highlight along the upper left edge to create the illusion of depth.
This simple shadow-and-highlight trick is what makes the design look engraved. The design does not need to be perfect. In fact, slightly uneven lines can make the stone look more natural.
Step 5: Add Valentine Details
Once the carved design is dry, add small accents. Dots, mini hearts, arrows, vines, flowers, sparkles, or a border can make the stone feel finished. A red heart inside a white engraved outline looks classic. Pink dots around the edge add a playful feel. Metallic gold accents give the whole thing a “tiny royal love monument” vibe.
Step 6: Let Everything Dry
Before sealing, let the paint dry thoroughly. A little patience here prevents smearing. If you used thick paint or several layers, let the stones dry longer. The surface should feel dry and smooth, not tacky.
Step 7: Seal the Stone
Apply a clear acrylic sealer or outdoor-safe craft sealer to protect your design. Brush-on sealers are easy to control, while spray sealers can give a smooth finish when used properly by an adult in a well-ventilated area. If the stone will stay indoors, a basic craft sealer works well. If it will go outside, choose a product made for outdoor use.
Seal the front, let it dry, then seal the back. This helps protect the entire stone and gives the finished piece a polished look.
Design Ideas for “Carved in Stone” Valentine Rocks
Classic Initials in a Heart
Paint a large carved-style heart in the center of the rock and add two initials inside. This design works for couples, best friends, siblings, or even a pet’s name. Because nothing says true love like including the dog.
Conversation Heart Stones
Paint stones in pastel pink, lavender, mint, or yellow, then add short messages inspired by conversation candies. Try “Hug Me,” “Kind Heart,” “So Sweet,” or “You Rock.” The stone version lasts longer and will not taste like chalky nostalgia.
Garden Love Stones
Use natural gray rocks with white faux engraving and place them in a planter, herb garden, or flower bed. Messages like “Grow Love,” “Bloom,” or “Love Lives Here” make beautiful outdoor accents.
Friendship Rocks
Valentine’s Day is not only for romance. Make stones for friends with cheerful messages such as “Bestie,” “You Shine,” “Good Vibes,” or “Rock Star.” These are great for classrooms, clubs, teams, or Galentine’s Day parties.
Minimalist Keepsake Stones
For a modern look, use a matte black or charcoal base and paint one tiny white heart in the center. Add a thin gray shadow and seal it with a satin finish. Simple, stylish, and very “I have my life together,” even if your craft table says otherwise.
Tips for Better Results
Use thin coats of paint instead of one thick coat. Thin layers dry more evenly and are less likely to peel. Let each layer dry before adding details. If using paint pens, test them on paper first so you do not get a surprise blob right on your carefully painted heart.
For lettering, write slowly and keep messages short. Block letters are easier than cursive on uneven surfaces. If you make a mistake, wait for the paint to dry, cover the area with the base color, and try again. Rocks are patient. They have been around for a while.
To make the carved effect stronger, remember the light source rule: highlights go on one side, shadows go on the opposite side. You do not need to be an art professor. Just pick upper left for highlights and lower right for shadows, then stay consistent.
Ways to Use Your Finished Valentine Stones
Once your stones are sealed and dry, they can be used in many creative ways. Place one at a breakfast table on Valentine’s Day morning. Add one to a gift bag instead of a tag. Tuck a stone into a potted plant. Use several as centerpiece decorations. Give them to classmates or coworkers. Hide them around the house for a Valentine treasure hunt.
You can also create a set of stones that tells a story. One stone might say “Love,” another “Laugh,” and another “Always.” Arrange them in a bowl or along a windowsill. For families, make one stone for each person’s name and display them together. It is a small project, but it can feel surprisingly meaningful.
Kid-Friendly Version
For younger children, simplify the process. Skip the faux-carved shading and let them paint colorful hearts, dots, and smiley faces. Adults can add the lettering later if needed. Use washable paints for easier cleanup, though acrylic paint usually gives better coverage on rocks. Cover the work surface, provide aprons or old shirts, and accept that at least one child will paint their hand. This is not failure. This is Tuesday.
Choose larger stones for small hands, and avoid very small rocks around toddlers. Keep sealers and permanent markers for adult use. The safest version is relaxed, supervised, and focused on fun rather than perfection.
Adult Craft Night Version
For adults, turn this project into a cozy Valentine craft night. Set out stones, paints, brushes, paint pens, snacks, and a few sample designs. Choose a color palette before starting: romantic reds and pinks, rustic neutrals, black-and-white modern, or soft cottagecore pastels.
You can make matching stones as a couple, create friendship stones, or design little place cards for a Valentine dinner. Add names to stones and place them at each table setting. Guests can take them home as favors. It is cheaper than roses, more personal than a store-bought card, and less dramatic than trying to cook heart-shaped pasta from scratch.
Common Mistakes to Avoid
One common mistake is painting rocks before they are fully dry. Moisture can stop paint from adhering well. Another is using too much sealer too quickly, which may cause cloudiness, tackiness, or smearing. Apply light coats and let each coat dry according to the product directions.
Another mistake is overcrowding the design. A tiny rock with five hearts, three names, a quote, and a decorative border can look busy. Let the stone breathe. Simple designs often look more elegant and more intentional.
Finally, do not hide sealed rocks in places where they could become litter or cause problems. If you participate in a kindness-rock activity, place stones responsibly and follow local community guidelines. A sweet message is lovely; a rock in a lawn mower’s path is not.
Why Handmade Valentine Gifts Matter
Handmade gifts have a special kind of charm because they carry time, thought, and personality. A store-bought gift can be beautiful, but a handmade Valentine stone feels intimate. It says the giver paused long enough to create something. In a world full of instant messages and same-day shipping, that pause has value.
The “Carved in Stone” craft also offers a nice metaphor. Love, friendship, and kindness are not always flashy. Sometimes they are steady, quiet, and durable. A small painted stone can represent a memory, an inside joke, a shared date, or a simple message of appreciation. That is a lot of emotional mileage for something that started in a bag of rocks.
Experience: Making the “Carved in Stone” Valentine Craft at Home
The best part of this craft is how quickly it changes the mood of a room. At first, everyone sees a pile of plain rocks and wonders if this is a craft or evidence from a landscaping project. Then the paint comes out, the first heart appears, and suddenly the table feels like a tiny Valentine workshop.
In a real home setting, this project works especially well because it does not demand perfection. One person may carefully sketch initials inside a heart. Another may paint three pink blobs and confidently declare them roses. Someone else may spend twenty minutes choosing between red and “slightly different red.” Every result has personality. That is what makes the craft fun instead of stressful.
One helpful experience is to start with a practice stone. Before making the “official” Valentine rock, test the paint pen, shadow line, and sealer on a less important stone. This removes the pressure. The first attempt teaches you how the paint moves on the surface, how quickly it dries, and whether the marker tip is too thick. By the second stone, the carved effect usually looks much better.
Another lesson is that the smallest details often make the biggest difference. A plain white heart is cute, but when you add a thin gray shadow on one edge and a tiny highlight on the other, it suddenly looks dimensional. A simple border of dots can make a rock feel finished. A tiny arrow through the heart can turn a basic design into a keepsake. These details do not take long, but they add charm.
This craft is also surprisingly good for conversation. During a family craft session, people naturally start asking what message they should write, who the stone is for, or whether “You Rock” is too obvious. It is absolutely obvious, which is why it works. The pun is part of the joy. Valentine’s Day can sometimes feel overly serious, but this project keeps it warm and playful.
For classroom or group settings, the experience is smoother when the supplies are organized in stations. One station for washing and drying stones, one for base coats, one for decorating, and one adult-managed area for sealing. Pre-painted base stones can save time if the group is young or the session is short. Kids especially enjoy choosing a stone because each one feels like a tiny blank character waiting for a costume.
For couples, this craft can become a relaxed date-night activity. It gives people something to do with their hands while talking, laughing, and maybe gently debating whose heart looks more like a potato. Add music, snacks, and a few sample designs, and the project becomes less about crafting skill and more about making a memory. The finished stones can be kept on a desk, nightstand, bookshelf, or windowsill as a quiet reminder of the day.
The most satisfying moment comes after sealing, when the stone has a slight shine and the colors look deeper. Suddenly, it feels less like a craft project and more like a finished gift. That transformation is the magic of this easy Valentine’s Day craft. It starts with something ordinary and turns it into something personal, lasting, and sweetproof that love does not always need grand gestures. Sometimes it just needs a smooth rock, a steady hand, and a little red paint.
Conclusion
Easy Valentine’s Day Craft: Carved in Stone is a simple, affordable, and meaningful project that turns ordinary rocks into heartfelt keepsakes. With smooth stones, acrylic paint, a few clever shading tricks, and a protective sealer, you can create Valentine decorations and gifts that look charmingly engraved without using carving tools.
This craft is flexible enough for kids, adults, classrooms, parties, and cozy nights at home. It can be romantic, funny, friendly, rustic, modern, or wonderfully silly. Best of all, it gives Valentine’s Day a handmade touch that feels personal and lasting. Flowers fade, cards get tucked away, and chocolate disappears under suspicious circumstances. But a little stone that says “You Rock”? That can stick around for years.
Note: This article is original web-ready content written in standard American English and based on practical craft methods, common rock-painting techniques, and real safety-conscious DIY guidance.