Table of Contents >> Show >> Hide
- Before You Start: What Kind of Backyard Pond Do You Want?
- Materials and Tools You’ll Need
- How to Build a Backyard Pond: 14 Steps
- 1. Choose the Best Pond Location
- 2. Check Local Rules and Call Before You Dig
- 3. Plan the Shape and Size
- 4. Design Plant Shelves and Depth Zones
- 5. Calculate the Pond Liner Size
- 6. Dig the Pond Basin
- 7. Add Sand or Underlayment
- 8. Position the Pond Liner
- 9. Add Water Slowly and Adjust the Liner
- 10. Install the Pond Pump and Filter
- 11. Build the Pond Edge
- 12. Add Gravel, Rocks, and a Waterfall if Desired
- 13. Add Aquatic Plants
- 14. Let the Pond Settle and Start Maintenance
- Common Backyard Pond Mistakes to Avoid
- Best Plants for a Backyard Pond
- How Much Does a DIY Backyard Pond Cost?
- Seasonal Backyard Pond Care
- of Real-World Experience: What Building a Backyard Pond Teaches You
- Conclusion
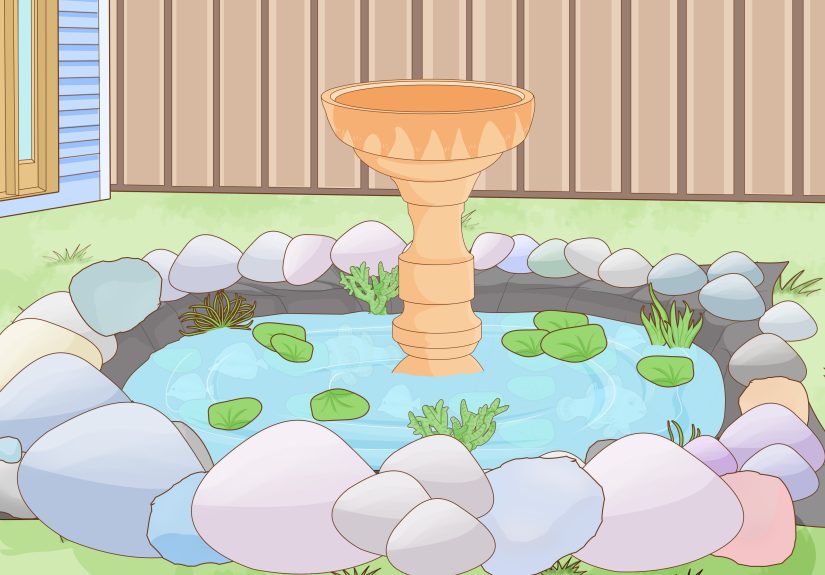
A backyard pond can turn an ordinary patch of lawn into the kind of peaceful garden corner where birds stop by, dragonflies patrol like tiny helicopters, and you suddenly become the person who says things like, “Let’s sit by the water feature.” The good news? You do not need a landscaping degree or a castle-sized estate to build one. With smart planning, a sturdy pond liner, the right pump, a little patience, and a shovel that is about to become your closest frenemy, you can create a beautiful DIY backyard pond that looks natural, supports plants, and brings gentle movement to your outdoor space.
This guide explains how to build a backyard pond in 14 clear steps, from choosing the right location to adding aquatic plants and maintaining clean water. Whether you want a small garden pond, a wildlife-friendly water feature, or a fish pond with a fountain, the process starts with the same basic principles: plan carefully, dig safely, protect the liner, circulate the water, and avoid turning your new oasis into a mosquito motel with waterfront views.
Before You Start: What Kind of Backyard Pond Do You Want?
Before buying materials, decide what role your pond will play in the yard. A decorative water garden can be shallow, plant-focused, and simple. A wildlife pond may include sloped access points, native plants, and fewer mechanical features. A fish pond needs more depth, better filtration, and consistent water quality. A koi pond requires even more planning because koi grow large, produce waste, and need room to swim like they are auditioning for a very elegant underwater parade.
For many homeowners, a small flexible-liner pond is the best first project. It allows a custom shape, can fit into corners or curved garden beds, and is easier to disguise with stone and plants than a rigid preformed shell. Preformed liners are useful for quick installations, but flexible pond liners are better when you want a natural-looking edge, shelves for plants, or a small waterfall.
Materials and Tools You’ll Need
Your exact supply list depends on the size and design, but most backyard pond projects need a flexible pond liner, pond underlayment, a pond pump, filter or fountain kit, tubing, edging stones, gravel, aquatic plant baskets, aquatic soil, dechlorinator if using tap water, a level, garden hose, shovel, wheelbarrow, utility knife, tape measure, and heavy gloves. For electrical safety, outdoor pond equipment should be connected to a properly installed GFCI-protected outlet. Water and electricity are a dramatic duo, and not in a romantic-comedy way.
How to Build a Backyard Pond: 14 Steps
1. Choose the Best Pond Location
Pick a spot where you can see and enjoy the pond from a patio, window, or garden path. A pond hidden in the far corner of the yard may look nice on paper, but if you never visit it, it becomes less “backyard retreat” and more “expensive puddle with ambitions.” Aim for a location that receives about four to six hours of sunlight per day. Too much direct sun can encourage algae, while deep shade can limit aquatic plant growth.
Avoid placing the pond directly under large trees. Falling leaves, twigs, seed pods, and mystery tree confetti can overload the water and make maintenance harder. Also avoid low areas where fertilizer, lawn chemicals, or muddy runoff may wash into the pond after rain. A slightly raised or well-drained site is usually easier to manage.
2. Check Local Rules and Call Before You Dig
Before digging, contact your local building department or homeowners association if applicable. Some areas have rules about pond depth, fencing, electrical work, and water features. Then contact 811 or your state’s utility marking service a few business days before digging. Even a small garden pond can run into underground gas, electric, cable, irrigation, or water lines. Nobody wants their weekend pond project to become a neighborhood power outage with witnesses.
3. Plan the Shape and Size
Use a garden hose, rope, or marking paint to outline the pond shape on the ground. Curved, irregular shapes tend to look more natural than perfect circles or rectangles. Keep the design simple if this is your first pond. A kidney shape, oval, or soft teardrop form is easier to dig, line, and edge than a shape with lots of narrow points.
For a small water garden, a pond between 6 by 8 feet and 8 by 10 feet is manageable for many DIYers. If you plan to keep fish, bigger is usually better because larger volumes of water are more stable. Shallow ponds heat quickly, cool quickly, and are more vulnerable to algae swings. A depth of 18 to 24 inches is common for small garden ponds, but fish ponds in cold climates may need deeper sections so fish can overwinter safely. Koi ponds often need at least 3 feet of depth and more robust filtration.
4. Design Plant Shelves and Depth Zones
A good backyard pond is not just a hole full of water. It should have depth zones. Create a shallow shelf around the edge for marginal plants, usually about 8 to 12 inches deep. Add a deeper middle section for water lilies, a pump, or fish refuge. If you want a natural wildlife pond, include one gently sloped access area or a flat stone ramp so frogs, birds, and other small visitors can get in and out safely.
Plant shelves also help disguise the liner. Once aquatic plants, stones, and gravel are added, the pond will look less like a plastic-lined crater and more like something nature thoughtfully installed while you were at the hardware store.
5. Calculate the Pond Liner Size
Measure the longest length, widest width, and maximum depth of the pond. A common liner formula is: liner length equals pond length plus twice the depth plus 2 feet extra; liner width equals pond width plus twice the depth plus 2 feet extra. The extra material gives you enough liner to tuck securely around the edges. It is much better to trim extra liner later than to discover you are six inches short after digging a hole that looks suspiciously permanent.
Choose a pond-safe liner designed for outdoor water features. EPDM rubber liners are popular because they are flexible, durable, and easier to shape around shelves and curves. PVC liners can work for smaller features, but quality varies. Always use pond underlayment beneath the liner to protect it from rocks, roots, and pressure points.
6. Dig the Pond Basin
Start digging from the center or from the deepest section and work outward. Remove sod first, then excavate in layers to create shelves and depth zones. Keep the sides stable and avoid vertical soil walls unless the soil is firm and the pond design is small. Use a level across a long board to check the rim of the pond. If one side is lower, water will escape there before the pond fills evenly.
Save some excavated soil if you plan to create a small waterfall mound or raised planting area nearby. Remove sharp stones, roots, and debris from the basin. Tamp the soil gently so the base is firm. This part is not glamorous, but it matters. A smooth, stable basin gives your liner a much better chance of living a long and leak-free life.
7. Add Sand or Underlayment
Once the hole is shaped, add a thin layer of sand if your soil is rocky, then install pond underlayment over the entire basin. Underlayment works like a protective cushion between the earth and the liner. It helps guard against punctures from roots, stones, and burrowing critters. Do not use old carpet unless it is recommended by a pond professional and safe for the setting; some materials can break down, smell, or release unwanted substances.
Overlap underlayment pieces generously and press them into corners, shelves, and the deepest area. Leave extra material extending beyond the pond edge. This protective layer may seem like one of those optional “extra steps,” but it is much cheaper than draining the pond later to repair a puncture.
8. Position the Pond Liner
Lay the flexible pond liner over the hole on a warm day if possible. Warm liner material is easier to fold and shape. Center the liner so it overlaps all edges evenly. Gently press it into the deepest section first, then smooth it over shelves and curves. Avoid stretching it tight; the liner should settle naturally into the basin as water is added.
Expect folds. A liner without folds is a fantasy, much like a garage that stays organized after one ambitious Saturday. Make neat pleats where possible, especially along curves. Larger folds can be hidden later with rocks, gravel, and plants.
9. Add Water Slowly and Adjust the Liner
Begin filling the pond with a garden hose. As the water rises, pause occasionally to adjust the liner and smooth major wrinkles. The weight of the water will pull the liner into place, so do not trim the edges too early. Fill the pond halfway, check the level, and make adjustments before continuing.
If using municipal tap water and adding fish or sensitive plants, treat the water with a pond-safe dechlorinator. Chlorine and chloramine are useful for drinking water systems but not friendly to fish or beneficial pond life. If your pond is plant-only, you still may want to let the water sit and stabilize before adding delicate plants.
10. Install the Pond Pump and Filter
A pond pump circulates water, supports oxygen levels, and helps prevent stagnation. Choose a pump sized for your pond’s volume and intended feature. For a simple water garden, a pump that circulates the pond volume about once every one to two hours is often adequate. For fish ponds or waterfalls, you may need more flow and better filtration.
Place the pump on a flat stone or pump stand rather than directly on the pond bottom. This helps reduce clogging from sludge and sediment. Run tubing to a fountain head, small waterfall, or filter. Hide cords and tubing safely without burying electrical connections where they cannot be inspected. Follow all manufacturer instructions and local electrical rules.
11. Build the Pond Edge
The edge is where many DIY ponds either look polished or accidentally reveal their rubbery secrets. Pull the liner flat around the rim and anchor it with flat stones, pavers, or natural rock. Leave several inches of liner beyond the waterline before trimming. Fold or tuck excess liner behind stones so water cannot wick out into nearby soil.
Use a mix of stone sizes for a more natural look. Large flat stones create stability, while smaller rocks and gravel fill gaps. Avoid placing sharp stones directly on the liner unless there is extra underlayment or protective fabric between them. The goal is to hide the liner, stabilize the edge, and create a pond border that looks intentional rather than “I ran out of ideas near the finish line.”
12. Add Gravel, Rocks, and a Waterfall if Desired
Rinse gravel and rocks before placing them in the pond to reduce cloudiness. A thin layer of rounded gravel on plant shelves can help create a natural look and provide surface area for beneficial bacteria. Do not pile heavy rock on unsupported liner folds or steep sides.
If adding a waterfall, build it on a compacted soil mound or stable base. Use a separate piece of liner or waterfall spillway so water flows back into the pond without escaping behind rocks. Test the waterfall with running water before finalizing the stones. Water has a mischievous personality; it will find the one wrong gap and sneak out like it has somewhere better to be.
13. Add Aquatic Plants
Plants are more than decoration. They shade the water, compete with algae for nutrients, soften the pond edge, and provide habitat for pollinators and wildlife. Use a mix of marginal plants, floating plants, submerged oxygenators, and deep-water plants such as water lilies. Choose non-invasive varieties suited to your region, and consider native plants whenever possible.
Plant aquatic plants in baskets or pots made for water gardens. Use aquatic planting media rather than regular potting soil, which can float away and cloud the water. Top containers with gravel to hold soil in place. Place marginal plants on shelves, water lilies in deeper areas, and floating plants where they have room to spread without covering the entire surface.
14. Let the Pond Settle and Start Maintenance
New pond water often turns cloudy before it clears. This is normal. Let the pump run, give plants time to establish, and avoid adding too many fish too soon. A backyard pond is a small ecosystem, not a decorative bathtub. It needs time to balance.
Remove leaves and debris regularly, especially in fall. Rinse mechanical filter pads as needed using pond water rather than chlorinated tap water, which can harm beneficial bacteria. Top off water during hot weather. Keep the pump intake clear. If mosquitoes become a concern, improve circulation, remove stagnant pockets, consider mosquito dunks containing Bti where appropriate, and avoid broad pesticide sprays near the pond because many chemicals can harm fish, pollinators, and aquatic organisms.
Common Backyard Pond Mistakes to Avoid
Making the Pond Too Small
A tiny pond may seem easier, but very small water features can be harder to keep stable. Water temperature and chemistry change faster in a small volume. If you have the space and budget, build slightly larger than your first sketch. Most pond owners eventually say, “I wish I had made it bigger,” usually while staring at a water lily that has decided to become a real estate developer.
Skipping the Underlayment
Underlayment is not glamorous, but it protects your liner. Skipping it to save money can lead to leaks, especially in rocky soil or areas with tree roots. A liner repair after the pond is filled, edged, planted, and admired by your neighbors is far more annoying than installing underlayment the first time.
Ignoring Water Runoff
Do not place a pond where lawn fertilizer, pesticides, mulch dye, or soil runoff will wash into it. Excess nutrients can fuel algae blooms and make water quality harder to manage. Use surrounding plants, gravel, and gentle grading to direct runoff away from the pond.
Adding Fish Too Quickly
Fish add movement and charm, but they also add waste. Wait until the pond has circulated and stabilized before stocking fish. Start with a small number and avoid overfeeding. Uneaten food decomposes and contributes to poor water quality. Fish do not need an all-you-can-eat buffet; they need a balanced pond.
Best Plants for a Backyard Pond
The best pond plants depend on your climate, pond depth, and sunlight. Popular options include water lilies for surface shade and flowers, pickerelweed for upright blooms, sweet flag for texture, rushes for vertical interest, and submerged oxygenating plants for habitat. Floating plants can help shade the water, but avoid invasive species and check local restrictions before buying.
For the most natural look, repeat a few plant types around the pond rather than collecting one of everything like a botanical shopping spree. Group plants in odd numbers, vary heights, and leave open water visible. A pond should have breathing room. If plants cover the entire surface, the effect becomes less “tranquil garden” and more “where did the water go?”
How Much Does a DIY Backyard Pond Cost?
A small DIY backyard pond can cost a few hundred dollars if you keep the design simple and do the digging yourself. Larger ponds, fish ponds, waterfalls, stonework, and professional electrical installation can raise the cost significantly. The biggest budget items are usually the liner, underlayment, pump, filter, stone, and plants.
To save money, start with a modest pond and add features later. You can install a basic pump now, then upgrade to a waterfall next season. You can plant lightly at first, then divide and expand plants as they grow. A backyard pond does not have to be finished in one shopping trip. In fact, the best ponds often evolve over time.
Seasonal Backyard Pond Care
Spring
Remove winter debris, inspect the pump, divide overgrown plants, and restart filtration if it was shut down. Spring is also a good time to check the pond edge for settling stones or exposed liner.
Summer
Monitor water levels, clean pump intakes, thin aggressive plants, and provide shade if algae becomes a problem. During heat waves, moving water is especially important for oxygen levels.
Fall
Net or skim leaves before they sink. Decaying leaves add nutrients and can reduce water quality. Cut back dead plant foliage and prepare tender aquatic plants for winter according to your region.
Winter
In cold climates, protect pumps and plumbing from freezing if they are not designed for winter use. If fish overwinter in the pond, maintain an opening in the ice for gas exchange, but do not smash ice with a hammer. The shock can stress fish. Use a pond de-icer or aerator designed for the purpose.
of Real-World Experience: What Building a Backyard Pond Teaches You
The first thing you learn when building a backyard pond is that the ground is never as soft, level, or cooperative as it looked while you were standing in the garden with a cup of coffee and a dream. Digging reveals rocks, roots, compacted clay, old sprinkler lines, and sometimes mysterious objects that make you wonder what previous homeowners were doing on weekends. That is why the planning stage matters so much. A pond that looks simple in a sketch becomes much easier to build when you have already chosen the depth zones, marked the shelves, measured the liner, and checked the level before the hole becomes too deep to casually change your mind.
Another lesson is that pond edges deserve more attention than beginners expect. The basin can be perfect, the pump can work beautifully, and the plants can look lovely, but if the liner edge is exposed, the whole project looks unfinished. The trick is to think in layers. Use flat stones to hold the liner, smaller rocks to hide gaps, gravel to soften transitions, and low-growing plants to blend the pond into the surrounding landscape. Creeping Jenny, sedges, native rushes, and moisture-loving perennials can make the edge look settled instead of staged. The goal is not to hide every inch of stone; it is to make the pond look like it belongs there.
You also discover that clear water is not always instant water. Many new ponds go through a cloudy or green phase while plants, bacteria, and filtration establish balance. This is where patience saves money. Beginners often panic and start buying bottles of quick fixes. Sometimes the better solution is shade, circulation, fewer nutrients, more plants, and less feeding if fish are present. A pond is not a swimming pool. It should be clean and healthy, but it does not need to look like blue glass from a resort brochure.
Maintenance becomes easier when you design for access. Place the pump where you can reach it without performing a dramatic full-arm plunge every time leaves clog the intake. Leave stepping stones or a stable edge where you can kneel safely. Put plants in baskets so they can be moved, divided, or removed. Make sure the electrical connection is accessible and weather-safe. The best backyard pond is not just beautiful on day one; it is manageable in month six.
Finally, a pond changes how you use the yard. You start noticing birds landing for a drink, bees visiting edge plants, and the soft sound of moving water covering neighborhood noise. Even a small pond can make a patio feel calmer and a garden feel more alive. It becomes a place to pause. Yes, you may occasionally skim leaves in your pajamas or explain to guests that the frog moved in without paying rent. But that is part of the charm. A backyard pond is not only a landscape feature; it is a tiny living system, and once it settles in, it has a way of making the whole yard feel more intentional, more peaceful, and just a little more magical.
Conclusion
Building a backyard pond is one of those DIY landscaping projects that rewards careful planning and a little muddy persistence. Start by choosing the right location, calling before you dig, designing practical depth zones, and using a quality liner with protective underlayment. Add a properly sized pump, finish the edge with stone, introduce aquatic plants, and give the pond time to find its balance. Whether your finished pond is a small water garden or a fish-friendly backyard feature, the result can bring movement, sound, wildlife, and a relaxing focal point to your outdoor space.
The secret is not perfection. It is patience. Build the pond well, maintain it regularly, and let plants and water do what they do best: soften the hard edges, invite life in, and make your backyard feel like somewhere worth lingering.