Table of Contents >> Show >> Hide
- Before You Start: Know Your Ports
- The Best Connection Setup for Most Modern TVs
- Step-by-Step: Connect the Digital Cable Box
- Step-by-Step: Connect the DVD Player
- Step-by-Step: Connect the VCR
- Should You Run the DVD Player Through the VCR?
- What If Your TV Has Only HDMI Inputs?
- What If You Have an Older TV?
- How to Label Inputs and Avoid Remote-Control Chaos
- Common Problems and Easy Fixes
- Best Cable Choices for Picture Quality
- Can You Record Cable TV to a VCR?
- Example Setup for a Typical Living Room
- Extra Experience: What Real Setup Usually Teaches You
- Conclusion
Connecting a DVD player, VCR, and digital cable box can feel like solving a puzzle designed by someone who owned too many cords and not enough labels. One device wants HDMI, another prefers red-white-yellow RCA cables, the VCR thinks it is still 1998, and your TV remote is quietly judging everyone. The good news? This setup is absolutely manageable once you understand which cable carries what signal and which device should connect directly to the TV.
This guide explains how to connect a DVD player, VCR, and digital cable box to a modern TV or an older television. You will learn the cleanest connection method, what cables you need, how to switch inputs, how to handle TVs with limited ports, and how to troubleshoot common problems like “No Signal,” missing audio, fuzzy VHS playback, or a DVD picture that looks like it was filmed through soup.
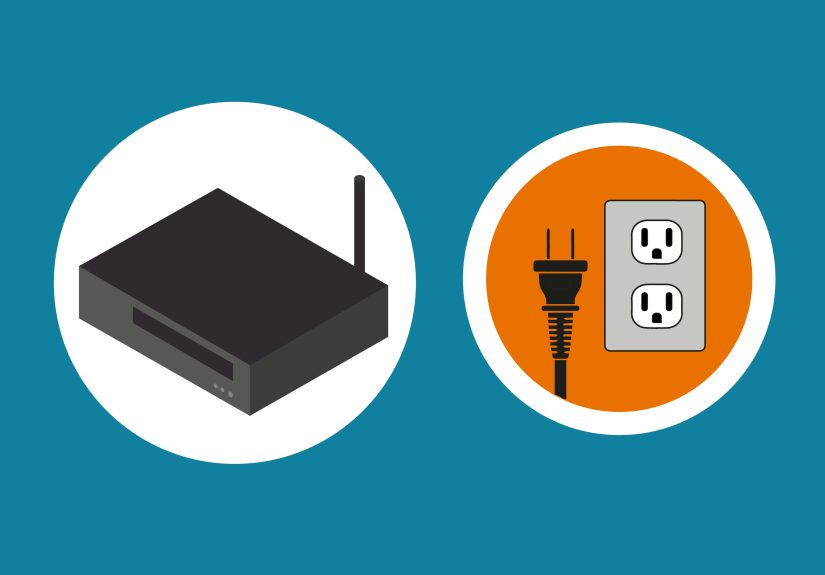
Before You Start: Know Your Ports
The fastest way to avoid frustration is to look at the back of each device before plugging anything in. Most home entertainment setups use a few common connection types: HDMI, composite RCA, component video, coaxial cable, and sometimes S-Video. Each one has a different purpose.
HDMI: Best for the Digital Cable Box and Newer DVD Players
HDMI is the easiest and cleanest connection because it carries both video and audio through one cable. Most digital cable boxes use HDMI as the preferred output, and many newer DVD players include HDMI as well. If your cable box has HDMI, connect it directly to an HDMI input on your TV. This gives you the best picture and avoids the mess of separate audio cables.
Composite RCA: The Classic Red, White, and Yellow Cables
Composite RCA cables are the familiar red, white, and yellow plugs. Yellow carries video, while red and white carry right and left audio. VCRs usually depend on composite output, and older DVD players often include it too. Composite video is standard definition, so it will not look razor-sharp on a big 4K TV, but it is perfect for VHS tapes, family recordings, and that one exercise tape someone swears they will use again.
Component Video: Better Than Composite for Some DVD Players
Component video uses green, blue, and red cables for video, plus separate red and white cables for audio. Some DVD players support component output, which can produce a cleaner image than composite. However, many modern TVs have reduced or removed component inputs, so HDMI is usually simpler when available.
Coaxial Cable: Common for Cable Service and Older TVs
A coaxial cable is the round screw-on cable often coming from the wall. In a modern cable setup, coax usually runs from the wall outlet to the digital cable box. From there, HDMI typically connects the cable box to the TV. Older VCRs and televisions may also use coaxial input or output, especially if the TV does not have RCA jacks.
The Best Connection Setup for Most Modern TVs
For most households, the best setup is simple: connect each device directly to the TV whenever possible. This avoids unnecessary signal loss and makes it easier to choose what you want to watch.
Recommended Modern Setup
Use this arrangement if your TV has at least one HDMI port and one composite input:
- Digital cable box: Connect coaxial cable from the wall to the cable box, then connect HDMI from the cable box to the TV.
- DVD player: Connect HDMI from the DVD player to another HDMI port on the TV. If the DVD player does not have HDMI, use composite or component cables.
- VCR: Connect composite RCA cables from the VCR output to the TV composite input.
After everything is connected, use the TV remote’s Input, Source, or TV/Video button to switch between devices. For example, HDMI 1 might be your cable box, HDMI 2 might be your DVD player, and AV or Video 1 might be your VCR.
Step-by-Step: Connect the Digital Cable Box
The digital cable box should usually be your highest-priority connection because it delivers live TV channels, on-demand content, and DVR features if your service includes them.
Step 1: Connect the Coaxial Cable from the Wall
Take the coaxial cable from the cable wall outlet and connect it to the port on the cable box labeled Cable In, RF In, or Coax In. Tighten it gently by hand. Do not attack it with pliers like it owes you money; too much force can damage the connector.
Step 2: Connect HDMI from the Cable Box to the TV
Plug one end of an HDMI cable into the HDMI output on the cable box. Plug the other end into an available HDMI input on the TV. Remember which HDMI port you used, such as HDMI 1 or HDMI 2.
Step 3: Power On and Select the Correct Input
Turn on the TV and cable box. Use the TV remote to select the HDMI input where the cable box is connected. If you see “No Signal,” double-check that the cable box is powered on, the HDMI cable is fully seated, and the TV is on the correct input.
Step-by-Step: Connect the DVD Player
DVD players are usually easier than VCRs because many support HDMI or component video. The best connection depends on the outputs available on your DVD player and the inputs available on your TV.
Option 1: Connect a DVD Player with HDMI
If your DVD player has HDMI, use it. Connect HDMI from the DVD player’s HDMI output to an open HDMI input on the TV. Turn on the DVD player, insert a disc, and choose the matching HDMI input on the TV.
Option 2: Connect a DVD Player with Composite RCA
If the DVD player only has red, white, and yellow RCA outputs, connect yellow to the TV’s yellow video input, white to white audio left, and red to red audio right. Then select the TV input labeled AV, Video, Composite, or Line In.
Option 3: Connect a DVD Player with Component Video
If your DVD player and TV both have component video, connect green to Y, blue to Pb/Cb, and red to Pr/Cr. Then connect the separate red and white audio cables. Select the component input on the TV. This setup can look better than composite, especially for progressive-scan DVD players.
Step-by-Step: Connect the VCR
The VCR is the charmingly stubborn member of the group. It does not care about 4K, smart apps, or streaming passwords. It wants composite cables, maybe coaxial, and a little respect.
Option 1: Connect the VCR with Composite RCA
Connect the yellow video output on the VCR to the yellow video input on the TV. Connect white audio out to white audio in, and red audio out to red audio in. Then turn on the VCR and select the TV input labeled AV, Video, or Composite.
If your VCR only has one audio output, it may be mono. In that case, connect the single audio cable to the white audio input on the TV. The sound may come through one channel unless your TV has a mono setting.
Option 2: Connect the VCR with Coaxial Cable
If your TV has a coaxial antenna input and your VCR has RF out, connect a coaxial cable from the VCR’s RF Out or TV Out port to the TV’s antenna input. Then set the TV to channel 3 or 4, depending on the switch on the back of the VCR. This method works, but composite usually gives a better picture.
Should You Run the DVD Player Through the VCR?
In most cases, no. It may seem convenient to connect the DVD player to the VCR and then connect the VCR to the TV, but this can cause problems. Many DVDs use copy-protection signals that can look distorted when routed through a VCR. You may see brightness pulsing, color shifting, or a picture that behaves like it drank too much coffee.
The cleaner solution is to connect the DVD player directly to the TV. If your TV does not have enough inputs, use an AV switch, an HDMI switch, or a proper RCA-to-HDMI converter depending on your equipment.
What If Your TV Has Only HDMI Inputs?
Many newer TVs have dropped composite and component inputs. If your TV only has HDMI, you can still connect a VCR or older DVD player, but you will need the correct converter.
Use an RCA-to-HDMI Converter
For a VCR or older DVD player with red-white-yellow outputs, buy an RCA-to-HDMI converter. Pay close attention to direction. You need a converter that accepts RCA input and sends HDMI output to the TV. An HDMI-to-RCA converter does the opposite and will not solve the problem.
The setup looks like this:
- VCR yellow/red/white outputs go into the RCA-to-HDMI converter.
- HDMI output from the converter goes to the TV.
- The converter’s power cable plugs into USB or a wall adapter.
- The TV is set to the HDMI input used by the converter.
Use an AV Switch for Multiple Older Devices
If both your VCR and DVD player use composite RCA cables, an AV switch can save you from constantly crawling behind the TV. Connect the VCR and DVD player to the switch, then connect the switch to the TV or to an RCA-to-HDMI converter. Press a button on the switch to choose the device. Your knees will send a thank-you card.
What If You Have an Older TV?
If your TV is older and only has a coaxial antenna input, you may need an RF modulator. An RF modulator converts composite RCA video and audio into a coaxial signal that an older TV can display on channel 3 or 4.
Older TV Setup with RF Modulator
Connect the VCR or DVD player’s yellow, red, and white outputs to the RF modulator. Then connect coaxial cable from the RF modulator to the TV’s antenna input. Set the RF modulator and TV to channel 3 or 4. If you also have a cable box, the setup may require a switch or careful routing so each device can reach the TV.
This is not the sharpest picture possible, but it is useful for vintage TVs, garage setups, guest rooms, and anyone committed to keeping classic electronics alive.
How to Label Inputs and Avoid Remote-Control Chaos
Once everything works, label your inputs. Many TVs let you rename HDMI 1 as “Cable Box,” HDMI 2 as “DVD,” and AV as “VCR.” If your TV does not support input labels, use small stickers or a note taped inside your media cabinet. Is it glamorous? No. Does it prevent fifteen minutes of remote-button roulette? Absolutely.
A practical setup might look like this:
- HDMI 1: Digital cable box
- HDMI 2: DVD player
- AV/Composite: VCR
- HDMI 3: RCA-to-HDMI converter, if needed
Common Problems and Easy Fixes
No Signal on the TV
Make sure the TV is set to the correct input. Check that the device is powered on. Reseat the HDMI or RCA cables. If using a cable box, confirm the coaxial cable from the wall is connected to the box, not directly to the TV unless your provider specifically supports that setup.
DVD Has Picture but No Sound
If you are using HDMI, try another HDMI port or cable. If using component video, remember that component carries video only, so you still need red and white audio cables. If using composite, check that red and white audio plugs are connected to the matching input group as the yellow video plug.
VCR Picture Is Fuzzy or Rolling
Clean the tape path if you know how, try another VHS tape, and check the tracking control on the VCR. Old tapes degrade, and some were never exactly Oscar-worthy in the first place. If the picture is black and white, the yellow video cable may be plugged into the wrong input.
DVD Picture Looks Distorted Through the VCR
Connect the DVD player directly to the TV instead of routing it through the VCR. DVD copy-protection signals can cause distortion when passed through a VCR.
The TV Has Shared Component and Composite Inputs
Some TVs use shared input jacks where the green component port also works as the yellow composite video input. Look for labels like “Y/Video.” If your TV supports this, plug the yellow composite cable into the green Y/Video jack and connect red and white audio normally.
Best Cable Choices for Picture Quality
Use HDMI first whenever available. HDMI is best for the digital cable box and newer DVD players because it handles audio and video in one cable. Component video is a good second choice for DVD players when HDMI is not available. Composite RCA is usually the best practical option for VCRs. Coaxial should be used for cable service from the wall to the cable box or as a last-resort connection for older TVs.
Can You Record Cable TV to a VCR?
Sometimes, but there are limitations. If your cable box has composite outputs, you may be able to connect those outputs to the VCR’s line inputs and then connect the VCR to the TV. The VCR must be set to the correct line input, not channel 3 or 4. However, many modern cable boxes limit analog outputs, and some channels or programs may block recording. For reliable recording, a cable provider’s DVR is usually easier.
Example Setup for a Typical Living Room
Imagine you have a smart TV with three HDMI ports and one shared AV input. Your cable box has HDMI. Your DVD player has HDMI and composite. Your VCR has composite only. The best setup is:
- Wall coaxial cable to digital cable box.
- Cable box HDMI out to TV HDMI 1.
- DVD player HDMI out to TV HDMI 2.
- VCR composite out to TV AV input.
- TV input labels changed to Cable, DVD, and VCR.
This gives each device its own path to the TV. It also makes troubleshooting easier because one bad cable or wrong input will not take down the whole entertainment kingdom.
Extra Experience: What Real Setup Usually Teaches You
After helping with this type of setup more times than anyone should admit, one lesson stands above the rest: the problem is rarely the device itself. Most issues come from the wrong input, a cable plugged into “out” instead of “in,” or a converter facing the wrong direction. Ports labeled “in” and “out” are not decorative. They are tiny traffic signs for your signal.
One common experience is connecting everything perfectly, turning on the TV, and seeing “No Signal.” Panic arrives. Someone blames the cable company. Someone else declares the DVD player dead. Then the input button gets pressed once, and suddenly everything works. This is why input selection should be the first troubleshooting step, not the final desperate act.
Another practical lesson is that older devices need patience. A VCR may take a few seconds to stabilize the picture. A VHS tape may look soft, wavy, or noisy because the tape itself is old. A modern 65-inch TV will not magically make VHS look like a new movie. In fact, it may reveal every flaw with brutal honesty. That does not mean the setup is wrong; it means VHS is being VHS.
Converters are also a frequent source of confusion. Many people buy an HDMI-to-RCA converter when they actually need RCA-to-HDMI. The words look similar, but the direction matters. If the VCR is sending signal and the TV is receiving it through HDMI, the converter must accept RCA input and produce HDMI output. Think of it like a one-way bridge. Buying the wrong direction is like building the bridge out of town when you wanted to come home.
It also helps to keep cable quality reasonable without going overboard. You do not need luxury HDMI cables guarded by dragons. A reliable HDMI cable of the right length is enough. For RCA cables, avoid loose connectors and damaged wires. If the red, white, or yellow plugs wiggle like a loose tooth, replace the cable. Many “mystery” audio problems are just tired cables asking for retirement.
Finally, the neatest setup is not always the most complicated one. Direct connections are better than daisy chains. The cable box should go straight to the TV with HDMI. The DVD player should go straight to the TV if possible. The VCR should use composite or a converter. Once everything works, label the inputs and take a photo of the back of the TV. Future you will appreciate it, especially when moving furniture, changing TVs, or explaining to someone why the VCR still deserves a spot in the cabinet.
Conclusion
Connecting a DVD player, VCR, and digital cable box is mostly about matching outputs to inputs and choosing the best cable for each device. Use HDMI for the cable box and newer DVD players, composite RCA for the VCR, component video if your DVD player and TV both support it, and an RCA-to-HDMI converter when a modern TV lacks older inputs. Avoid running DVD video through a VCR, label your inputs, and remember that the TV remote’s input button is often the hero of the story.
Once the setup is complete, you can enjoy live cable TV, DVDs, and old VHS tapes without swapping cables every time nostalgia strikes. It may not be as sleek as a streaming stick, but there is something satisfying about bringing three generations of home entertainment together and making them cooperate like a slightly chaotic family reunion.