Table of Contents >> Show >> Hide
- Why This DIY Project Is Worth It
- What You’ll Need
- Before You Start: Pick the Right Solar Light
- How to Make a Concrete Rock Solar Light
- How to Place Your Concrete Rock Solar Lights in the Yard
- Common Mistakes to Avoid
- How Much Does It Cost?
- What It’s Really Like to Use These Lights in a Real Yard
- Final Thoughts
If your yard feels a little too dark, a little too plain, or a little too “something is definitely hiding in those shrubs,” a DIY concrete rock solar light is a smart fix. It combines the rugged look of natural stone with the simplicity of a solar path light, which means you get outdoor lighting without trenching wires, hiring an electrician, or developing a mysterious new fear of extension cords.
This project works because it solves two problems at once. During the day, the light looks like a decorative landscape rock instead of a plastic stake sticking awkwardly out of the mulch like a tiny robot flagpole. At night, it adds a soft glow that makes walkways, garden beds, and patios feel safer and more inviting. Better yet, solar outdoor lighting is easy to install, doesn’t raise your electric bill, and is generally low-maintenance once it’s in place.
In this guide, you’ll learn how to make a concrete rock solar light from scratch, how to avoid the classic “whoops, that set too fast” concrete mistakes, and how to place the finished lights so your yard looks polished instead of overlit. We’ll also cover real-life tips, styling ideas, and the practical experience of living with these lights once the project is done.
Why This DIY Project Is Worth It
A concrete rock solar light hits a sweet spot that a lot of backyard projects miss. It’s functional, attractive, and surprisingly affordable. A basic solar stake light already does the hard part by collecting sunlight during the day and switching on automatically at dusk. Your job is to give it a tougher, more attractive housing that blends into the landscape.
That’s the beauty of this project: you’re not inventing solar technology in your garage while wearing safety goggles and confidence. You’re customizing a ready-made light into something that looks intentional. The concrete shell adds weight, weather resistance, and a natural stone effect. It also helps the light stay upright in wind, rain, and the occasional yard encounter with a dog, a mower, or an overexcited child with a soccer ball.
From a design standpoint, these lights work well along pathways, near flower beds, beside steps, around patios, and at the edge of gravel or mulch zones. They can be subtle and sculptural during the day, then quietly useful at night. That’s the dream: less “airport runway,” more “tasteful evening garden.”
What You’ll Need
- 1 solar path light or stake light, preferably with a removable top
- Fast-setting concrete mix, sand/topping mix, or a fine concrete blend
- Water
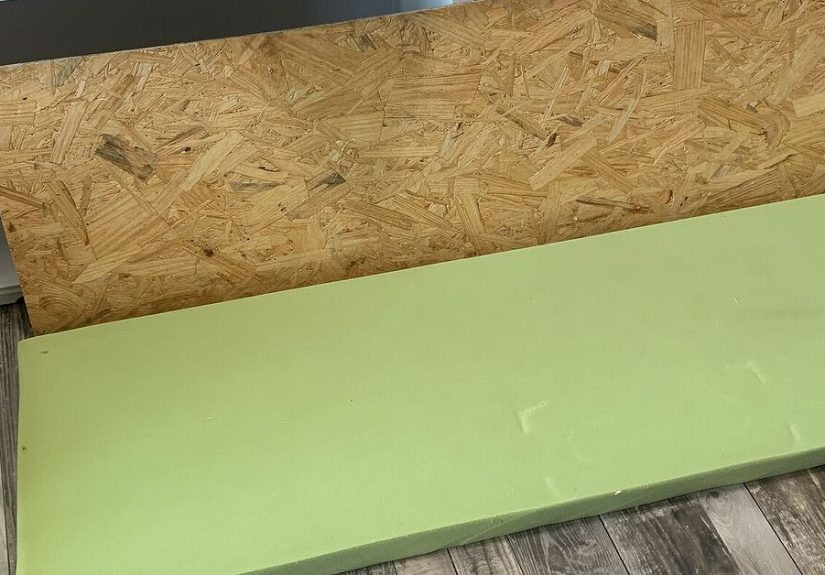
- A mold, such as a plastic container, bowl, flexible tub, or repurposed packaging
- A smaller insert or spacer to create the opening for the solar light
- Nonstick spray, petroleum jelly, or a light coat of oil for easier demolding
- Rubber gloves, eye protection, and a dust mask or N95
- A mixing bucket and stir stick or trowel
- Sandpaper, rubbing stone, or masonry file for smoothing edges
- Exterior concrete sealer
- Optional: concrete pigment, small stones, texture tools, silicone sealant
Before You Start: Pick the Right Solar Light
Choose a simple solar yard light with a removable housing. You want the solar panel and LED section to sit securely in the concrete rock, but you also want access for cleaning, battery replacement, and the occasional troubleshooting moment when the light decides to take a personal day.
For a walkway or garden bed, softer light is usually better. Super bright fixtures can feel harsh in a small yard. A gentle glow is enough to define edges, improve visibility, and create atmosphere. When you’re planning several lights, keep the overall effect in mind. Outdoor lighting should guide the eye and make movement easier, not make your tulips feel like they’re being interrogated.
How to Make a Concrete Rock Solar Light
1. Create Your Rock Shape
Start with a mold that gives you an irregular, natural-looking form. A flexible plastic bowl works well because it’s easier to release later. You can also shape the outside with crumpled plastic, tape, or a second container if you want more jagged contours.
The easiest approach is to make a rounded, low-profile “rock” that sits firmly on the ground. Think decorative boulder, not concrete meteorite. A flatter base makes installation easier and keeps the light stable once it’s in the yard.
2. Plan the Opening for the Light Insert
Before mixing concrete, test how the solar light will fit. The top should be exposed enough to collect direct sunlight, and the lens should not be buried or blocked by concrete lips. Use a smaller plastic cup, jar, or wrapped form as a placeholder to create the cavity where the solar light will sit.
Make sure the insert is centered or slightly offset based on the look you want. If the cavity is too loose, the light may wobble. If it’s too tight, you’ll say words your neighbors do not need to hear. Aim for snug but removable.
3. Mix the Concrete the Smart Way
Wear gloves, eye protection, and a mask before opening the bag. Dry concrete dust is irritating, and wet concrete is strongly alkaline, which means it can irritate skin and even cause chemical burns if it sits on you too long. This is not the moment to prove how tough your bare hands are.
Add water gradually. Concrete should be workable, not soupy. Too much water weakens the finished piece and can lead to cracking, shrinkage, and a sad, chalky-looking result. Stir until the mix resembles thick oatmeal or stiff brownie batter. Not delicious, but correct.
4. Pour, Pack, and Shape
Coat the mold and insert with a light release agent. Fill the mold partway, then tap the sides to release air bubbles. Set the cavity insert in place and continue packing the concrete around it. Press firmly so the mix fills corners and irregular shapes.
If you want a more realistic rock texture, rough up the outer surface while the mix is still workable. You can press in wrinkles with plastic, dab the surface with a sponge, or lightly texture it with a stick. Avoid overworking it. Real rocks are irregular, but they do not look like frosting experiments.
5. Let It Set, Then Demold Carefully
Allow the piece to set according to the mix instructions. Fast-setting mixes may firm up quickly, but don’t rush demolding. A concrete shell that feels solid on the outside can still be fragile inside. When in doubt, wait longer.
Once firm, remove the mold and cavity insert carefully. If needed, trim rough edges with a masonry file or sandpaper. This is the time to clean up the opening for the solar light so it sits level and neat.
6. Cure It Properly
This is the step many DIYers skip, and it’s the step that separates “nice project” from “why is my fake rock flaking like pie crust?” Concrete gains strength as it cures. Keep the piece out of direct blazing sun while it hardens, and keep it slightly moist for the first few days if your mix instructions allow. Proper curing improves strength, color consistency, and durability.
Even if the piece feels hard quickly, concrete continues gaining strength over time. Give it a few days before serious outdoor use and more time before treating it like an indestructible yard boulder. It is a light housing, not a fortress.
7. Seal and Assemble
Once cured, apply an exterior concrete sealer. This helps reduce moisture penetration, improves weather resistance, and can help the finish last longer in rain, sun, and freeze-thaw conditions. If you like, add a little concrete stain or color wash before sealing for a more stone-like effect.
After the sealer dries, insert the solar light. If the fit is already secure, leave it removable for cleaning and battery access. If you need extra hold, use a small amount of exterior-grade sealant around the rim without blocking drainage or the solar panel.
How to Place Your Concrete Rock Solar Lights in the Yard
Placement matters as much as construction. Solar landscape lighting needs enough sunlight during the day to perform well at night, so don’t tuck these under dense shrubs or deep porch overhangs and then blame the light for having low ambition.
Put them where the solar panel gets several hours of direct sun. Along paths and walkways, spacing them several feet apart usually looks better than bunching them together. Give each light breathing room so the glow feels rhythmic and calm instead of crowded. On many residential paths, a soft, warm spread works better than blasting every square inch of lawn with brightness.
These lights are especially effective in these spots:
- Along a front walkway to improve visibility and curb appeal
- At the edge of a garden bed to outline planting zones
- Near steps or uneven transitions to reduce trip hazards
- Beside a patio or seating area for atmosphere
- In gravel areas where standard plastic stakes look flimsy or out of place
For a layered look, combine your concrete rock solar lights with other outdoor lighting types, such as string lights over a seating area or a single accent light on a tree. The goal is balance. You want your yard to look welcoming, not like it’s auditioning for a reality show renovation reveal.
Common Mistakes to Avoid
Using Too Much Water
Extra water makes concrete easier to mix, but it weakens the final result. Add water slowly and stop when the consistency is workable.
Skipping Safety Gear
Concrete dust and wet cement are not harmless. Gloves, eye protection, and a mask are small hassles that prevent bigger problems.
Blocking the Solar Panel
If the concrete rim shades the panel, the light won’t charge properly. Keep the top exposed and angled well.
Demolding Too Early
Concrete that seems firm can still crack if handled too soon. Patience is cheaper than starting over.
Ignoring Drainage
If water pools inside the cavity, the solar fixture may fail sooner. Make sure the insert area stays dry enough and does not trap water.
Overlighting the Yard
Path lights should guide and accent, not glare. A little glow goes a long way in a small landscape.
How Much Does It Cost?
One of the nicest things about this DIY concrete garden light is that it looks more expensive than it is. If you already have a bucket, gloves, and a mixing tool, your main costs are the solar light, the concrete mix, and a small amount of sealer. A single project can be quite budget-friendly, and making multiple lights at once is even more efficient because you’ll use the same setup, tools, and leftover materials.
Time-wise, this is a beginner-friendly weekend project. The hands-on portion is short, but curing and sealing add waiting time. In other words, the labor is easy; the patience is the workout.
What It’s Really Like to Use These Lights in a Real Yard
Here’s the part people usually want to know after the tutorial: do these DIY concrete rock solar lights actually make life outside better, or are they just another project that looks cute for one week and then gets ignored forever? In practice, they do something small but incredibly satisfying. They make the yard feel finished.
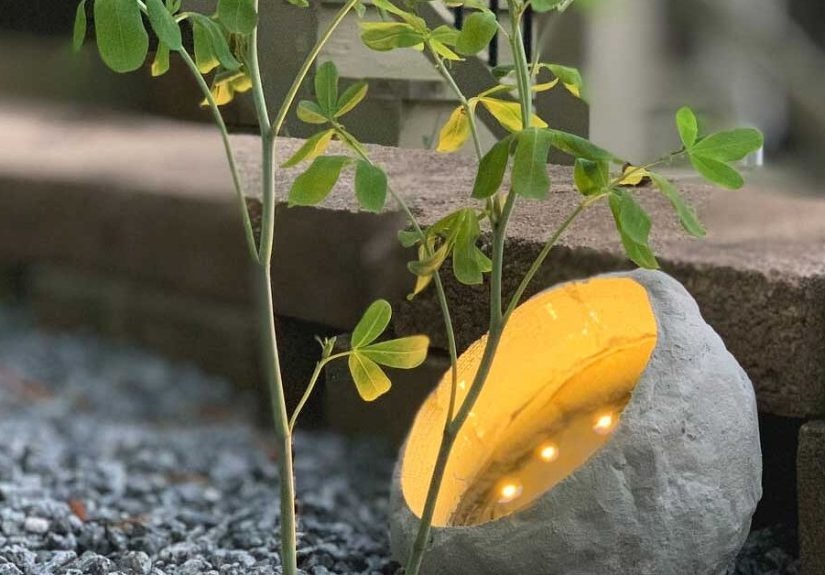
During the day, the lights blend into the landscaping in a way plastic fixtures rarely do. A regular stake light can look obviously store-bought, especially when the mulch shifts or the stake leans sideways after a hard rain. A concrete rock light feels grounded. It looks like it belongs near pavers, river stone, garden edging, or low shrubs. Even when the light is off, the piece still works as a decorative element.
At dusk, the change is subtle but noticeable. The yard doesn’t suddenly turn into a glowing theme park. Instead, the edges of a walkway become easier to read, a flower bed gains shape, and the whole space feels a little calmer. That’s what good yard illumination does. It doesn’t scream for attention; it quietly helps the space make sense after sunset.
There’s also something practical about the weight of the concrete shell. Lightweight solar stake lights can tilt, pop out of soft ground, or get knocked around by routine yard activity. A concrete version stays put. If you’ve ever gone outside after a storm and found a plastic light lying face-down in the mulch like it gave up on life, you’ll appreciate that stability.
Maintenance is refreshingly simple. Every so often, you wipe off the solar panel, check for leaves or dirt around the top, and make sure the cavity hasn’t collected moisture or debris. That’s usually enough. If the battery eventually fades, a removable insert makes replacement much easier than rebuilding the whole project. This is one reason it’s smart not to permanently entomb the light fixture in concrete like you’re sealing a time capsule for future archaeologists.
Visually, the project ages well when it’s placed thoughtfully. Around gravel, mulch, or stone borders, the faux rock look becomes more convincing over time, especially if the concrete takes on a little weathering. In fact, the light often looks better after a season outdoors than it did on day one. The surface softens, the color settles, and the piece starts to feel integrated with the yard rather than freshly dropped in from a craft table.
The biggest lesson from real use is that restraint wins. One or two lights can disappear. Ten packed too tightly can look fussy. But a line of well-spaced concrete rock solar lights along a path or clustered near key transitions can make the yard feel intentional, safe, and welcoming. Guests notice it. You notice it. Even taking the trash out at night becomes slightly less annoying, which may be the most glowing review any outdoor project can hope for.
And maybe that’s the best part: this is a DIY project that doesn’t just sit there looking clever. It improves the way the yard works. You get a handmade piece, a better nighttime landscape, and a little burst of satisfaction every evening when the lights switch on by themselves and you remember, with great dignity, that you made those weirdly beautiful concrete rocks with your own hands.
Final Thoughts
If you want a backyard upgrade that is practical, attractive, and beginner-friendly, a DIY concrete rock solar light is hard to beat. It gives you the energy-saving convenience of solar lighting, the visual heft of stone, and the satisfaction of building something that looks custom instead of off-the-shelf.
Take your time with the mold, use the right concrete consistency, cure it properly, and place the finished lights where they’ll get real sun. Do that, and you’ll end up with durable concrete garden lights that make your yard brighter, safer, and more inviting without making it look overdesigned. That’s a rare DIY win.