Table of Contents >> Show >> Hide
- Understanding the Three Main Doorbell Parts
- How a Standard Wired Doorbell Circuit Works
- Tools and Materials You May Need
- Safety First: What to Do Before Touching Anything
- Step-by-Step: Wiring the Low-Voltage Doorbell System
- Common Doorbell Wiring Problems and Fixes
- Specific Example: Wiring One Front Door Button
- Specific Example: Wiring Front and Rear Buttons
- Best Practices for a Clean, Reliable Installation
- When to Call a Licensed Electrician
- Extra Experience: What Homeowners Learn After Wiring a Doorbell
- Conclusion
A wired doorbell is one of those tiny home systems that feels mysterious until you see the whole circuit. Then it becomes almost charmingly simple: a button outside, a chime inside, and a transformer quietly reducing household voltage into low-voltage power that can safely make the “ding-dong” happen. It is not magic. It is a loop. A polite, wall-mounted loop that announces visitors, package deliveries, and the occasional neighbor who presses the button like they are trying to launch a rocket.
This guide explains how a traditional wired doorbell system works, how the doorbell button panel, chime, and transformer connect, and how to troubleshoot common issues without turning a five-minute project into a weekend drama. The focus is on the low-voltage side of the system. The transformer’s household-power side can involve line voltage, local electrical code, and real shock risk, so that portion should be handled only by someone qualified. If you are unsure, hire a licensed electrician. Your doorbell should announce guests, not become the reason guests call emergency services.
Understanding the Three Main Doorbell Parts
1. The Doorbell Button Panel
The doorbell button panel is the part visitors press. In most standard wired systems, the button is a simple momentary switch. When nobody is pressing it, the circuit is open. When someone presses it, the circuit closes and sends low-voltage current through the chime. That small action makes the chime plunger move, a tone bar ring, or an electronic chime play a tune that may or may not sound like it came from 1997.
The two wires on a basic doorbell button usually do not have polarity. In plain English: either wire can go on either screw terminal for a standard mechanical button. The button’s job is simply to connect the two wires when pressed. Lighted buttons and smart doorbell buttons may have extra requirements, so always check the product manual before assuming anything.
2. The Chime
The chime is the indoor sound unit. Many mechanical chimes have terminals labeled FRONT, REAR, and TRANS. The FRONT terminal connects to the front door button. The REAR terminal connects to a back or side door button if your system has one. The TRANS terminal connects to the transformer. When the front button is pressed, the chime usually makes a two-note sound. When the rear button is pressed, it may make a single-note sound so you can tell which door needs attention.
Some modern electronic chimes use different terminal markings or require a diode, power module, or jumper. That is especially common with musical chimes and smart doorbells. If your chime came with a tiny mystery part in the box, do not treat it like leftover furniture hardware. It probably matters.
3. The Transformer
The transformer is the quiet hero of the system. It reduces normal household power to low-voltage AC power, commonly 16 volts AC for many traditional wired chimes. Smart video doorbells often need a transformer in the 16 to 24 volt AC range with enough VA capacity to support the device. The exact rating depends on your doorbell, chime, and whether you are powering one button, two buttons, a video doorbell, or multiple chimes.
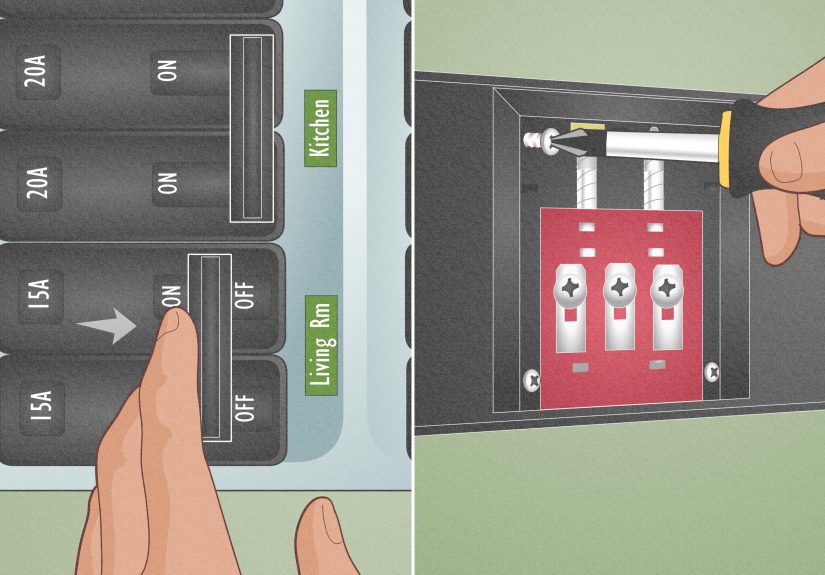
The low-voltage screw terminals on the transformer feed the doorbell circuit. The line-voltage side connects to the home’s electrical system and should be treated with caution. Turn off power at the breaker and verify power is off before inspecting any existing transformer. If the transformer is mounted to a junction box, inside an electrical panel area, or connected to wires you cannot identify confidently, call a licensed electrician.
How a Standard Wired Doorbell Circuit Works
A basic single-button doorbell circuit is a loop. One transformer terminal sends low-voltage power to the chime’s TRANS terminal. The chime’s FRONT terminal connects to one side of the front button. The other side of the button returns to the other transformer terminal. When the button is pressed, the circuit completes and the chime rings.
For a front and rear door setup, the transformer still feeds the chime, but each button gets its own chime terminal. The front button connects through FRONT. The rear button connects through REAR. The TRANS terminal remains the transformer connection.
This is why doorbell wiring can look confusing inside the chime box. Several thin low-voltage wires may be tucked behind the chime, and some may be spliced together. Before disconnecting anything, take clear photos and label the wires. Future you will appreciate present you for not creating a tiny copper spaghetti mystery.
Tools and Materials You May Need
For the low-voltage portion of a doorbell installation, you may need a screwdriver, wire stripper, masking tape, labels, a non-contact voltage tester, a multimeter, low-voltage doorbell wire, a compatible chime, a compatible transformer, wall anchors, mounting screws, and wire connectors rated for the wire size. Many doorbell systems use 18- or 20-gauge low-voltage wire, but you should match the requirements of your device and local rules.
If you are replacing only the button, the job may be as simple as removing two screws, securing the wires so they do not fall into the wall, connecting the new button, and mounting it. If you are replacing a transformer or installing a new one, the project becomes more serious because the transformer’s primary side may connect to household current. That is the point where many homeowners should pause and bring in a pro.
Safety First: What to Do Before Touching Anything
Before working on a wired doorbell, turn off power at the circuit breaker that feeds the transformer. Then verify that power is actually off with a tester. Do not rely on the doorbell being silent as proof. A dead chime can still be attached to live wiring at the transformer.
Never work inside the main electrical panel unless you are qualified. Never guess which wires are hot, neutral, or ground. Never install a transformer where it is not allowed, where it cannot dissipate heat, or where the manufacturer says not to place it. If your existing system is old, damaged, warm to the touch, buzzing loudly, or has brittle insulation, stop and get professional help.
Step-by-Step: Wiring the Low-Voltage Doorbell System
Step 1: Identify Your Existing System
Remove the chime cover and look for terminal labels. Common labels are FRONT, REAR, and TRANS. Take a photo before loosening anything. If you have an existing front button, press it and listen for the chime pattern. If there is a rear button, test that too. Label wires based on where they were connected, not based on wire color alone. Doorbell wire colors are not always standardized, especially in older homes.
Step 2: Confirm Transformer Rating
Look for the transformer’s rating, often printed on the transformer body. A traditional chime often uses 16V AC, while many smart wired doorbells require 16–24V AC and enough VA capacity. A transformer that is too weak may cause buzzing, weak chime movement, intermittent operation, or smart doorbell power errors. A transformer that is incompatible can damage equipment.
Step 3: Mount the Chime
Choose an indoor location where the chime can be heard clearly. Feed the low-voltage wires through the opening in the chime base. Mount the base level and secure it with screws. Do not pinch the wires behind the chime. Mechanical chimes need room for plungers and tone bars to move freely, so avoid cramming extra wire into the moving parts.
Step 4: Connect the Chime Terminals
Connect the transformer feed wire to the TRANS terminal. Connect the front button wire to FRONT. Connect the rear button wire, if present, to REAR. Tighten the screws firmly but do not crush the wire. Loose connections can cause weak ringing, buzzing, or no sound at all.
Step 5: Connect the Button Panel
At the door, pull the two low-voltage wires gently through the button opening. Secure them so they do not fall back into the wall. Attach one wire to each screw on the button. For a basic button, the order usually does not matter. Mount the button panel so it sits flat against the wall or trim. If the button is outdoors, use weather-resistant hardware and follow the manufacturer’s sealing instructions.
Step 6: Restore Power and Test
Once all low-voltage connections are secure and covers are back in place, restore power. Press the button. A properly wired front button should trigger the front chime sound. If the chime buzzes but does not ring, disconnect power and inspect for a stuck button, loose terminal, incompatible transformer, or mechanical chime obstruction.
Common Doorbell Wiring Problems and Fixes
The Doorbell Does Not Ring
If nothing happens, start with the simplest parts. The button may be worn out, the transformer may not be supplying power, the chime may be damaged, or a wire may be loose. Many traditional systems fail at the button because it is outside, exposed to weather, and pressed by everyone from delivery drivers to children with dramatic enthusiasm.
The Chime Hums Constantly
A constant hum can mean the button is stuck, the wires are shorted, or a smart doorbell module is installed incorrectly. Turn off power before checking. A mechanical chime is designed to receive power briefly, not continuously. If it stays energized, it can overheat or fail.
The Chime Rings Weakly
A weak ding may point to low transformer output, long wire runs, undersized wire, dirty or stuck chime plungers, or a transformer that cannot support a smart doorbell. Mechanical chimes should be clean and unobstructed. Do not oil the plungers unless the manufacturer specifically says to do so; oil can attract dust and make the problem worse.
The Smart Doorbell Works, But the Indoor Chime Does Not
Many smart doorbells need a chime connector, power kit, or app setting to work with an existing mechanical or digital chime. Some systems require the indoor chime to be bypassed. Others require a resistor when no chime is used. Follow the smart doorbell manufacturer’s exact instructions. Guessing with smart doorbell wiring is a great way to create a very expensive rectangle that blinks sadly.
Specific Example: Wiring One Front Door Button
Imagine a simple home with one front door button and one mechanical chime. The transformer has two low-voltage terminals. The chime has FRONT and TRANS terminals. One transformer terminal connects to TRANS. The FRONT terminal connects to one screw on the front button. The other screw on the front button returns to the second transformer terminal. Pressing the button completes the loop, energizes the chime, and creates the sound.
In this setup, the button is not “sending a signal” like a remote control. It is physically closing the circuit. That is why two plain wires are enough for most old-school buttons. The simplicity is beautiful. It is also why a loose screw can make the entire system act haunted.
Specific Example: Wiring Front and Rear Buttons
For two doors, the transformer still powers the system, but the chime separates the sounds. The front door button connects through FRONT, while the back door button connects through REAR. Both buttons share the transformer return side. When the front button is pressed, the chime uses one tone pattern. When the rear button is pressed, it uses another. This lets you know whether to walk toward the front porch or pretend you did not hear the back door.
Best Practices for a Clean, Reliable Installation
Use solid low-voltage wire where recommended. Keep wires neat and avoid sharp bends. Do not staple low-voltage wire so tightly that the insulation is crushed. Leave a small service loop behind the chime and button so future replacement is easier. Label everything, especially if the home has multiple doors, multiple chimes, or an older wiring layout.
Mount the button at a comfortable height, usually near the latch side of the door where visitors naturally reach. Keep it away from direct sprinkler spray if possible. If the button is installed on masonry, use appropriate anchors. If it is installed on wood trim, drill pilot holes to reduce splitting.
When to Call a Licensed Electrician
Call a licensed electrician if the transformer must be replaced, relocated, or connected to household wiring. Also call a professional if you cannot identify the breaker, if voltage remains present after switching off power, if wires are damaged, if the transformer is inside or near the electrical panel, or if your home has unusual wiring. A doorbell project should not require bravery. It should require patience, labeling, and the wisdom to stop when the project crosses into line-voltage work.
Extra Experience: What Homeowners Learn After Wiring a Doorbell
After working with a few doorbell systems, one lesson becomes obvious: the wiring is usually less complicated than the wall. The electrical loop is simple, but getting the button to sit straight on uneven brick, fishing a wire through old trim, or finding the transformer in a basement can be the real adventure. Many transformers are tucked into surprising places: near the electrical panel, attached to a junction box in the basement, mounted in a closet, hidden near the furnace, or sitting in the attic like a tiny metal fossil from a previous renovation.
A practical experience tip is to photograph every connection before removing a wire. Even if the old system looks wrong, the photo gives you a map. Label the chime wires as FRONT, REAR, and TRANS the moment you identify them. A small piece of masking tape can save thirty minutes of detective work later. It also prevents the classic DIY moment where you stare at three identical-looking wires and whisper, “Surely I’ll remember.” You will not remember. Nobody remembers.
Another lesson is that a doorbell button can fail in sneaky ways. Sometimes it feels fine when pressed but does not close the circuit reliably. Sometimes corrosion builds up behind the button. Sometimes the mounting screws are overtightened and the button sticks just enough to keep the chime humming. If the chime hums constantly, do not ignore it. A stuck button can keep the chime energized and may damage the chime or transformer over time.
Chime placement also matters more than people think. A chime hidden behind a thick hallway door or mounted in a noisy laundry area may be technically functional but practically useless. Before final mounting, think about where people spend time in the home. A centrally located hallway is often better than a far corner. If the home is large, a second chime or compatible extender may be worth considering, but the transformer must have enough capacity for the extra load.
Smart doorbells add another layer of planning. A traditional mechanical chime only needs a brief burst of power. A video doorbell needs continuous power for the camera, Wi-Fi, motion detection, night vision, and app alerts. That is why an old transformer that worked perfectly for a basic button may struggle with a smart model. Symptoms can include random restarts, poor video performance, chime problems, or low-power warnings in the app. Checking voltage and VA before installation is much easier than troubleshooting after the device is already mounted and connected to Wi-Fi.
The best final habit is to test the system in stages. Test the transformer output. Test the chime connections. Test the button before fully tightening the faceplate. Then test again after mounting. Small checks prevent big confusion. Doorbell wiring rewards calm, methodical work. Rush it, and you get silence. Do it carefully, and you get the most satisfying sound in home improvement: a clean, confident ding-dong.
Conclusion
Wiring a doorbell button panel, chime, and transformer is easier when you understand the system as one low-voltage loop. The transformer supplies safe operating voltage, the button closes the circuit, and the chime turns that brief electrical moment into sound. Most low-voltage button and chime connections are manageable for careful DIYers, but transformer line-voltage work deserves respect and often a licensed electrician.
The winning formula is simple: identify the parts, label the wires, match the transformer to the chime or smart doorbell, keep connections secure, and test before closing everything up. With patience and safety-first thinking, your doorbell can go from dead silence to cheerful chime without turning your entryway into a wiring crime scene.
Note: This article is for general educational guidance about typical low-voltage wired doorbell systems. Always follow the manufacturer’s instructions, local electrical code, and safety rules. Hire a licensed electrician for transformer line-voltage work or any wiring you cannot identify with confidence.