Table of Contents >> Show >> Hide
- Before You Start: Why a Radiator Is Different From Other Wall-Mounted Fixtures
- How to Hang a Radiator: 14 Steps
- Step 1: Identify the type of radiator you are dealing with
- Step 2: Read the manufacturer instructions before you even pick a wall
- Step 3: Turn the heat off and let everything cool down
- Step 4: Choose the radiator location based on heat performance, not just aesthetics
- Step 5: Confirm what your wall can actually support
- Step 6: Match the bracket kit to the exact radiator model
- Step 7: Measure twice, then measure like you do not trust the first two times
- Step 8: Plan for help before lifting day
- Step 9: Keep clearances and airflow in mind
- Step 10: Treat plumbing, steam, and hardwiring as professional territory
- Step 11: Make service access a priority
- Step 12: Protect the room from heat and moisture side effects
- Step 13: Test performance after installation, not just appearance
- Step 14: Know when the smartest move is calling a pro
- Common Mistakes That Make Radiator Installation Harder Than It Needs to Be
- Experience From Real Homes: What This Job Usually Teaches People
- Final Thoughts
Editor’s note: This is a safety-first homeowner guide written for web publishing. It is not a substitute for a licensed HVAC, plumbing, steam, or electrical professional. Radiators are heavy, heating systems can be hazardous, and installation details vary by model and wall type.
Hanging a radiator sounds like one of those weekend jobs that starts with confidence and ends with someone saying, “Well, that escalated quickly.” And honestly, that is because it can. A radiator is not a floating bookshelf, a picture frame, or a bold little DIY experiment from a late-night video rabbit hole. It is a heavy heating appliance that has to sit securely on the wall, connect correctly to the system, and operate safely once hot water, steam, or electricity enters the chat.
Still, homeowners should absolutely understand the process. The more you know, the better decisions you make about placement, wall support, installer questions, product choice, and long-term performance. Whether you are replacing an old unit, upgrading to a slim panel radiator, or adding a towel warmer in a bathroom, the smartest path is to treat the job like a planning project first and a hands-on installation second.
This guide walks through 14 practical steps to help you approach the job the right way. It explains what to check, what to ask, what can go wrong, and where it makes sense to call in a pro before the radiator becomes a very expensive wall decoration.
Before You Start: Why a Radiator Is Different From Other Wall-Mounted Fixtures
Radiators have three traits that make them tricky. First, they are heavy. Second, they rely on precise manufacturer hardware and mounting locations. Third, they are part of a larger heating system, which means a mistake does not just affect the wallit can affect comfort, efficiency, leaks, pressure, and safety throughout the home.
That is why the best installation mindset is simple: understand the system, respect the weight, follow the model manual, and leave any uncertain connection work to a qualified installer. Now let’s get into the steps.
How to Hang a Radiator: 14 Steps
Step 1: Identify the type of radiator you are dealing with
Before anything else, figure out whether your unit is a hot-water radiator, steam radiator, electric radiator, electric towel warmer, or a modern hydronic panel radiator. That sounds obvious, but it matters more than people think. Mounting hardware, connection points, wall clearances, valve placement, and service requirements vary by type. A slim wall panel radiator and a chunky older cast-iron unit are not even playing the same sport.
If the manual says the unit must be wall mounted in a specific orientation, believe it. This is not a “close enough” situation. The right setup affects heat output, service access, and safety.
Step 2: Read the manufacturer instructions before you even pick a wall
This is the least glamorous step and the one that saves the most trouble. Manufacturer instructions often specify whether the radiator is reversible, which connection side is preferred, what brackets are included, what minimum clearances are required, and whether the wall must be solid framing, masonry, or reinforced drywall.
In plain English: the radiator manual should make the decisions before your tape measure does. If you skip this part, you can end up placing the unit where the pipework does not line up, the brackets do not land correctly, or the service valve becomes impossible to reach without yoga-level flexibility.
Step 3: Turn the heat off and let everything cool down
Any work around a radiator begins with shutting the system down and waiting for the unit to cool. Hot water, steam, and heated metal are all terrible team members when people get impatient. Even a quick inspection is safer when the radiator is no longer actively heating.
This is also the right time to protect flooring, clear the area, and remove furniture, drapes, or clutter. A radiator is not something you want to maneuver in a room that still looks like a yard sale.
Step 4: Choose the radiator location based on heat performance, not just aesthetics
Yes, looks matter. No one dreams of a gorgeous room and then whispers, “You know what this needs? Awkward heater energy.” But performance matters more. Radiators often work best where they can distribute heat evenly and where air circulation is not blocked. In many homes, that means below a window or along an exterior wall, provided the model instructions support that placement.
The best location also leaves room for cleaning, airflow, and maintenance. If a sofa, vanity, cabinet, or curtain is going to crowd the unit, the radiator will not perform at its best. Beautiful placement that kills efficiency is just expensive interior design irony.
Step 5: Confirm what your wall can actually support
This step separates smart planning from dramatic regret. A radiator has to hang on a wall structure that can safely support its weight when the unit is installed and, for hydronic models, when it is full. That means you need to know whether you are working with studs, masonry, blocking, tile over backing, or standard drywall that may not be enough on its own.
If there is any doubt, pause. A radiator should never rely on guesswork and good vibes. Secure fastening matters because movement over time can stress brackets, shift connections, and lead to damage that starts small and ends soggy.
Step 6: Match the bracket kit to the exact radiator model
Radiators are not universal when it comes to hardware. The correct brackets, posts, sleeves, clamps, anchors, and spacers are usually model-specific. Using “something similar from the garage” is how you create a custom problem no warranty wants to meet.
Check that the hardware package is complete before installation day. Missing one small piece can derail the whole job, especially if the unit depends on a specific locking or snap-fit bracket system. The best time to discover a missing part is before the radiator is halfway out of the box and everyone is already tired.
Step 7: Measure twice, then measure like you do not trust the first two times
Good radiator placement depends on clean, careful measuring. The important thing is not just where the radiator looks centered, but whether the bracket points align with the wall structure, whether the piping or electrical access makes sense, and whether the finished height works for airflow and cleaning.
Many installers use the carton, template, or layout diagram from the manufacturer to transfer bracket positions accurately. That step matters because even a small error can turn a neat install into a crooked headache. A radiator that is slightly off is the kind of thing you notice forever.
Step 8: Plan for help before lifting day
Even when a manual says one person can install the unit, that does not always mean one person should. Radiators are awkward, heavy, and not especially interested in cooperating while you line up brackets and protect finished surfaces at the same time.
A second set of hands helps with safe lifting, alignment, and wall protection. It also reduces the chance of dragging the unit across tile, dinging trim, or performing the classic homeowner move of saying, “I got it, I got it,” right before clearly not having it.
Step 9: Keep clearances and airflow in mind
Radiators need breathing room. The manual may call for minimum space below the unit, behind it, or at the sides. Those gaps are not there to annoy you. They help with convection, cleaning access, and serviceability. They also help prevent the radiator from looking like it was squeezed into place by a decorating committee with no sense of thermodynamics.
Once the unit is installed, avoid blocking it with bulky furniture, long drapes, stacked baskets, or decorative screens that trap heat. A radiator hidden by everything in the room is basically heating the furniture first and the people second.
Step 10: Treat plumbing, steam, and hardwiring as professional territory
This is the biggest safety line in the whole project. Hanging the radiator and connecting the radiator are not the same task. Hydronic piping, steam connections, valve configuration, bleeding strategy, pressure testing, and hardwired electrical connections should be handled or verified by qualified professionals when the job goes beyond simple manufacturer-approved homeowner steps.
That is especially true when the radiator is being added to an existing system, when old pipes are involved, when the wall opening must be modified, or when the unit is electric. A clean-looking radiator is not a success story if the connection behind it is wrong.
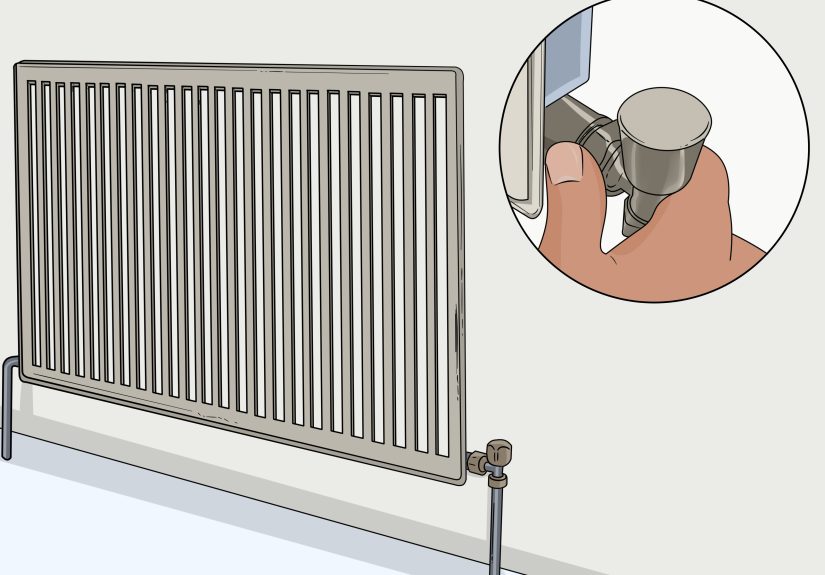
Step 11: Make service access a priority
One common mistake is installing the radiator in a way that makes the valve, vent, controls, or connection points hard to reach later. Future you deserves better. Repairs, bleeding, cleaning, and seasonal checks all become easier when the radiator is mounted with access in mind.
That means thinking about side clearance, nearby cabinetry, trim details, and how someone will actually inspect the unit after installation. A radiator should not require furniture acrobatics every time it needs attention.
Step 12: Protect the room from heat and moisture side effects
Radiators live in the real world, not in pristine brochure photos. Walls can show marks, trim can collect dust, paint can age differently near heat, and small drips can become big frustrations if nobody notices them. Choose finishes and room layouts that work with a heat source instead of pretending the radiator is decorative pottery.
Once installed, keep an eye on nearby textiles, especially in tight spaces. In bathrooms, be extra mindful of towels and cords. In bedrooms, make sure bedding and curtains are not constantly pressed against the unit. Warmth is cozy. Unplanned fabric contact is not the same thing.
Step 13: Test performance after installation, not just appearance
When the work is done, the radiator should not only look straight and secureit should heat properly, stay dry, and operate quietly. That means checking for signs of leaks, unusual noise, uneven heat, poor airflow, or controls that do not behave as expected. A radiator that photographs beautifully but clangs like a kitchen band at 2 a.m. is still a problem.
Watch the unit during early use. If there is anything odd, do not “wait and see” forever. Heating issues tend to become clearer, not kinder, with time.
Step 14: Know when the smartest move is calling a pro
There is no prize for wrestling a heating appliance into submission while pretending confidence. If the wall structure is questionable, the manual is unclear, the connections do not match, the system is old, the radiator is unusually heavy, or the install involves hardwiring, steam, or hidden pipework, bring in a qualified professional.
That is not quitting. That is managing risk like an adult with functioning self-preservation instincts. The best radiator install is not the one that feels heroic. It is the one that stays secure, efficient, and uneventful for years.
Common Mistakes That Make Radiator Installation Harder Than It Needs to Be
Ignoring the manual: Model-specific instructions exist for a reason. Brackets, valve sides, and minimum clearances are often unique to the product.
Assuming every wall can hold the load: A radiator needs real support. A wall that looks fine on the surface may not be ready for the weight without proper framing or reinforcement.
Blocking airflow: A radiator crammed behind furniture or covered by heavy textiles will not perform as well. Heating the couch is funny once and irritating forever.
Focusing only on where it looks centered: The best visual placement is not always the best technical placement. Piping, brackets, controls, service access, and airflow all matter.
Trying to save money on professional connections: The labor you skip now can come back as leaks, noise, poor heating, or rework later. Cheap twice is rarely a bargain.
Experience From Real Homes: What This Job Usually Teaches People
People who have dealt with radiator installation, replacement, or repositioning tend to learn the same lessons fast. The first is that radiators almost always look simpler than they are. Homeowners see a neat white panel on the wall and think the job is mostly about hanging it straight. Then they discover the real plot twist: the wall support matters, the bracket system matters, the pipe alignment matters, the access around the valves matters, and the room layout matters too. In other words, the radiator is the visible part of a much bigger decision tree.
Another common experience is underestimating weight and awkwardness. Even compact models can be bulky, slippery to handle, and easy to knock into trim, tile, or finished walls. Many people start out determined to do everything solo and quickly realize that “independent” is less useful than “not dropping a heating appliance.” A helper is not just convenient; a helper often prevents cosmetic damage and rushed mistakes. That lesson tends to arrive right around the moment the unit is half-lifted and someone suddenly becomes deeply interested in teamwork.
There is also a big lesson in wall reality versus wall optimism. Plenty of homeowners assume a wall is solid enough until bracket placement exposes the truth. Stud locations may not line up as expected. Existing tile may complicate fastening. Older walls may be less predictable than modern product photos suggest. This is where good planning saves the day. People who take time to confirm the structure, double-check layout, and verify the manufacturer hardware usually end up with a cleaner result. People who rush because the radiator “probably goes about here” often end up with an expensive extra chapter nobody wanted.
One of the most useful takeaways from real-world radiator projects is that performance matters just as much as appearance. A perfectly centered radiator can still be annoying if it is too close to furniture, hard to bleed, awkward to clean around, or installed where the controls are a pain to reach. Homeowners who are happiest with the final result usually think beyond launch day. They ask practical questions: Can this be serviced easily? Will curtains touch it? Can I vacuum around it? Will the room layout still work in winter? That kind of thinking is not glamorous, but it is what turns a good-looking installation into a genuinely smart one.
Finally, experience teaches that professional help is not a sign of failure. It is often the reason the project ends well. Plenty of confident DIYers are perfectly capable of understanding the process, choosing the right model, preparing the room, and planning the placement. The handoff point comes when the work moves from general planning into technical connection, testing, or wall conditions that are less than straightforward. The smartest homeowners are usually the ones who know exactly when to stop improvising and start calling the right person. In radiator work, that judgment is not a weakness. It is the skill that saves time, money, and a whole lot of muttering.
Final Thoughts
If you are wondering how to hang a radiator, the real answer is not “grab some tools and hope for the best.” The real answer is to understand the model, assess the wall, plan the location, respect the weight, protect airflow, and bring in a qualified installer when the job crosses into technical territory.
That is how you get a radiator that looks good, heats well, and does not become a future repair story. And that, frankly, is the kind of boring success every homeowner should aspire to. In heating projects, boring is beautiful.