Table of Contents >> Show >> Hide
- What Is a Shirt Corset Top?
- Best Shirts to Use for a DIY Corset Top
- Supplies You Will Need
- Step 1: Wash, Dry, and Press the Shirt
- Step 2: Take Your Measurements
- Step 3: Create a Simple Pattern
- Step 4: Cut the Shirt Pieces
- Step 5: Sew the Outer Bodice
- Step 6: Sew the Lining
- Step 7: Add Boning Channels
- Step 8: Join the Outer Fabric and Lining
- Step 9: Finish the Bottom Edge
- Step 10: Add Eyelets or Grommets
- Step 11: Lace the Back
- Styling Ideas for Your Shirt Corset Top
- Common Mistakes to Avoid
- How to Make the Corset Top Look More Professional
- Can You Make a No-Sew Corset Top From a Shirt?
- Care Tips for a Shirt Corset Top
- Conclusion: Your Old Shirt Deserves a Main Character Moment
- Experience Notes: What I Learned From Making a Corset Top From a Shirt
Turning an old shirt into a corset top is one of those DIY fashion projects that feels slightly magical. One minute you have a forgotten button-down or oversized tee sulking in the back of your closet. A few cuts, seams, and “please behave” moments later, you have a fitted, structured, one-of-a-kind top that looks like it came from a boutique with exposed brick walls and suspiciously tiny hangers.
The best part? You do not need to be a professional designer to learn how to make a corset top from a shirt. You do need patience, accurate measuring, basic sewing skills, and the willingness to unpick a seam without taking it personally. This tutorial will walk you through the process step by step, from choosing the right shirt to adding boning, eyelets, and a lace-up back. You can keep the design casual, romantic, edgy, cottagecore, streetwear-inspired, or proudly “I made this and will mention it every 12 minutes.”
This guide is written for a fashion corset top, not a medical corset or waist-training garment. In other words, it is designed to shape and style your outfit, not dramatically alter your body. Comfort, movement, and safe construction matter more than squeezing yourself into a fabric tortilla.
What Is a Shirt Corset Top?
A shirt corset top is a refashioned garment made by transforming a shirt into a fitted bodice with corset-inspired details. These details may include panel seams, boning channels, a lace-up back, front buttons, grommets, eyelets, curved shaping, or a pointed hem. Unlike traditional corsets, a DIY corset top from a shirt is usually lighter, softer, and easier to wear with jeans, skirts, trousers, or layered over dresses.
You can make this project from several types of shirts. A men’s button-down works beautifully because it offers enough fabric, a built-in button placket, and crisp cotton structure. A flannel shirt creates a casual, grunge-inspired corset top. A linen shirt gives breezy summer energy. A T-shirt can work too, but because knit fabric stretches, it needs extra stabilization with interfacing or lining if you want real corset-style shape.
Best Shirts to Use for a DIY Corset Top
1. Oversized Button-Down Shirt
This is the easiest choice for beginners. A larger shirt gives you more fabric to work with, and woven cotton is stable enough for shaping. The front buttons can become a stylish closure, saving you from installing a zipper or making a complicated front opening.
2. Men’s Dress Shirt
A men’s dress shirt is a thrift-store goldmine. Look for medium-weight cotton, oxford cloth, chambray, or poplin. Avoid shirts that are too thin or slippery, because they may wrinkle, tear, or collapse under boning and lacing tension.
3. Flannel Shirt
Flannel makes a cozy corset top with a little attitude. It is great for fall outfits, concert looks, and “I chopped up a lumberjack shirt and made it fashion” moments. Add black ribbon lacing for contrast.
4. T-Shirt
A T-shirt can become a stretch corset-style top, but it behaves differently from woven fabric. Knit material can grow, curl, and stretch while sewing. Use lightweight fusible interfacing, a stable lining, or a second layer of fabric to prevent the finished top from looking like it lost a wrestling match with the sewing machine.
Supplies You Will Need
- One oversized shirt
- Measuring tape
- Fabric scissors
- Pins or sewing clips
- Tailor’s chalk or washable fabric marker
- Sewing machine
- Matching thread
- Seam ripper
- Fusible interfacing
- Lining fabric, such as cotton muslin or leftover shirt fabric
- Plastic boning, spiral steel boning, zip ties, or rigilene boning
- Bias tape or twill tape for boning channels
- Eyelets or grommets
- Eyelet setter, grommet tool, or hand press
- Ribbon, cord, or fabric lacing
- Iron and ironing board
If you are a beginner, plastic boning or heavy-duty zip ties are easier to cut and handle than steel boning. For a fashion top, you only need enough support to keep the bodice from crumpling. The goal is structure, not armor. You are going to brunch, not jousting.
Step 1: Wash, Dry, and Press the Shirt
Before cutting anything, wash and dry the shirt the same way you plan to wash the finished top. This prevents surprise shrinkage later. A shirt that shrinks after you have added boning and grommets is not a garment; it is a tiny betrayal.
After washing, iron the shirt flat. Pressing helps you measure accurately and cut cleanly. Pay special attention to side seams, darts, button plackets, collars, and hems. If the shirt has pockets, decide whether to keep them as a design feature or remove them with a seam ripper.
Step 2: Take Your Measurements
Accurate measurements are the secret sauce of this project. Measure your bust, underbust, waist, and the desired length from upper chest to hem. If you want straps, measure from front neckline over the shoulder to the back. If you want a strapless look, make sure the top edge sits securely above the bust and includes enough structure to stay put.
Write down your measurements and add seam allowance. A common seam allowance is 1/2 inch, but 5/8 inch gives you more room for adjustments. If you are nervous, add extra width at the side seams. You can always take fabric in. Adding fabric back after cutting too small requires either genius-level patchwork or a very forgiving design aesthetic.
Step 3: Create a Simple Pattern
You can make a basic corset top pattern using a fitted tank top, a bodice pattern, or your own measurements. For an easy shirt refashion, divide the bodice into five main sections: center front, two side front panels, and two back panels. If your shirt has buttons, use the button placket as the center front. This creates a polished look and keeps the original shirt personality alive.
Lay the shirt flat and mark your pieces with chalk. The center front should follow the button placket. The side front panels should curve gently from bust to waist. The back panels should leave a gap of 1 to 3 inches at the center back for lacing. If you prefer a closed back, you can add a zipper instead, but lacing is more adjustable and more forgiving.
Beginner Tip
Make a test version from scrap fabric first if you are using a special shirt. This is called a muslin. It sounds fancy, but it is basically a rough draft your sewing machine can judge silently before the final version.
Step 4: Cut the Shirt Pieces
Cut slowly and keep your fabric flat. If the shirt has stripes, checks, or plaid, match the pattern where possible. Perfect pattern matching is not required, but lining up obvious stripes at the front can make the finished top look much more professional.
Cut matching lining pieces from leftover shirt fabric, cotton muslin, or another lightweight woven fabric. Lining gives the corset top a cleaner inside and helps hide boning channels. If your shirt fabric is thin, apply fusible interfacing to the wrong side of the outer pieces before sewing. Interfacing adds body and keeps grommets from tearing through the fabric.
Step 5: Sew the Outer Bodice
Place the outer fabric pieces right sides together and sew the panel seams. Start with the center front and side front pieces, then attach the back panels. Press each seam open or toward one side. Pressing may feel like an annoying extra step, but it is what separates “handmade” from “homemade in a thunderstorm.”
Try the outer bodice on carefully. Pin the back gap closed loosely or hold it in place with clips. Check the bust, waist, underarm, and neckline. If there is extra fabric at the side seams, take it in gradually. If the top feels tight before lacing, let out the seams if possible. A corset top should feel snug, not like it has personal issues with your ribs.
Step 6: Sew the Lining
Sew the lining pieces the same way you sewed the outer bodice. Press the seams neatly. If you want hidden boning channels, you can attach twill tape or bias tape to the lining along the seam lines. Another option is to use the seam allowances themselves as channels, as long as they are wide enough and secure.
Boning channels should run vertically or nearly vertically. Place them at the side seams, side front seams, and back edges. For a simple fashion corset top, four to eight bones are usually enough. Add more if your fabric is soft or if you want stronger shaping.
Step 7: Add Boning Channels
Boning is what helps the corset top keep its structure. Without it, the top may still be cute, but it can wrinkle and fold at the waist. Cut boning pieces slightly shorter than each channel so they do not poke through the top or bottom seam. Round the ends of plastic boning or cover them with tape to prevent sharp edges.
Sew each boning channel straight and even. Test the boning before closing the channel permanently. The bone should slide in smoothly without forcing. If it gets stuck, the channel is too narrow or your seam has wandered into chaos territory. Widen the channel and try again.
Step 8: Join the Outer Fabric and Lining
Place the outer bodice and lining right sides together. Sew around the top edge, front edges, and back edges, leaving the bottom open. Clip corners and curves carefully, then turn the bodice right side out. Push out the corners gently with a point turner or chopstick. Do not use scissors for this step unless you enjoy accidental fabric stabbings.
Press the edges flat. Understitching the lining near the top edge can help it stay inside instead of rolling out. If understitching sounds intimidating, simply press well and topstitch close to the edge for a clean finish.
Step 9: Finish the Bottom Edge
You have several options for the hem. You can fold the bottom edge inward and topstitch it closed, bind it with bias tape, or create a pointed corset-style hem. A pointed front hem gives the top a classic corset silhouette, while a straight hem looks cleaner and more modern.
For a beginner-friendly finish, use double-fold bias tape. It covers raw edges, adds stability, and can become a design detail if you choose a contrasting color. Black bias tape on a white shirt, for example, creates a sharp graphic look.
Step 10: Add Eyelets or Grommets
Mark the eyelet placement along both back edges. The spacing should be even, usually about 1 inch apart. Make sure the left and right sides match exactly. Uneven grommets will still lace, but they may look like they were installed during an earthquake.
Reinforce the back edges before adding eyelets. Use interfacing, extra fabric, or a folded facing. Cut holes carefully with a punch, awl, or small sharp scissors. Insert the eyelets or grommets according to your tool instructions, then test each one on scrap fabric before touching your actual top. This one practice step can save your project from tragedy.
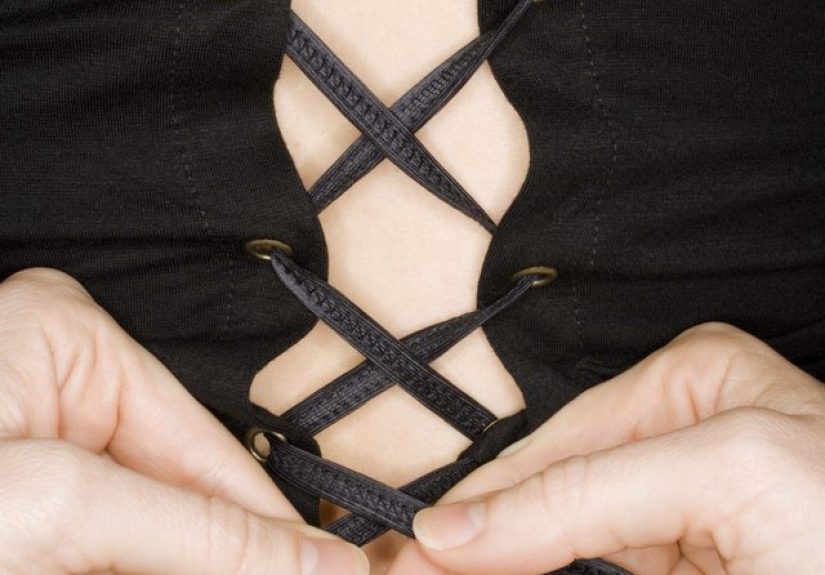
Step 11: Lace the Back
Use ribbon, cotton cord, satin lacing, shoelaces, or a strip of fabric made from the shirt scraps. Start lacing from the top or bottom and crisscross through the eyelets. For easier tightening, create “bunny ears” at the waist by leaving two loops in the middle, then tie the ends at the bottom or center back.
Do not lace the top too tightly. A shirt corset top should support your outfit, not challenge your breathing. Sit down, raise your arms, and move around before declaring the project finished. If you cannot reach for a coffee, hug a friend, or dramatically point at your masterpiece in the mirror, loosen the lacing.
Styling Ideas for Your Shirt Corset Top
Casual Day Look
Pair a white button-down corset top with high-waisted jeans, sneakers, and small hoop earrings. Keep the buttons visible for a crisp, reworked-shirt effect.
Romantic Cottagecore Look
Use a floral shirt or soft cotton blouse. Add cream ribbon lacing, puff sleeves from the original shirt, and a flowy midi skirt. This look says, “I bake bread,” even if your oven is mostly storage.
Streetwear Look
Make the corset top from an oversized striped shirt and wear it over a fitted long-sleeve tee. Add cargo pants, boots, and chunky jewelry. Contrast topstitching can make the design look intentional and fashion-forward.
Evening Look
Choose a black shirt, satin blouse, or deep-colored button-down. Add metal grommets, black ribbon, and a sleek skirt or tailored trousers. The result is polished without looking like you tried too hard, which is the highest level of trying.
Common Mistakes to Avoid
Cutting Before Measuring Twice
Always measure twice and cut once. Better yet, measure twice, walk away, drink water, come back, and measure again. Fabric has no undo button.
Skipping Interfacing
If your shirt fabric is thin, interfacing is essential. It helps the bodice hold shape and prevents grommets from ripping out.
Using Too Few Boning Channels
One bone on each side is usually not enough. Add boning at the side seams and back edges at minimum. More channels create better support and smoother shaping.
Making It Too Tight
A fashion corset top should fit close to the body but still allow movement. If the seams strain or the buttons pull, adjust the fit.
Ignoring the Grainline
When possible, cut pieces along the original shirt grain. Crooked grain can twist the finished top, especially after washing.
How to Make the Corset Top Look More Professional
Small finishing choices make a big difference. Press every seam. Trim loose threads. Use matching thread unless contrast stitching is part of the design. Keep topstitching even. Choose grommets that match your style: silver for edgy, brass for vintage, black for modern, or white for a softer finish.
You can also reuse original shirt details. Turn cuffs into straps, use the collar as a decorative neckline, or make lacing from sleeve fabric. If the shirt has embroidery, logos, stripes, or pockets, plan your pattern pieces so those details land somewhere interesting. Upcycling is not about hiding the shirt’s past. It is about giving it a better plot twist.
Can You Make a No-Sew Corset Top From a Shirt?
You can make a corset-inspired shirt top without sewing by cutting, tying, and lacing fabric, but it will not have the same structure as a sewn corset top with boning. A no-sew version is better for a quick costume, festival outfit, photoshoot, or experimental fashion moment. For everyday wear, sewing gives more security and a cleaner finish.
If you do not have a sewing machine, you can hand-sew the project, but choose a simple design. Use strong backstitches for seams and reinforce stress points. Hand-sewn eyelets can also work, though they take time and patience. Consider it a craft project and a character-building exercise.
Care Tips for a Shirt Corset Top
Hand wash your finished corset top or use a delicate cycle in a mesh laundry bag if the construction is sturdy. Avoid high heat, especially if you used plastic boning or fusible interfacing. Lay the top flat to dry and press it carefully, avoiding direct heat on grommets, ribbon, or synthetic boning.
Store it flat or hanging. Do not crush the boning under heavy clothes. If the lacing gets wrinkled, remove it and press it separately. Your future self will appreciate not having to detangle ribbon five minutes before leaving the house.
Conclusion: Your Old Shirt Deserves a Main Character Moment
Learning how to make a corset top from a shirt is a practical, creative, and surprisingly satisfying way to refresh your wardrobe. You get a custom-fit garment, reduce textile waste, and turn something ordinary into something with personality. Whether you start with a crisp button-down, a thrifted flannel, or a soft oversized tee, the process teaches useful sewing skills: measuring, fitting, lining, reinforcing, adding boning, and installing eyelets.
The first attempt may not be perfect, and that is completely normal. Even experienced sewists keep seam rippers nearby like tiny swords of humility. Focus on fit, comfort, and clean finishing. Once you understand the basic method, you can experiment with different necklines, straps, fabrics, colors, closures, and decorative details. Your closet may never look at an old shirt the same way again.
Experience Notes: What I Learned From Making a Corset Top From a Shirt
The first big lesson is that the shirt you choose matters more than you think. An oversized button-down is much easier to work with than a small fitted shirt because it gives you room for mistakes, shaping, lining, and seam allowance. When I use a shirt that is only slightly larger than my measurements, every cut feels like a suspense movie. When I use a roomy men’s shirt, the project feels calmer, and I can place the pattern pieces more thoughtfully.
The second lesson is to respect the fitting stage. It is tempting to sew everything quickly because the transformation is exciting, but a corset top is all about fit. I like to baste the main seams first using a long stitch, try the bodice on, and adjust before sewing permanent seams. This saves time in the long run. A tiny change at the side seam can make the difference between “custom boutique top” and “why is this digging into my soul?”
Another experience-based tip is to stabilize early. Thin shirt fabric may look fine on the table, but once you add lacing pressure, it can wrinkle or pull. Interfacing the back edges and center panels makes the top feel sturdier. If I am using a soft cotton shirt, I also like adding a lining because it hides the inside construction and makes the garment more comfortable against the skin.
Boning placement is also worth testing before final stitching. I have found that boning near the back lacing edges is especially helpful because it prevents the fabric from collapsing when the laces are tightened. Side seam boning also adds support without making the top feel stiff. For a casual top, I prefer flexible plastic boning or trimmed zip ties because they are easy to cut and comfortable enough for everyday wear.
Eyelets and grommets are the part where patience earns its paycheck. I always test the tool on scrap fabric first. Different fabrics behave differently, and one bad grommet on the final top can be very annoying. Reinforcing the area before punching holes is non-negotiable. If the back edge feels flimsy, add another strip of interfacing or fabric before installing hardware.
Finally, do not underestimate styling. A shirt corset top can look polished, casual, romantic, or edgy depending on what you pair it with. My favorite version keeps the original button placket in front because it makes the finished piece clearly connected to its former life as a shirt. That little detail adds charm. It tells the story of the garment without shouting, “I used to have sleeves!”
The real joy of this project is that every version turns out slightly different. One shirt becomes a structured summer top. Another becomes a layered vest over a dress. Another becomes a dramatic lace-up piece for a night out. Once you make one, you may start looking at every thrift-store shirt like raw material. Consider yourself warned: upcycling can become a very stylish habit.