Table of Contents >> Show >> Hide
- Before You Begin: Choose the Right Wooden Box Design
- Tools and Materials You Will Need
- Best Wood for Making a Wooden Box
- Simple Wooden Box Cut List
- Step-by-Step Guide: How to Make a Wooden Box
- Finishing Your Wooden Box
- Joinery Options for a Stronger or More Stylish Box
- Common Mistakes to Avoid
- Safety Tips for Wooden Box Projects
- Creative Wooden Box Ideas
- Experience Notes: What You Learn After Making a Few Wooden Boxes
- Conclusion
Learning how to make a wooden box is one of the most satisfying beginner woodworking projects because it teaches the skills that show up everywhere else: measuring, cutting, gluing, squaring, sanding, and finishing. In other words, it is the woodworking version of learning to make scrambled eggs before attempting a five-layer wedding cake. A wooden box can become a keepsake box, desk organizer, gift box, tool tote, recipe-card holder, planter, memory chest, or the official home of “small things I swear I will need someday.”
The best part? You do not need a warehouse full of fancy machines to build a strong, clean-looking box. A basic wooden box can be made with dimensional lumber, plywood, wood glue, clamps, nails or screws, sandpaper, and a few common tools. Once you understand the simple version, you can upgrade the project with rabbets, box joints, miters, hinges, dividers, decorative splines, or a beautiful lift-off lid.
Before You Begin: Choose the Right Wooden Box Design
For a first project, keep the design simple: four sides, one bottom, and an optional lid. A beginner-friendly box usually uses butt joints, where the end of one board meets the face of another board. Butt joints are not the fanciest joinery in the woodworking kingdom, but they are practical, forgiving, and strong enough when reinforced with glue and brad nails or screws.
If you already have some woodworking experience, you can make the box more refined by using rabbet joints, miter joints, or box joints. Rabbets create a small shoulder for the bottom panel or side pieces to sit in. Miters give the corners a clean picture-frame look, but they demand accurate 45-degree cuts. Box joints interlock like wooden fingers and add both strength and style. For this guide, the main build uses a simple butt-joint method, with upgrade options along the way.
Tools and Materials You Will Need
Materials
- One 1 x 6 board, 6 to 8 feet long, such as pine, poplar, cedar, oak, or maple
- One piece of 1/4-inch or 1/2-inch plywood for the bottom
- Wood glue
- 1-inch to 1-1/4-inch brad nails, finish nails, or wood screws
- Sandpaper in 120-, 180-, and 220-grit
- Wood filler, if needed
- Paint, stain, Danish oil, polyurethane, or another protective finish
- Optional: hinges, small handle, felt pads, dividers, liner, or decorative trim
Tools
- Tape measure or ruler
- Pencil
- Combination square or speed square
- Miter saw, circular saw, table saw, or handsaw
- Clamps
- Drill and drill bits
- Hammer, brad nailer, or screwdriver
- Sanding block or random-orbit sander
- Safety glasses, hearing protection, and dust mask
Best Wood for Making a Wooden Box
Pine is the friendly golden retriever of woodworking lumber: affordable, available, and easy to cut. It is great for painted boxes, rustic storage boxes, and beginner practice projects. Poplar is another excellent choice because it is smooth, stable, and takes paint beautifully. Cedar works well for decorative storage and outdoor-friendly boxes because it naturally resists moisture and insects. Oak, maple, cherry, and walnut create more elegant keepsake boxes, but they cost more and can be harder on tools.
Plywood is especially useful for the bottom panel because it is stable and less likely to expand, shrink, or cup compared with solid wood. For small boxes, 1/4-inch plywood is usually enough. For heavier storage boxes, use 1/2-inch plywood or thicker material. Avoid warped boards whenever possible. A twisted board can turn a simple project into a tiny wooden argument.
Simple Wooden Box Cut List
The following cut list makes a practical box that is about 12 inches long, 8 inches wide, and 5-1/2 inches tall. You can resize it easily by changing the length of the front, back, sides, and bottom panel.
- Front and back: two pieces at 12 inches long
- Sides: two pieces at 6-1/2 inches long
- Bottom panel: one piece at 12 inches by 8 inches, adjusted to fit your assembled frame
- Optional lid: one piece slightly larger than the box opening, or sized to sit flush
This design assumes the front and back boards run across the full width of the box, while the side boards fit between them. If you change the layout, adjust the side dimensions based on the actual thickness of your boards. A “1 x 6” board is usually 3/4 inch thick and 5-1/2 inches wide, not a full 1 inch by 6 inches. Lumber sizing is one of those charming traditions designed to keep beginners humble.
Step-by-Step Guide: How to Make a Wooden Box
Step 1: Plan the Box Size and Purpose
Before cutting anything, decide what the box will hold. A jewelry box needs different proportions than a garden tool box. A wine gift box should be long and narrow. A memory box needs enough depth for photos, letters, and keepsakes. Sketch the box on paper and write down the outside dimensions, inside dimensions, board thickness, and bottom style.
Planning prevents one of the most common beginner mistakes: building a beautiful box that is exactly 1/4 inch too small for the thing it was supposed to hold. That is how “custom storage” becomes “decorative disappointment.”
Step 2: Measure and Mark Carefully
Use a tape measure, pencil, and square to mark your pieces. Place a small “X” on the waste side of each line so you remember which side to cut away. If several pieces need to be the same length, clamp them together and cut them as a group when possible, or use a stop block to make repeat cuts consistent.
Accuracy matters more than speed. A wooden box is basically four corners asking, “Did you measure correctly?” If the answer is no, they will tell on you immediately.
Step 3: Cut the Front, Back, and Side Boards
Cut two front/back pieces and two side pieces according to your cut list. After cutting, lightly sand the ends to remove splinters, but do not round over the joint faces. Clean, square ends make stronger glue joints and cleaner corners.
If you are using a circular saw or handsaw, clamp the board securely before cutting. If you are using a miter saw or table saw, keep your hands away from the blade path and let the blade stop spinning before reaching near the workpiece. Safety is not optional. A good box is nice; keeping all ten fingers is better.
Step 4: Dry-Fit the Box Frame
Set the four side pieces on a flat work surface without glue. Check that the corners meet cleanly and that the box sits flat. Use a square to check each corner. Measure diagonally from one corner to the opposite corner, then measure the other diagonal. If the two measurements match, the box is square. If they do not match, gently shift the frame until they do.
This dry fit is your rehearsal. Glue-up is the live performance, and wood glue has no patience for dramatic pauses.
Step 5: Glue and Fasten the Sides
Apply a thin, even layer of wood glue to the mating surfaces. You do not need a glue waterfall. Too much glue creates squeeze-out, extra cleanup, and the suspicious feeling that the box is sweating. Clamp the sides together and check for square again.
Reinforce the corners with brad nails, finish nails, or screws. If using screws, drill pilot holes first to reduce the risk of splitting the wood. Pilot holes are especially important near board ends and when working with hardwood. Wipe away excess glue with a damp cloth before it dries.
Step 6: Cut and Attach the Bottom Panel
Once the frame is assembled, measure the outside dimensions for the bottom panel. Cut the plywood to size. For the simplest build, glue and nail or screw the bottom panel directly to the underside of the frame. Make sure the edges are flush before fastening.
For a cleaner, more advanced version, cut a rabbet or groove inside the lower edge of the side boards before assembly, then slide the bottom panel into the groove. This method hides the bottom edge and gives the box a more professional look. However, attaching the bottom underneath is perfectly acceptable for storage boxes, craft boxes, and beginner projects.
Step 7: Add a Lid, If Desired
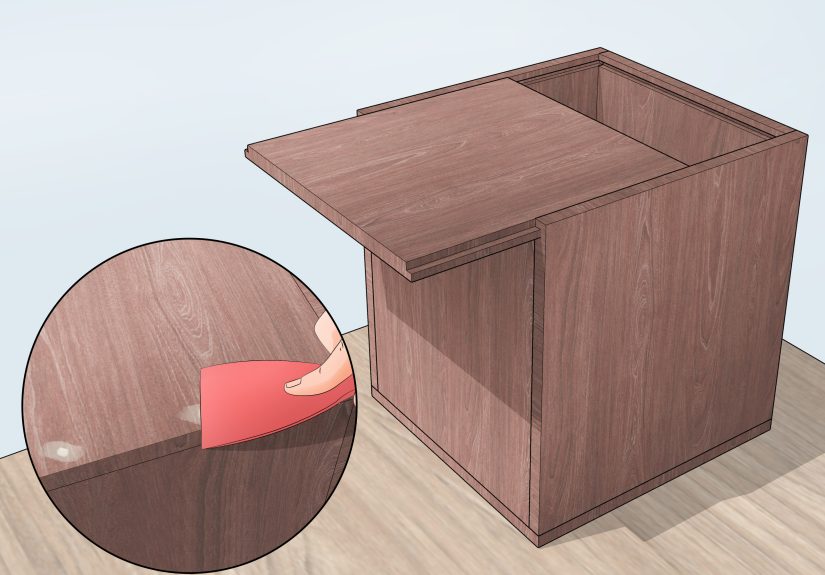
A wooden box does not always need a lid, but a lid instantly makes it feel more intentional. The easiest lid is a flat board that sits on top. Add a small strip underneath the lid to keep it from sliding around. This is called a lift-off lid, and it avoids the fuss of hinges.
If you want a hinged lid, use small butt hinges or a piano hinge. Mark the hinge locations carefully, drill pilot holes, and test the lid swing before tightening every screw. For a more refined keepsake box, build the box as a closed six-sided form and then cut the lid free after assembly. This technique creates a perfectly matched lid, but it requires careful saw control and is better for intermediate woodworkers.
Step 8: Sand the Wooden Box Smooth
Start sanding with 120-grit paper to remove saw marks and uneven spots. Move to 180-grit, then finish with 220-grit for a smooth surface. Sand with the grain whenever possible, especially if you plan to stain the box. Sanding across the grain can leave scratches that become painfully obvious once stain hits the wood.
Break the sharp edges lightly with sandpaper. Do not overdo it unless you want a rounded rustic look. Remove sanding dust with a vacuum, tack cloth, or slightly damp cloth. Dust left behind can ruin a smooth finish faster than a cat walking across wet paint.
Finishing Your Wooden Box
The finish depends on the look and use of the box. Paint is great for pine, poplar, toy boxes, and decorative storage. Stain highlights the natural grain of oak, walnut, cherry, maple, or cedar. Clear polyurethane adds protection for boxes that will be handled often. Danish oil or wipe-on finishes create a soft, natural appearance that feels warm and handmade.
If you are staining softwoods like pine, consider using a pre-stain wood conditioner to reduce blotchiness. Always test stain on a scrap piece from the same board before applying it to the whole project. Wood can be unpredictable; one board may turn honey-gold, while another decides to become pumpkin orange with no warning.
Apply finish in thin coats. Let each coat dry according to the product directions. Lightly sand between protective coats with 220-grit paper if recommended, then remove dust before recoating. For the inside of a keepsake box, you can leave the wood natural, seal it lightly, or add felt, cork, fabric, or thin cedar lining.
Joinery Options for a Stronger or More Stylish Box
Butt Joints
Butt joints are the easiest and fastest option. They work well for painted boxes, utility boxes, and beginner projects. Reinforce them with glue and nails or screws.
Rabbet Joints
Rabbet joints add more glue surface and help pieces align during assembly. They are a great next step after mastering the basic box.
Miter Joints
Miter joints create clean 45-degree corners and look excellent on decorative boxes. They require accurate cuts and careful clamping.
Box Joints
Box joints are strong, attractive, and perfect for small boxes, drawers, and keepsake projects. They usually require a table saw jig or router jig for consistent spacing.
Common Mistakes to Avoid
The first mistake is using warped wood. If the board looks like it is trying to leave the shop on its own, choose another board. The second mistake is skipping the dry fit. Dry-fitting lets you catch gaps, wrong dimensions, and upside-down pieces before glue enters the conversation.
Another common issue is overclamping. Clamps should hold the pieces firmly, not squeeze them into submission. Too much pressure can force pieces out of alignment or starve the joint of glue. Also, remember to check for square before the glue dries. A box that is out of square may still hold objects, but the lid may never fit correctly.
Finally, do not rush the finish. A great build can look sloppy if the sanding and finishing are hurried. Smooth surfaces, clean corners, and dust-free coats make the difference between “I made this” and “I made this, and yes, you may admire it.”
Safety Tips for Wooden Box Projects
Wear safety glasses whenever cutting, drilling, sanding, or nailing. Use hearing protection with loud power tools. Wear a dust mask or respirator when sanding, especially indoors or when working with hardwoods. Keep your work area clean so offcuts and cords do not become tiny workshop traps.
Clamp small pieces instead of holding them near a blade. Keep hands away from cutting paths, and never remove guards unless a tool manual specifically allows a safe setup for a particular cut. Read the instructions for stains, paints, and finishes, and work in a ventilated area. Good craftsmanship includes knowing when to slow down.
Creative Wooden Box Ideas
Once you understand the basic structure, you can customize almost everything. Add dividers to create a tea box, jewelry organizer, seed packet box, or hardware sorter. Install a dowel handle to make a small tool tote. Attach small wooden feet to lift the box and give it a furniture-like look. Add a name, date, stencil, carved design, or burned pattern to make it personal.
You can also play with proportions. A long, shallow wooden box makes a great desk tray. A tall narrow box works for kitchen utensils. A cedar box can store keepsakes or seasonal items. A small hardwood box with a lift-off lid makes a thoughtful handmade gift. The beauty of a box is that it is simple enough to build in a weekend but flexible enough to keep improving for years.
Experience Notes: What You Learn After Making a Few Wooden Boxes
The first wooden box teaches patience. The second teaches accuracy. By the third, you start developing little habits that make the whole process smoother. One of the biggest lessons is that a box reveals every tiny error because all four sides depend on one another. A shelf can sometimes forgive a slightly imperfect cut. A box? Not so much. It will display that mistake proudly at the corner like a tiny museum exhibit.
A useful habit is to cut matching parts at the same time. If the two side pieces must be equal, cut one, then use it as a reference for the second, or use a stop block. This is often more reliable than measuring each piece separately. Repeated measuring invites tiny differences, and tiny differences become gaps. Another lesson is to label parts. Mark the inside faces, outside faces, top edges, and order of assembly. When working with attractive grain, lay the pieces out before assembly so the grain flows naturally around the box. Even a simple pine box looks more intentional when the boards are arranged thoughtfully.
Glue control also improves with experience. Beginners often use too much glue because it feels safer. In reality, a thin, even coat on clean bare wood is usually better than a messy flood. Excess glue can block stain from absorbing evenly, especially around corners. Wiping it right away helps, but dried glue hiding in a corner can still surprise you during finishing. A small brush, scrap stick, or even a fingertip can spread glue evenly without overdoing it.
Clamping is another skill that gets better fast. The goal is not maximum force; the goal is alignment. Use clamps to bring the joints together, then check for square before walking away. If the diagonals are unequal, a gentle diagonal clamp can pull the box back into shape. Building on a flat surface also matters. If the workbench is twisted or covered in debris, the box may dry slightly out of plane and rock later. A flat board, table saw top, or clean workbench surface can help keep the frame true.
Sanding teaches restraint. It is tempting to sand aggressively when a corner is uneven, but heavy sanding can change the shape of the box. It is better to assemble carefully than to rely on sanding as a rescue mission. Start with the right grit, move gradually, and stop when the surface is smooth. Over-sanding edges can make a crisp box look tired. For a storage box, slightly softened edges feel good in the hand. For a refined keepsake box, cleaner lines usually look better.
Finishing is where personality enters the project. Paint can make a simple pine box look cheerful and modern. Stain can make a hardwood box look rich and classic. A clear finish lets the grain do the talking. The most important experience-based rule is to test the finish on scrap. The sample board will tell you more truth than the label on the can. In the end, making a wooden box is not only about creating storage. It is about learning how wood behaves, how tools respond, and how small details turn a basic project into something worth keeping.
Conclusion
Making a wooden box is a perfect woodworking project because it is useful, affordable, and packed with essential skills. You learn how to choose wood, measure accurately, cut cleanly, assemble square corners, attach a bottom, add a lid, sand properly, and apply a finish that protects the project. Start with a simple butt-joint box, then experiment with rabbets, miters, box joints, dividers, feet, liners, and decorative details as your confidence grows.
The secret is not building the most complicated box on your first try. The secret is building one clean, square, sturdy box and learning from it. Once you can do that, you can make gift boxes, tool boxes, keepsake boxes, drawer boxes, organizers, and custom storage for almost anything. Congratulations: you have officially entered the world where scrap wood is no longer trash. It is “future box material.”
Note: This article is written for web publication and is based on practical woodworking methods, common U.S. DIY guidance, shop safety principles, and real box-making techniques used by hobbyists and woodworkers.