Table of Contents >> Show >> Hide
- What Is Gum Paste, Exactly?
- Why Bakers Love Gum Paste
- Before You Start: Basic Supplies
- Recipe 1: Classic Homemade Gum Paste
- Recipe 2: Quick Gum Paste From Fondant
- Which Recipe Should You Choose?
- How to Tell If Your Gum Paste Is Ready
- Common Gum Paste Problems and How to Fix Them
- How to Color, Roll, and Shape Gum Paste
- Drying and Storage Tips
- Best Uses for Homemade Gum Paste
- Experience-Based Lessons From Making Gum Paste at Home
- Final Thoughts
Note: Ready-to-publish HTML body only.
If you have ever looked at a cake covered in delicate roses, ruffled petals, tiny bows, or elegant topper details and thought, “Whoever made that clearly has magical powers,” good news: the magic is mostly gum paste. It is one of the most useful cake-decorating mediums around, and once you understand how it behaves, it stops being intimidating and starts feeling like edible craft clay with a sweet tooth.
This guide breaks down exactly how to make gum paste in two easy ways: a classic homemade recipe from scratch and a shortcut version that starts with fondant. Both methods work, both can help you make beautiful sugar flowers and decorations, and both are much less scary than they sound. The only real enemy here is impatience. And possibly humidity. Humidity always shows up uninvited.
Whether you are decorating a birthday cake, making cupcake toppers, or experimenting with your first sugar flowers, this article will help you choose the right recipe, mix it correctly, troubleshoot common problems, and store it like a pro.
What Is Gum Paste, Exactly?
Gum paste is a sugar-based decorating dough used to create detailed edible decorations. Unlike fondant, which stays softer and is often used to cover cakes, gum paste dries firm and hard. That makes it ideal for thin petals, leaves, ruffles, bows, plaques, and other decorations that need to hold their shape without slumping like a sleepy pancake.
Think of fondant as the smooth outfit your cake wears, while gum paste is the jewelry. Both are useful, but they are not the same thing. If you try to make very thin flowers with plain fondant, it often tears or droops. Gum paste is stronger, dries faster, and handles fine details much better.
It is technically edible, but let’s be honest: gum paste is usually edible in the same way holiday ornaments are technically “made of something.” It is best admired, not munched by the handful.
Why Bakers Love Gum Paste
Home bakers and cake decorators keep coming back to gum paste for one simple reason: it gives big visual payoff. A plain frosted cake becomes elegant the second you add a few thin petals or a cluster of blossoms. It also works beautifully for monograms, name plaques, baby shower toppers, and little figurines that need structure.
Another bonus is timing. Since gum paste decorations can be made ahead, you do not have to create everything the night before a party while also frosting a cake, washing dishes, and questioning your life choices. You can make flowers days or even weeks in advance if they are stored properly.
Before You Start: Basic Supplies
You do not need a pastry-school toolkit the size of a small suitcase. A few basics go a long way:
- Powdered sugar
- Tylose powder or Gum-Tex
- Egg whites or fondant, depending on the recipe
- Vegetable shortening
- Cornstarch or powdered sugar for dusting
- Gel food coloring
- A rolling pin
- Plastic wrap and zip-top bags
- A foam pad or parchment-lined tray for drying pieces
- Small cutters, if you want flowers or leaves
If you have a ball tool, veining tool, or flower formers, great. If not, you can still start with simple shapes and blossoms. No one is born knowing how to make a peony that looks like it belongs in a wedding magazine.
Recipe 1: Classic Homemade Gum Paste
This is the traditional method and the best choice when you want a sturdy, professional-style gum paste for flowers and detailed work. It makes a generous batch, so you will have plenty for practice.
Ingredients
- 1/2 cup egg whites
- 6 2/3 cups sifted powdered sugar, plus more if needed
- 3 tablespoons tylose powder
- 2 tablespoons vegetable shortening
- Gel food coloring, optional
How to Make It
- Place the egg whites in the bowl of a stand mixer fitted with the paddle attachment. Mix briefly until frothy.
- Add the powdered sugar and mix on low until combined. Then increase the speed and mix until the mixture looks glossy and soft.
- With the mixer on low, slowly add the tylose powder. Keep mixing until the dough starts gathering around the paddle and forming a ball.
- Turn the mixture onto a clean surface dusted lightly with powdered sugar.
- Knead in the vegetable shortening until the gum paste becomes smooth, soft, and pliable.
- If you want to color it, knead in gel food coloring now. Use gloves unless you enjoy having neon fingers.
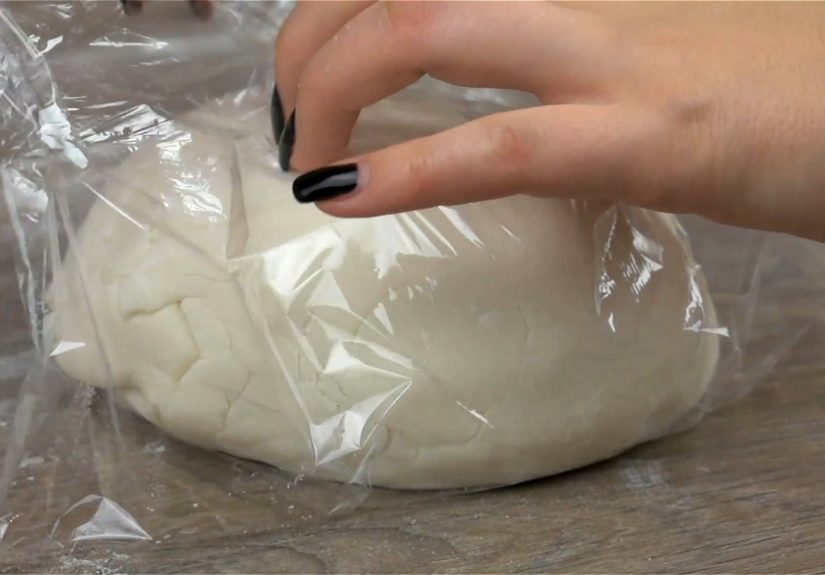
- Wrap the gum paste tightly in plastic wrap, then place it in a zip-top bag. Let it rest for at least a few hours before using. Overnight is even better.
Why This Recipe Works
The egg whites provide moisture and structure, the powdered sugar gives body, and the tylose turns the whole mixture into a decorating dough that will dry firm. The shortening keeps it from becoming brittle too early and makes it easier to knead and shape.
This version is especially good for roses, lilies, petals, leaves, and decorations that need crisp edges. If you want the strongest, most reliable result, start here.
Recipe 2: Quick Gum Paste From Fondant
This shortcut is perfect when you want gum paste fast and do not feel like starting from scratch. It begins with ready-made fondant or homemade marshmallow fondant, then adds a drying agent to make it act more like gum paste.
Ingredients
- 16 ounces fondant
- 1 to 2 teaspoons tylose powder or Gum-Tex, added gradually
- 1 teaspoon vegetable shortening, only if needed
- Cornstarch or powdered sugar for dusting
- Gel food coloring, optional
How to Make It
- Knead the fondant until it is smooth and soft.
- Sprinkle in about 1 teaspoon of tylose powder or Gum-Tex and knead thoroughly.
- If the fondant still feels very stretchy or soft, add a little more powder, a pinch at a time, until the texture becomes firmer and less elastic.
- Wrap it tightly in plastic wrap and let it rest for about 30 minutes so the drying agent can activate.
- Test a small piece by rolling it thin. If it holds a petal shape better and feels slightly stronger than plain fondant, it is ready to use.
- If it becomes too stiff, knead in a tiny bit of shortening to soften it.
Why This Shortcut Is So Handy
This recipe is fast, convenient, and beginner-friendly. It is ideal when you only need a small amount for toppers, bows, letters, or simple flowers. It is also a great way to use fondant you already have on hand instead of buying one more baking product that will live in your pantry until the end of time.
If you are using homemade marshmallow fondant, make sure it has already rested and is smooth before you add the tylose. That gives you a more even final texture.
Which Recipe Should You Choose?
Go with the classic homemade gum paste if you want the most dependable structure and plan to make thin petals, wired flowers, or detailed decorations. Choose the shortcut fondant version if you need speed, convenience, or only a smaller amount.
In practical terms, the classic version is your “I am making showpiece flowers” recipe. The quick version is your “I need cute decorations today and I still have laundry to do” recipe.
How to Tell If Your Gum Paste Is Ready
Good gum paste should feel smooth, stretchy enough to work with, and firm enough to hold shape. It should not feel wet, greasy, crumbly, or like it wants to glue itself permanently to your counter.
When you roll out a piece, it should thin nicely without tearing immediately. When you cut a shape, the edges should stay neat. When you lift a petal, it should bend slightly but not collapse. That is the sweet spot.
Common Gum Paste Problems and How to Fix Them
It Is Too Sticky
Knead in a little more powdered sugar or dust your surface lightly with cornstarch. Sticky gum paste can also mean your kitchen is warm or humid, so let the dough rest in a cool, dry spot for a bit.
It Is Cracking
Cracks usually mean the gum paste is drying out. Knead in a tiny amount of shortening and keep the rest covered while you work. Gum paste is dramatic like that; leave it uncovered for too long and it acts personally offended.
It Feels Too Soft
Add a small amount of tylose or Gum-Tex, then let it rest. Sometimes the dough only needs time to firm up.
It Dries Before You Finish Shaping
Work with small pieces and keep the unused portion wrapped. Do not leave the whole batch on the counter while you slowly decide whether your flower needs four petals or five.
The Pieces Droop
Roll the paste a bit thinner, use a drying former or curved spoon, or mix in a touch more drying agent. Also give decorations enough drying time before moving them.
How to Color, Roll, and Shape Gum Paste
Gel food coloring works best because it adds concentrated color without too much moisture. Start with a toothpick amount and knead well before adding more. Color deepens as it sits, so try not to panic and add half the bottle right away.
When rolling, dust the surface lightly with cornstarch. Too much can dry the gum paste too quickly, so aim for “helpful dusting” rather than “winter blizzard.” For flowers and petals, roll the paste very thin. That is where gum paste really shines.
To shape beginner decorations, start with these easy ideas:
- Simple blossoms with a small flower cutter
- Leaves pressed with a toothpick for veins
- Bows made from strips
- Dots, pearls, and plaques
- Name toppers and number toppers
Attach pieces with a tiny amount of edible glue, a dab of water, or gum paste adhesive. Use just enough to stick. Flooding the piece will soften the details and create a soggy mess nobody invited.
Drying and Storage Tips
Let finished decorations dry completely before storing them. Small flowers may dry in a few hours, while larger pieces can take overnight or longer. Place them on parchment, foam, or a flower former depending on the shape you want.
Once dry, store gum paste decorations in an airtight container at room temperature. Add tissue paper or soft padding if the pieces are delicate. Keep the container in a cool, dry place away from direct sunlight and humidity.
Avoid the refrigerator and freezer for dried gum paste decorations. Moisture and condensation are the villains in this story. The fridge can make decorations sticky, limp, or syrupy, which is heartbreaking when you have spent an hour making a rose that finally looked rose-like.
Best Uses for Homemade Gum Paste
Once you have a batch ready, there is a lot you can do with it:
- Sugar flowers for cakes and cupcakes
- Leaves and vines
- Baby shower toppers
- Wedding cake accents
- Monograms and name plaques
- Decorative bows and ribbons
- Holiday shapes and edible ornaments
If you are a beginner, start with daisies, blossoms, or leaves before attempting a lifelike peony with attitude. Small wins matter, especially in cake decorating.
Experience-Based Lessons From Making Gum Paste at Home
Now for the part most tutorials skip: what making gum paste actually feels like in a real kitchen. The first time many home bakers try it, they expect a neat, polished process. The actual process is usually more like this: the dough is stickier than expected, the first petal tears, the second one folds in on itself, and suddenly you are bargaining with a sugar flower like it is a stubborn toddler. That is normal.
One of the biggest lessons people learn quickly is that gum paste rewards speed and preparation. If your tools are not ready, your work surface is cluttered, or your cutters are still somewhere in a drawer under three mystery spatulas, the gum paste starts drying while you search. The difference between a smooth decorating session and a frustrating one is often as simple as setting out your roller, dusting powder, cutters, foam pad, and storage wrap before you begin. It sounds boring, but boring prep creates pretty flowers.
Another common experience is discovering that less dusting is better than more. Beginners often throw cornstarch or powdered sugar around like confetti at a parade. That can make the dough dry too fast, crack around the edges, and look chalky. A light dusting works better. The same goes for food coloring. Add a little, knead well, and wait a minute before deciding it is too pale. Gum paste color deepens as it sits, and nothing says “surprise” quite like a flower that looked blush pink at noon and hot magenta by dinner.
Humidity also deserves its own dramatic soundtrack. On dry days, gum paste can behave beautifully and dry with crisp, elegant edges. On humid days, that same batch may stay soft longer, feel tacky, or droop when shaped too thin. Experienced bakers adjust instead of fighting it. They add a touch more tylose, let pieces rest longer, use fans lightly, and choose simpler shapes if the weather is being difficult. That is not failure. That is smart decorating.
There is also the emotional journey of expectations. Many people assume their first gum paste rose should look bakery-perfect. In reality, the first batch often produces flowers that look a little cabbage-like. Still cute, just not exactly red-carpet ready. But then something interesting happens: by the third or fourth try, your hands start understanding the dough. You roll more evenly. You know when to stop thinning a petal. You use less glue. You become calmer. Gum paste is one of those decorating skills that clicks through repetition, not through reading alone.
And finally, the best experience-based tip of all: make decorations ahead of time whenever possible. When gum paste is rushed, it shows. When you make flowers a day or two early, let them dry properly, and store them carefully, decorating becomes fun instead of frantic. You can focus on placement, balance, and style instead of trying to hold a soft bow upright with one hand while texting “I’m almost done” with the other. In short, gum paste gets much easier when you treat it less like an emergency and more like a small edible art project.
Final Thoughts
Learning how to make gum paste is one of the most useful upgrades a home baker can make. It opens the door to more polished cakes, more creative toppers, and more confidence in decorating overall. The classic scratch recipe gives you a strong, reliable paste for serious detail work, while the fondant shortcut gets you to the fun part faster.
Start simple, keep everything covered, let your pieces dry properly, and do not judge your first batch too harshly. Even the decorators making flawless sugar flowers today probably started with petals that looked a little confused. With a little practice, your gum paste decorations can go from “adorably homemade” to “wait, you made that?”