Table of Contents >> Show >> Hide
- What Is a Necklace Slipknot?
- Best Materials for Tying Necklace Slipknots
- How to Tie Necklace Slipknots Step by Step
- What a Good Video Tutorial Should Show
- Simple Slipknot vs. Double Sliding Knot
- Common Mistakes When Tying Necklace Slipknots
- How to Make the Necklace More Comfortable
- Design Ideas for Slipknot Necklaces
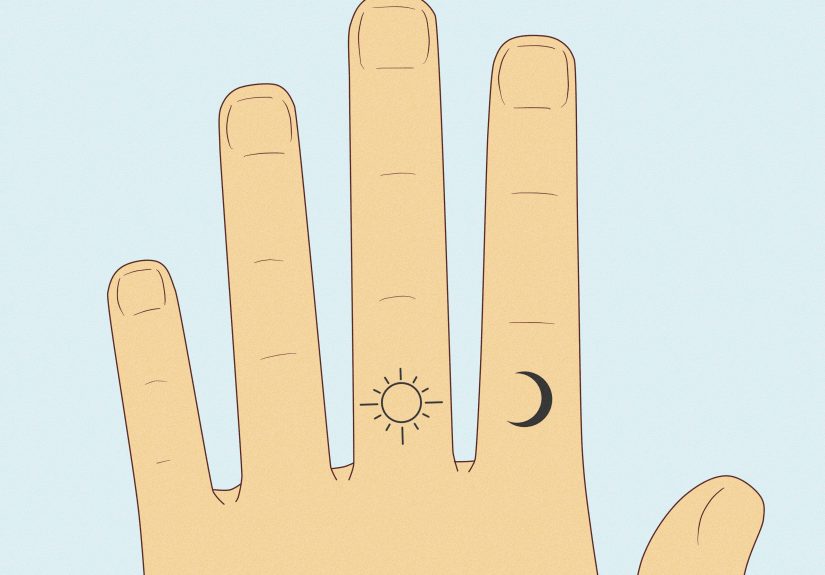
- How to Choose the Right Necklace Length
- How to Keep Slipknots from Coming Undone
- Cleaning and Caring for Slipknot Necklaces
- Experience-Based Tips for Tying Necklace Slipknots
- Conclusion
Learning how to tie necklace slipknots is one of those tiny craft skills that makes you feel suspiciously powerful. One minute you have a cord, a pendant, and a vague sense of optimism. Ten minutes later, you have an adjustable necklace that slides neatly, fits comfortably, and does not require a clasp, pliers, tiny jump rings, or the patience of a watchmaker.
A necklace slipknot, often called a sliding knot or adjustable knot, is a practical closure used in cord jewelry. It works especially well with leather cord, cotton cord, waxed cotton, hemp, nylon, satin cord, suede lace, and macramé cord. Instead of fastening with a metal clasp, the two ends of the cord wrap around each other, creating knots that can slide to shorten or lengthen the necklace. It is simple, sturdy, and delightfully forgivingbasically the sweatpants waistband of jewelry making, but much prettier.
This guide explains how to tie necklace slipknots step by step, how to choose the right cord, what videos should show when you are learning visually, and how to fix the common problems beginners run into. Whether you are making a pendant necklace, a beachy shell necklace, a beaded cord necklace, or a handmade gift that says, “Yes, I made this, and yes, I am now emotionally attached to it,” you are in the right place.
What Is a Necklace Slipknot?
A necklace slipknot is an adjustable knot used to close a necklace without a clasp. The most common version for jewelry is technically a pair of sliding knots. Each cord end is tied around the opposite side of the necklace cord. When you pull the knots apart, the necklace becomes shorter. When you pull the necklace cord outward, the opening becomes larger so it can slip over your head.
This style is popular because it is clean, casual, and adjustable. It is also useful for people who dislike tiny clasps, have trouble fastening jewelry behind the neck, or want one necklace that can be worn at different lengths. A sliding knot necklace can sit close to the collarbone one day and hang lower over a sweater the next. Very dramatic. Very versatile. No tiny lobster clasp gymnastics required.
Best Materials for Tying Necklace Slipknots
Before tying anything, choose a cord that can handle friction. Slipknots work by gripping the cord while still allowing movement, so the material matters. If the cord is too slippery, the knots may loosen. If it is too stiff or thick, the knots may look bulky and refuse to slide politely.
Recommended Cord Types
Waxed cotton cord is one of the best beginner options. It has enough grip to hold the knot, enough flexibility to slide, and a nice handmade look. Leather cord is stylish and durable, but it can be stiff at first, so practice with scrap cord before tying your final necklace. Hemp cord gives a natural, earthy look and holds knots well. Nylon or satin cord creates a smoother, shinier finish, though it may need tighter knots or sealed ends to prevent fraying.
For most pendant necklaces, cord between 1 mm and 2 mm thick is ideal. Thinner cord can look delicate but may be harder to handle. Thicker cord looks bold but can create chunky knots. Like pizza toppings, balance is everything.
Tools You May Need
- Necklace cord, usually 24 to 36 inches or longer depending on the desired style
- A pendant, charm, bead, shell, or focal piece
- Sharp scissors
- A ruler or measuring tape
- Clear jewelry glue, optional
- A lighter or thread burner for synthetic cord only, optional and used carefully by adults
- Small beads for finishing cord ends, optional
If you are making a necklace that must slip over the head, make sure the cord is long enough before tying the knots. Many adjustable cord necklaces begin with about 30 to 36 inches of cord, especially if a pendant is involved. A shorter cord can work, but only if the finished necklace still opens wide enough to fit comfortably over the head. Nobody wants to finish a beautiful necklace and then discover it has become a bracelet with ambition.
How to Tie Necklace Slipknots Step by Step
The classic adjustable necklace uses two sliding knots. It may look confusing the first time because both cord ends are moving, crossing, looping, and generally behaving like spaghetti. Go slowly, and the structure becomes easy.
Step 1: Add Your Pendant or Beads
Thread your pendant, charm, or focal bead onto the cord before tying the slipknots. This sounds obvious, but it is one of the most common beginner mistakes. Once the knots are tied, adding a pendant may be impossible unless the pendant has a large bail or opening.
Center the pendant on the cord. Hold both cord ends together and check that the necklace will hang evenly. If your pendant has a front and back, make sure it faces forward before you start tying. Pendants are sneaky. They enjoy turning around at the least convenient moment.
Step 2: Overlap the Cord Ends
Lay the necklace in a circle on a flat surface. Overlap the left and right cord ends by several inches. The overlapping section is where the sliding knots will sit. For most necklaces, a 4 to 6 inch overlap gives you enough working room and adjustment range.
Think of the necklace as two roads crossing. Each loose end will wrap around the opposite road to form a knot. The knots should face each other, but they should not be tied together into one fixed knot.
Step 3: Tie the First Sliding Knot
Take the right cord end and place it over the left side of the necklace cord. Make a small loop by bringing the end back around the standing cord. Wrap it around once or twice, depending on the style you want. For a simple necklace slipknot, one clean overhand-style loop can work. For a more secure sliding knot, two wraps create better grip.
Feed the cord end through the loop you created. Pull gently to tighten the knot around the opposite cord, but do not strangle it. The knot should grip the cord while still sliding when pushed. If it feels frozen in place, loosen it slightly. If it flops around like it has no responsibilities, tighten it.
Step 4: Tie the Second Sliding Knot
Now repeat the same process with the left cord end, tying it around the right side of the necklace cord. Make the loop, wrap the end around the standing cord, feed the end through, and tighten gently. Try to make this knot the same size as the first one so the necklace looks balanced.
At this point, you should have two knots sitting on opposite sides of the necklace. They should slide toward and away from each other. When the knots move closer together, the necklace opening becomes larger. When the knots move farther apart, the necklace becomes shorter when worn.
Step 5: Test the Adjustment
Hold the necklace by the knots and pull gently. Then pull the necklace cord to expand the opening. Test the motion several times. A good slipknot should slide smoothly but not slip on its own. It should feel secure, not stubborn.
If the knots are too tight, loosen them carefully with your fingernails or a small blunt tool. If the knots are too loose, tighten the wraps or remake them with an extra loop. This is not failure. This is quality control wearing a craft apron.
Step 6: Trim and Finish the Ends
Once the necklace adjusts properly, trim the cord ends. Leave a small tail beyond each knot so the knot does not unravel. Depending on your design, you can add small beads to the ends, tie tiny stopper knots, or dab a small amount of jewelry glue on the knot ends.
For synthetic cords like nylon, some makers carefully seal the ends with heat. This should be done cautiously, with proper ventilation and adult supervision, because melted cord can be hot and messy. For cotton, hemp, leather, and suede, use glue or neat trimming instead.
What a Good Video Tutorial Should Show
Because slipknots are easier to understand visually, videos can be extremely helpful. The best video tutorials for tying necklace slipknots usually show the cord in a contrasting color against a plain background, zoom in on the looping motion, and repeat the knot from both directions. A good tutorial should not look like it was filmed during an earthquake inside a bead drawer.
When watching a necklace slipknot video, look for these details: how much cord is overlapped, which cord end moves first, how the loop is formed, where the tail passes through, and how tightly the knot is pulled. Pause often. Rewind shamelessly. Everyone rewinds knot videos. It is practically part of the craft.
Video Learning Tip: Use Two Cord Colors
If you are practicing while watching a video, use two different cord colors. For example, use black cord for the main necklace and tan cord as the working end, or practice with two shoelaces. This makes it easier to see which strand wraps and which strand stays straight. Once the motion makes sense, switch to your final jewelry cord.
Simple Slipknot vs. Double Sliding Knot
There are two common approaches for adjustable necklace closures: the simple sliding knot and the double sliding knot. Both are useful, but they serve slightly different purposes.
Simple Sliding Knot
A simple sliding knot is usually made by tying an overhand knot around the opposite cord. It is fast, beginner-friendly, and works well for lightweight necklaces. It is a good choice for casual cord necklaces, kids’ crafts, friendship necklaces, and simple pendant projects.
Double Sliding Knot
A double sliding knot uses extra wraps, creating a more secure and decorative closure. It is better for heavier pendants, smoother cords, and necklaces that will be worn often. The extra wraps add friction, which helps prevent the knot from loosening during wear.
If you are unsure which one to use, start with a double sliding knot. It takes only a little longer and usually performs better. The simple knot is like a bicycle; the double knot is like a bicycle with brakes that actually listen.
Common Mistakes When Tying Necklace Slipknots
Mistake 1: Cutting the Cord Too Short
The most frustrating mistake is starting with too little cord. Adjustable necklaces need extra length for overlap, knots, trimming, and the opening that fits over the head. Always cut more cord than you think you need. You can trim extra cord later, but you cannot politely ask the cord to grow.
Mistake 2: Pulling the Knots Too Tight
A slipknot must slide. If you tighten it like you are securing a boat in a storm, it may lock in place. Tighten the knot enough to hold, then test the movement. The goal is firm, not furious.
Mistake 3: Using the Wrong Cord
Very slippery cord may not hold well. Very rough cord may not slide smoothly. If your knot refuses to behave, try waxed cotton, leather, or hemp before blaming your hands. Sometimes the material is the drama.
Mistake 4: Forgetting to Add the Pendant First
Always add beads, pendants, charms, or shells before tying the sliding closure unless the focal piece can be attached afterward. This one mistake has humbled many confident crafters. The pendant must enter the story before the knots close the gate.
Mistake 5: Making Uneven Knots
Uneven knots can still work, but they may look messy. Try to use the same number of wraps on both sides and tighten them with similar pressure. A little asymmetry is handmade charm. A lot of asymmetry is “I tied this while sneezing.”
How to Make the Necklace More Comfortable
Comfort matters, especially for necklaces worn all day. Keep the knots small enough that they do not poke the back of the neck. Trim tails neatly so they do not scratch. If using leather cord, soften it by gently bending it back and forth before tying. If using waxed cotton, wipe away excess wax if the cord feels sticky.
For children’s jewelry or casual everyday necklaces, avoid heavy pendants on thin cord. The pendant can pull the necklace down and make the knots harder to adjust. Match the cord strength to the pendant weight. A tiny charm does not need rope worthy of a pirate ship.
Design Ideas for Slipknot Necklaces
Once you know how to tie necklace slipknots, you can use the technique in many designs. Try a gemstone donut pendant on black waxed cord for a clean minimalist look. Use hemp cord with wooden beads for a natural boho style. Pair a small silver charm with navy cotton cord for a simple everyday necklace. Add a shell pendant to tan cord for beach jewelry that looks like it has excellent vacation stories.
You can also use sliding knots for friendship necklaces, crystal necklaces, name bead necklaces, surfer-style necklaces, macramé pendants, and handmade gifts. The adjustable closure makes sizing easier, which is helpful when you are making jewelry for someone else and do not know their preferred necklace length.
How to Choose the Right Necklace Length
Adjustable slipknot necklaces are flexible, but it still helps to plan the length. A short necklace may adjust from choker length to collarbone length. A longer cord necklace may adjust from mid-chest to lower pendant length. Before tying, hold the cord around your neck and test the shortest and longest positions.
For most adult pendant necklaces, a finished adjustable range of about 16 to 28 inches works well. For a necklace that must slip over the head without opening a clasp, the largest opening must be wide enough to pass comfortably over the head. When in doubt, test with scrap cord first.
How to Keep Slipknots from Coming Undone
To make necklace slipknots more secure, use enough overlap, tie clean wraps, and leave small tails after trimming. For extra hold, add a tiny dot of flexible jewelry glue to the final tail, not inside the sliding channel. Do not glue the whole knot to the cord unless you want a non-adjustable necklace, which would be a plot twist nobody requested.
Stopper beads can also help. Slide a small bead onto each cord end, then tie a tiny knot below it. This gives the necklace a finished look and helps prevent the cord end from slipping back through the sliding knot.
Cleaning and Caring for Slipknot Necklaces
Cord necklaces are easy to wear, but they appreciate basic care. Keep them dry when possible, especially if they are made from leather, suede, hemp, or cotton. Water can weaken fibers, fade color, or make the cord stretch. Remove the necklace before swimming, showering, or applying lotions and perfumes.
If the cord gets dirty, wipe it gently with a slightly damp cloth and let it air dry completely. Do not soak leather or suede. Store the necklace flat or loosely coiled so the cord does not kink. If the sliding knots become stiff, move them back and forth a few times to loosen the fibers.
Experience-Based Tips for Tying Necklace Slipknots
The first time you tie a necklace slipknot, do not start with your fanciest cord. Practice with shoelaces, yarn, or cheap cotton cord. This removes the pressure. Expensive materials have a way of making beginners suddenly forget how fingers work. Once the motion feels natural, move to your real necklace cord.
One useful habit is to tie the knot slowly while saying the steps out loud: cross, loop, wrap, tuck, tighten. It may feel silly, but it works. Knot tying is muscle memory. Your hands learn the rhythm faster when your brain stops shouting, “What is happening?” in the background.
Another practical tip is to work on a table instead of holding the necklace in the air. A flat surface keeps the cords from twisting and helps you see the overlap clearly. If the cord keeps sliding around, tape the pendant area lightly to the table with painter’s tape. Do not tape the actual knot area, because you need those cords to move.
For leather cord, expect the first few adjustments to feel a little stiff. Leather often relaxes after being handled. Make the knots neat but not brutally tight. After tying, slide the knots open and closed several times to break them in. The necklace should become smoother with use.
Waxed cotton cord is usually the friendliest option for beginners. It grips well, cuts cleanly, and has enough structure to show the knot shape. If you are teaching someone else, especially a beginner crafter, waxed cotton is a great starting material. It behaves better than slippery satin cord and is less bulky than thick leather.
If your necklace has a heavy pendant, use a double sliding knot with two wraps on each side. Heavy pendants pull on the cord, so the closure needs more friction. A single loose knot may slide during the day, slowly turning your necklace into a surprise lanyard. Extra wraps help keep the length where you want it.
When making gifts, always test the necklace before wrapping it. Open it fully, close it fully, and make sure it can fit over the head. Check whether the knots sit comfortably at the back of the neck. A necklace may look perfect on the table but feel annoying when worn. Jewelry should not require negotiations with your skin.
For a cleaner finish, trim both cord tails to the same length. If the design allows, add small end beads that match the pendant. This makes the necklace look intentional rather than unfinished. A tiny finishing bead can turn “I made this at midnight” into “artisan studio energy.”
If a knot turns messy, untie it and redo it. Do not keep tightening a bad knot hoping it will become elegant through pressure. It will not. A clean loose knot is easier to fix than a tiny angry knot that has fused into a cord pretzel.
Finally, keep one finished sample necklace near your workspace. When you forget which way the cord wraps, look at the sample. This is much faster than rewatching a video twelve times, although rewatching knot videos is a completely honorable craft tradition.
Conclusion
Tying necklace slipknots is a simple skill that opens the door to adjustable, clasp-free jewelry. With the right cord, enough overlap, and a little practice, you can make pendant necklaces that slide smoothly, fit comfortably, and look polished. Start with an easy material like waxed cotton, practice the two-knot sliding closure, and test the adjustment before trimming the ends. Once you learn the movement, the technique becomes quick, reliable, and surprisingly satisfying.
The beauty of the necklace slipknot is its practicality. It works for casual designs, handmade gifts, beach jewelry, leather cord necklaces, macramé pieces, and minimalist pendants. It also saves you from wrestling with tiny clasps, which is a public service to humanity and fingernails everywhere.
Note: This article is written for web publishing in standard American English and is based on widely used jewelry-making practices for adjustable sliding knot necklaces.