Table of Contents >> Show >> Hide
- What Is Automator on Mac?
- Automator vs. Shortcuts: Which One Should You Use?
- How to Open Automator on a Mac
- Understanding Automator Workflow Types
- How the Automator Interface Works
- How to Create Your First Automator Workflow
- Useful Automator Examples for Everyday Mac Users
- Using Variables in Automator
- Using AppleScript and Shell Scripts in Automator
- Common Automator Mistakes and How to Avoid Them
- Best Practices for Using Automator on a Mac
- When Should You Use Automator?
- Real-World Experience: What Using Automator on a Mac Teaches You
- Conclusion
Automator is one of those Mac apps that quietly sits in the Applications folder like a shy genius at a party. It does not shout. It does not ask for attention. But once you learn how to use Automator on a Mac, you may start wondering why you spent so many years manually renaming files, resizing images, combining PDFs, moving folders, or repeating the same boring clicks like a highly educated hamster on a productivity wheel.
Built into macOS, Automator lets you create workflows that perform repetitive tasks automatically. You can build simple drag-and-drop automations without writing code, or you can add AppleScript and shell scripts when you want more control. Whether you are a student organizing class notes, a photographer processing image batches, a small business owner managing documents, or simply a Mac user who loves saving time, Automator can turn everyday chores into one-click magic.
This guide explains what Automator does, how to create your first workflow, which workflow type to choose, and how to build useful examples such as batch renaming files, resizing images, creating Quick Actions, and setting up Folder Actions. No computer science degree required. Coffee helps, but it is optional.
What Is Automator on Mac?
Automator is a macOS automation app that helps you create custom workflows by combining actions. Think of each action as a small instruction: get selected files, rename them, resize images, create a PDF, move items to a folder, run a script, or send output to another app. When you stack actions in the right order, Automator performs the entire process for you.
The best part is that Automator is visual. You usually build workflows by dragging actions from the Library into a workflow area. Many actions are already available for Finder, PDFs, images, calendars, contacts, mail, music, scripts, and system tasks. You choose what you want the Mac to do, arrange the steps, test the workflow, and save it.
Automator is especially useful for tasks that are repetitive, rules-based, and predictable. If you do something once, just do it manually. If you do it every day, every week, or every time a client sends you 72 files named “final_final_REALfinal_v3,” Automator deserves a seat at your desk.
Automator vs. Shortcuts: Which One Should You Use?
Modern macOS also includes the Shortcuts app, which Apple continues to emphasize across iPhone, iPad, and Mac. Shortcuts is excellent for cross-device automations, smart home triggers, app-based actions, and user-friendly shortcut libraries. Automator, however, still shines for classic Mac tasks involving Finder, files, folders, PDFs, image processing, and legacy workflows.
You do not have to treat them like rivals in a dramatic tech soap opera. Automator and Shortcuts can both be useful. In many cases, existing Automator workflows can be imported into Shortcuts, which makes it easier to modernize your automation setup over time. For file-heavy Mac workflows, Automator remains practical, fast, and surprisingly powerful.
How to Open Automator on a Mac
There are several easy ways to open Automator:
- Press Command + Space, type Automator, and press Return.
- Open Finder, go to Applications, and double-click Automator.
- Open Launchpad and search for Automator.
When Automator opens, you will usually see an option to create a new document. This is where you choose the type of workflow you want to build.
Understanding Automator Workflow Types
Before you drag your first action into place, you need to choose the right workflow type. This matters because it determines where and how your automation runs.
Workflow
A Workflow runs inside Automator. This is a good choice when you are experimenting, learning, or creating a process you do not need to access from Finder or another app.
Application
An Application is a standalone workflow. You can open it like an app, or in many cases, drag files or folders onto it. This is great for automations such as “drop images here to resize them” or “drop files here to rename and move them.”
Quick Action
A Quick Action is available from Finder, the Services menu, or contextual menus. This is one of the most useful Automator workflow types because it lets you right-click selected files and run your automation immediately. For example, you can create a Quick Action that converts selected images to JPEG or adds a date prefix to selected file names.
Folder Action
A Folder Action runs when items are added to a specific folder. It is perfect for automating your Downloads folder, sorting screenshots, organizing invoices, or moving files based on type. When something lands in the folder, Automator wakes up and gets to work.
Calendar Alarm
A Calendar Alarm runs when a scheduled calendar event occurs. You can use it for timed tasks, reminders, or recurring automations. It is not the right tool for every schedule-based workflow, but it can be helpful for simple time-triggered actions.
Image Capture Plugin
An Image Capture Plugin works with the Image Capture app. It is useful when importing photos or scans and applying an automatic process to them.
Dictation Command
A Dictation Command runs when you use a specific spoken command. It is less commonly used than Quick Actions and Folder Actions, but it shows how deeply Automator can connect with macOS features.
How the Automator Interface Works
Automator has three main areas. On the left, you will see the Library, which groups actions by category. In the middle, you can browse actions available within the selected category. On the right, you build your workflow by dragging actions into the workflow area.
Each action includes a short description that explains what it does. This is extremely helpful when you are learning. If an action sounds mysterious, click it and read the description before using it. Automator is friendly, but it is not psychic.
Actions usually pass information from one step to the next. For example, a workflow might start by getting selected Finder items, then pass those files to a rename action, then pass the renamed files to a move action. Understanding this input-and-output flow is the key to building reliable Automator workflows.
How to Create Your First Automator Workflow
Let us build a simple workflow that renames selected files in Finder. This is a classic Automator task and a great starting point.
Step 1: Open Automator
Launch Automator using Spotlight, Finder, or Launchpad. Choose New Document if prompted.
Step 2: Choose Quick Action
Select Quick Action and click Choose. At the top of the workflow area, set the workflow to receive files or folders in Finder. This tells Automator that the workflow will run on Finder selections.
Step 3: Add a Rename Action
In the Library, choose Files & Folders. Search for Rename Finder Items, then drag it into the workflow area. Automator may ask whether you want to add a copy step so your original files are preserved. For beginners, choosing to copy files first is a smart safety move. Your future self may send you a thank-you card.
Step 4: Configure the Rename Rule
Choose the type of rename operation you want. You might add text, replace text, make names sequential, or add a date and time. For example, you could add “Project-” before every selected file name.
Step 5: Test the Workflow
Before using it on important files, test the workflow with sample files. Create a temporary folder, add a few duplicate files, and run the workflow. Testing is not glamorous, but neither is explaining why 400 client images are now named “oops-001.”
Step 6: Save the Quick Action
Choose File > Save. Give the Quick Action a clear name such as Rename Selected Files. Now you can select files in Finder, right-click, and run your workflow from the Quick Actions or Services menu.
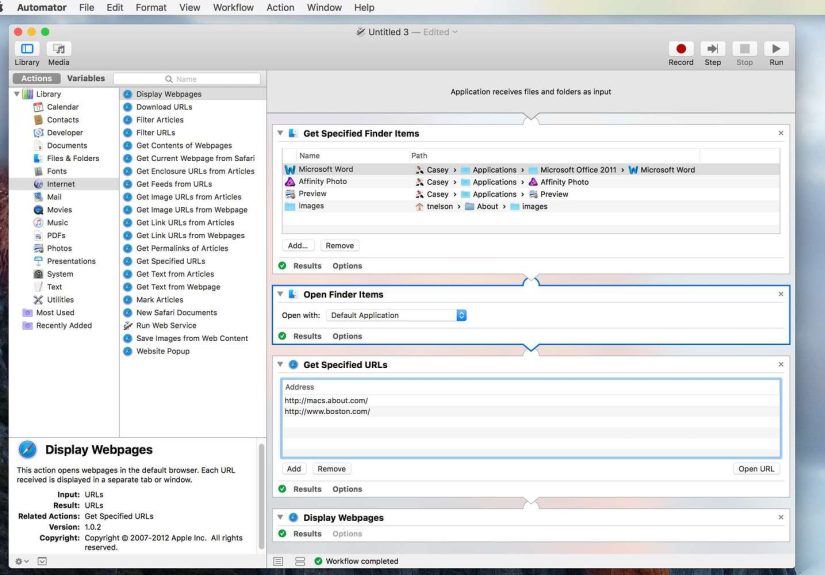
Useful Automator Examples for Everyday Mac Users
Example 1: Batch Resize Images
If you frequently upload images to a website, send photos by email, or prepare graphics for social media, resizing images manually gets old fast. Automator can process a whole folder of images in seconds.
Create a new Application or Quick Action. Add actions such as Copy Finder Items and Scale Images. Choose the target size, such as 1200 pixels wide. Save the workflow. Now you can run it whenever you need web-friendly images without opening a full photo editor.
Always copy the original images first unless you are absolutely sure you want to overwrite them. Originals are like leftovers after Thanksgiving: you may not need them right now, but you will be glad they exist later.
Example 2: Convert Images to Another Format
Automator can also convert image formats. For example, you can create a workflow that changes PNG files to JPEG files. Use actions such as Change Type of Images and choose the desired output format. This is useful when websites, email systems, or clients require a specific file type.
Example 3: Combine PDF Files
If you regularly combine contracts, reports, scanned pages, or forms, Automator can help. Create a workflow that receives PDF files, combines them, and saves the finished document. Depending on your macOS version and available actions, look under PDF-related actions in the Library.
This is a handy workflow for office work, school projects, real estate paperwork, legal documents, and any situation where PDF files multiply like rabbits wearing tiny business suits.
Example 4: Automatically Organize the Downloads Folder
Your Downloads folder may be a peaceful place. More likely, it looks like a digital junk drawer containing PDFs, screenshots, installers, receipts, memes, and a file named “document” that could either be your tax form or a lasagna recipe.
A Folder Action can help. Create a new Folder Action and attach it to the Downloads folder. Add actions that filter files by extension or kind, then move them into specific folders. For example, PDFs can go to a Documents folder, images can go to Pictures, and ZIP files can go to an Archives folder.
Start simple. Create one rule first, test it, and expand from there. Folder Actions are powerful, but a poorly planned one can move files faster than you can say, “Where did my invoice go?”
Example 5: Create a Text-to-Audio Workflow
Automator includes actions that can work with text and audio. You can create a workflow that takes selected text and turns it into a spoken audio file. This can be helpful for proofreading, accessibility, language learning, or listening to notes while doing something else.
Choose a workflow type that receives text, then look for actions related to text-to-speech or spoken audio. Configure the voice and save the result. It is a simple automation, but it can make long reading sessions easier.
Using Variables in Automator
Variables let Automator store information temporarily and use it later in the workflow. For example, you can store a selected folder, a date, a file path, or a piece of text. Variables are useful when a workflow needs to remember something while performing several steps.
To use variables, click Variables in Automator, choose a category, and drag the variable into your workflow. The value is evaluated when the workflow runs. Beginners can ignore variables at first, but once you start building more advanced workflows, they become extremely useful.
Using AppleScript and Shell Scripts in Automator
Automator is beginner-friendly, but it is not limited to drag-and-drop actions. You can add Run AppleScript or Run Shell Script actions to extend what your workflows can do.
A shell script can run command-line tasks, process text, manage files, or connect with tools available in macOS. AppleScript can control scriptable Mac apps and perform interface-level tasks. This makes Automator a bridge between everyday users and more advanced automation.
If you use scripts, test carefully. A script can be powerful, but power and carelessness are a spicy combination. Start with harmless sample files, read error messages, and save backup copies before running scripts on important data.
Common Automator Mistakes and How to Avoid Them
Choosing the Wrong Workflow Type
If you want to right-click files in Finder, use a Quick Action. If you want a workflow to run when files enter a folder, use a Folder Action. If you want to drag files onto a saved icon, use an Application. Choosing the right type from the start prevents confusion later.
Forgetting to Test on Copies
Automator can rename, move, resize, and transform files very quickly. That is wonderful when the workflow is correct and mildly terrifying when it is not. Test with duplicate files before touching anything important.
Ignoring Permissions
Modern macOS protects user files, folders, and app data with privacy permissions. If a workflow cannot access a folder or control another app, check System Settings > Privacy & Security. You may need to allow Automator, Finder, Terminal, or another related app to perform the task.
Breaking the Input Chain
Many Automator workflows depend on one action passing files or data to the next action. If an action receives the wrong kind of input, the workflow may fail or produce strange results. Read each action description and make sure the output of one step matches the input expected by the next.
Making Workflows Too Complicated Too Soon
Start small. Build a workflow with two or three actions, test it, then add more. Complex workflows are easier to troubleshoot when you know each section works.
Best Practices for Using Automator on a Mac
- Name workflows clearly. “Resize Images to 1200px” is better than “Workflow 7.”
- Use copies when editing files. Keep originals safe whenever possible.
- Create test folders. Use sample files before running workflows on real projects.
- Document your steps. Add comments or keep notes if the workflow is complex.
- Review old workflows. macOS updates, app changes, or moved folders can break automations.
- Combine Automator with Shortcuts when helpful. Use the tool that fits the job best.
When Should You Use Automator?
Use Automator when a task is repetitive, file-based, and predictable. It is excellent for renaming files, resizing images, combining PDFs, moving items, creating Finder shortcuts, running scripts, and organizing folders. It is also helpful when you want a local Mac automation that does not depend on cloud services.
Automator may not be ideal for complex app integrations, modern web services, or automations that need to run across iPhone, iPad, and Mac. In those cases, Shortcuts or third-party automation tools may be better. But for classic Mac productivity, Automator remains a reliable workhorse.
Real-World Experience: What Using Automator on a Mac Teaches You
The first time you use Automator, it may feel almost too simple. You drag an action, add another action, click Run, and suddenly your Mac does in five seconds what used to take ten minutes. That small victory is dangerous in the best possible way. You begin looking around your computer like a productivity detective. Why am I renaming these files by hand? Why do I keep resizing the same images? Why is my Downloads folder auditioning for a disaster movie?
In real use, the biggest lesson is that Automator works best when you think clearly about the task before building anything. The Mac can follow instructions beautifully, but it will not rescue vague planning. For example, “organize my files” is too broad. “Move every PDF added to Downloads into a folder called Receipts” is much better. Automator likes specific instructions. It is not lazy; it is literal.
A good practical habit is to write the workflow in plain English first. For an image workflow, you might write: get selected images, copy them to a safe folder, resize the copies, rename them with a web prefix, and save them to the desktop. Once the steps make sense in words, they are much easier to build in Automator.
Another experience-based tip is to treat Quick Actions as your everyday productivity buttons. A well-made Quick Action becomes part of Finder, so it feels natural. Select files, right-click, run the action, done. No hunting through menus. No opening five apps. No pretending that manual file management builds character.
Folder Actions are more powerful but deserve more caution. They run automatically, which is wonderful when the rule is correct and confusing when it is not. For that reason, it is smart to create a test folder before attaching an action to something busy like Downloads, Desktop, or iCloud Drive. Once the workflow behaves properly, move it into your real system.
You also learn that Automator is not about replacing human judgment. It is about removing tiny repetitive tasks so your brain can do better work. If you are editing photos, Automator can prepare the files. If you are managing documents, Automator can sort and rename them. If you are publishing content, Automator can help standardize assets before upload. The creative decisions still belong to you; the boring clicks can go live in robot jail.
Finally, Automator teaches a useful mindset: every repeated task is a candidate for improvement. You do not need to automate your entire Mac in one afternoon. Start with one annoying task. Build one workflow. Save five minutes. Then another five. Over weeks and months, those small automations add up to a calmer, cleaner, faster way to work.
Conclusion
Learning how to use Automator on a Mac is one of the easiest ways to save time without buying extra software. Start with simple workflows such as renaming files, resizing images, or combining PDFs. Then explore Quick Actions, Folder Actions, variables, and scripts as your confidence grows.
Automator may not be the flashiest app on your Mac, but it is one of the most quietly useful. Once you understand how actions connect, how workflow types behave, and how to test safely, you can turn repetitive Mac chores into smooth one-click routines. Your files get organized, your images get processed, your PDFs behave, and your clicking finger finally gets a vacation.