Table of Contents >> Show >> Hide
- What Does It Mean to Select Pixels in Photoshop?
- The Main Photoshop Selection Tools Beginners Should Know
- Selection Basics: Add, Subtract, and Intersect
- Feathering: The Difference Between Natural and Cut-Out Edits
- Select and Mask: Refining Edges Like a Pro
- Why Layer Masks Are Better Than Deleting Pixels
- How to Adjust Selected Pixels Without Damaging the Original
- Adjusting Pixels Directly: When It Makes Sense
- Using Generative Fill With Selections
- Common Selection Problems and How to Fix Them
- A Simple Workflow: Select, Mask, Adjust, Review
- Specific Example: Brightening a Subject Without Blowing Out the Background
- Specific Example: Changing the Color of an Object
- of Practical Experience: What You Learn After Editing Pixels for Real
- Conclusion: Master the Selection, Master the Edit
Photoshop can feel like a cockpit the first time you open it. There are panels, icons, menus, tiny arrows, mysterious shortcuts, and at least three tools that look like they were invented during a committee meeting. But underneath all that creative machinery, Photoshop is built on one simple idea: you select pixels, then you adjust them.
That is the heart of nearly every edit. Want to brighten a face without turning the sky radioactive blue? Select the face, adjust the pixels. Need to change the color of a shirt, remove a distracting object, sharpen a product photo, or make a background blurrier than your memory of middle school algebra? Select the right area first. Then adjust with control.
This guide explains the essential Photoshop basics for selecting and adjusting pixels in a practical, beginner-friendly way. We will cover selection tools, masks, adjustment layers, feathering, edge refinement, tonal corrections, color changes, and a few real-world habits that keep edits clean instead of crunchy. Consider this your friendly map through Pixel Town, where every tiny square has feelings and every selection edge deserves respect.
What Does It Mean to Select Pixels in Photoshop?
In Photoshop, an image is made of pixels: tiny squares of color and brightness. Selecting pixels means telling Photoshop, “Only work on this part.” A selection can be a simple rectangle, a person’s outline, a patch of sky, a product label, a strand of hair, or one stubborn crumb on a table that ruins an otherwise perfect photo.
When pixels are selected, Photoshop limits many commands to that active area. You can copy, delete, move, recolor, blur, sharpen, brighten, darken, or mask the selected region. If nothing is selected, Photoshop usually applies the edit to the entire active layer. That is why selections matter: they turn broad editing into precise editing.
The Main Photoshop Selection Tools Beginners Should Know
Photoshop gives you several ways to select pixels because images are not all shaped like neat office rectangles. A coffee mug, a dog’s ear, a skyline, and a messy hairstyle all need different approaches. The secret is not memorizing every tool at once. It is knowing which tool fits the job.
Marquee Tools: Best for Simple Shapes
The Rectangular Marquee Tool and Elliptical Marquee Tool are perfect for basic selections. Use the Rectangular Marquee when you need to crop, copy, or adjust a square or rectangular area. Use the Elliptical Marquee for circles and ovals, such as selecting a button, plate, lens, or round logo.
These tools are fast, clean, and wonderfully boringin the best way. If your selection has straight edges or a simple curve, start here. There is no need to invite artificial intelligence to select a square. That is like hiring a private chef to pour cereal.
Lasso Tools: Best for Freehand and Angular Selections
The Lasso Tool lets you draw a selection by hand. It is useful for rough, organic areas where perfection is not required. The Polygonal Lasso Tool creates straight-edged selections, making it helpful for buildings, signs, packaging, furniture, and other objects with crisp angles.
The Magnetic Lasso Tool attempts to cling to edges as you trace them. It can be helpful when contrast is clear, but it can also behave like a shopping cart with one bad wheel. Use it when it works, and do not feel personally betrayed when it wanders off.
Object Selection Tool: Best for Fast Subject Selection
The Object Selection Tool is one of the most beginner-friendly options. You draw a rectangle or lasso around an object, and Photoshop analyzes the area to identify the subject. It is especially useful for people, pets, products, vehicles, and other recognizable objects.
For many modern workflows, this is the tool to try first. It will not always create a perfect selection, but it often gives you a strong starting point. From there, you can add, subtract, feather, mask, or refine the edges.
Quick Selection Tool: Best for Painting a Selection
The Quick Selection Tool works like a brush. You paint over the area you want, and Photoshop expands the selection based on nearby color and texture. It is useful for selecting clothing, backgrounds, large objects, and areas with visible edges.
If the tool grabs too much, switch to subtract mode and paint away the unwanted area. This add-and-subtract rhythm is one of the most important beginner habits in Photoshop. Good selections are often built gradually. They are not born perfect, much like pancakes, essays, and first attempts at assembling furniture.
Magic Wand Tool: Best for Similar Colors
The Magic Wand Tool selects pixels based on color similarity. It shines when you have a solid-color background, flat graphic, logo, icon, or simple area with consistent tones. The key setting is Tolerance. A low tolerance selects colors very similar to the clicked pixel. A higher tolerance selects a wider range.
Turn Contiguous on when you want Photoshop to select only connected pixels. Turn it off when you want to select similar colors across the whole image. For example, if you click a blue sky with Contiguous off, Photoshop may select blue reflections, blue clothing, and maybe your entire creative optimism. Use carefully.
Selection Basics: Add, Subtract, and Intersect
Most selection tools let you create a new selection, add to an existing selection, subtract from it, or intersect with it. These options are essential because real images are complicated. You might select a person and accidentally include part of the background. No problem. Subtract it. You might miss part of a sleeve. Add it. You might need only the overlap between two selected areas. Use intersect.
Many beginners try to make one perfect selection in one dramatic swoop. That usually leads to frustration, weird edges, and muttering at the monitor. Instead, think of selection as sculpting. Add a little, remove a little, zoom in, refine, and repeat.
Feathering: The Difference Between Natural and Cut-Out Edits
Feathering softens the edge of a selection. A hard selection edge creates a sharp boundary, which is useful for icons, text, and product cutouts. But for skin, shadows, lighting, clouds, fabric, and natural photography, a hard edge can look fake.
A small featheroften 1 to 3 pixels for high-resolution imagescan help adjustments blend more naturally. Larger feathers are useful for broad lighting changes, such as darkening the corners of a photo or brightening a face. The right amount depends on image size and subject matter. The goal is simple: edits should look intentional, not like a sticker slapped onto a photo.
Select and Mask: Refining Edges Like a Pro
Once you have a basic selection, the Select and Mask workspace helps improve edges. This is especially helpful for hair, fur, fabric, leaves, and other tricky boundaries. Inside Select and Mask, you can change the view mode, smooth jagged edges, feather transitions, increase contrast, shift the edge inward or outward, and use refinement tools to improve complex outlines.
For portraits, the Refine Edge Brush can help with hair details. For product photos, increasing edge contrast may create a cleaner outline. For soft subjects, a little feathering and edge shifting can prevent halos. Halos are those bright or dark outlines that scream, “Hello, I was edited at 1:00 a.m.”
Why Layer Masks Are Better Than Deleting Pixels
One of the best Photoshop habits is using layer masks instead of deleting pixels. When you delete pixels, they are gone from that layer unless you undo or restore from a backup. When you use a layer mask, you hide pixels without destroying them.
A layer mask uses black, white, and gray to control visibility. White reveals the layer. Black hides it. Gray partially hides it. This means you can paint on the mask to fine-tune an edit at any time. If you hide too much, paint with white. If you reveal too much, paint with black. It is editing with an eraser that has a guilt-free undo button built into the workflow.
How to Adjust Selected Pixels Without Damaging the Original
After selecting pixels, you can adjust them in several ways. The beginner mistake is going straight to destructive commands on the original layer. A smarter approach is to use adjustment layers, masks, and duplicate layers so your edit remains flexible.
Use Adjustment Layers Whenever Possible
Adjustment layers apply changes without permanently altering the original pixels. Common adjustment layers include Levels, Curves, Hue/Saturation, Brightness/Contrast, Color Balance, Vibrance, Black & White, and Exposure.
If you make a selection before creating an adjustment layer, Photoshop can automatically turn that selection into a mask. That means the adjustment affects only the selected pixels. This is extremely useful for brightening eyes, changing shirt color, darkening a sky, improving a product label, or reducing redness in skin.
Levels: Fix Shadows, Midtones, and Highlights
Levels is one of the easiest tonal adjustments to understand. It uses a histogram to represent shadows, midtones, and highlights. Moving the black point can deepen shadows. Moving the white point can brighten highlights. Adjusting the middle slider changes midtone brightness.
For example, if a photo looks flat, a Levels adjustment can add contrast by setting stronger black and white points. If a face is underexposed, selecting the face and applying a masked Levels adjustment can brighten it without washing out the entire image.
Curves: More Control for Light and Contrast
Curves is like Levels after it drinks espresso and gets a graduate degree. It gives more precise control over brightness and contrast. You can lift shadows, lower highlights, create an S-curve for contrast, or adjust individual color channels to correct color casts.
A gentle S-curve is a classic way to add contrast. Lift the upper-right portion slightly to brighten highlights, and lower the lower-left portion slightly to deepen shadows. Keep it subtle. Curves is powerful, and power tools should not be waved around like party streamers.
Hue/Saturation: Change or Improve Color
Hue/Saturation lets you shift colors, increase or decrease saturation, and adjust lightness. It is helpful for changing the color of clothing, making grass less neon, warming a sunset, or toning down an overly intense background.
For a practical example, select a red jacket, add a Hue/Saturation adjustment layer, and shift the Hue slider to change the jacket color. If the selection is clean and the mask is refined, the edit can look surprisingly natural. If the mask is sloppy, the jacket may appear to be surrounded by a suspicious color fog. Masks matter.
Adjusting Pixels Directly: When It Makes Sense
Although non-destructive editing is usually best, there are times when direct pixel editing makes sense. Retouching small dust spots, cloning tiny distractions, painting on a blank layer, or editing a duplicate layer can be efficient. The key is to protect the original image.
Before direct edits, duplicate the layer with Ctrl+J on Windows or Command+J on Mac. Rename the duplicate layer based on the edit, such as “cleanup,” “skin retouch,” or “background fix.” Clear names save future you from opening a file with twelve layers named “Layer 3 copy copy final FINAL maybe.”
Using Generative Fill With Selections
Generative Fill uses a selection as the target area for an AI-assisted edit. You select an area, choose Generative Fill, and enter a prompt or leave it blank depending on the task. It can help remove objects, extend backgrounds, add elements, or fill gaps.
For beginners, the most important concept is that the selection guides the edit. A tighter selection gives Photoshop a clearer area to work inside, while a slightly expanded selection can provide surrounding context for blending. For object removal, include a little background around the object so the fill has room to create a believable replacement.
Generative tools are helpful, but they are not magic. Always zoom in, inspect edges, and compare results. If a generated area looks strange, regenerate, adjust the selection, or finish with Clone Stamp, Healing Brush, or a mask.
Common Selection Problems and How to Fix Them
The Selection Edge Looks Too Harsh
Add feathering or use Select and Mask to soften the transition. If the edit is already on an adjustment layer, click the mask and apply a slight blur or paint gently with a soft brush.
The Selection Includes Too Much Background
Use subtract mode with the same selection tool, or paint with black on the layer mask. Zoom in and work slowly around detailed areas.
The Selection Misses Tiny Details
Use add mode, try the Refine Edge Brush in Select and Mask, or manually paint on the mask. Hair, fur, and leaves usually need refinement rather than one-click perfection.
The Adjustment Looks Fake
Lower the adjustment layer opacity, soften the mask, or reduce the intensity of the change. Realistic edits usually come from restraint. If the photo starts looking like a radioactive postcard, pull back.
A Simple Workflow: Select, Mask, Adjust, Review
Here is a beginner-friendly workflow for almost any pixel adjustment:
- Duplicate the original layer or work with adjustment layers.
- Make a rough selection using Object Selection, Quick Selection, Lasso, Magic Wand, or Marquee.
- Refine the selection with add, subtract, feather, or Select and Mask.
- Create a mask so the edit stays flexible.
- Apply an adjustment layer such as Levels, Curves, or Hue/Saturation.
- Zoom in to inspect edges and fix halos or missed areas.
- Toggle the edit on and off to check whether it improves the image naturally.
This process works for portraits, product photos, social media graphics, blog images, thumbnails, digital art, and everyday photo fixes. Once you understand it, Photoshop becomes less intimidating. It stops being a monster with 900 buttons and becomes a toolbox with a few favorite tools you actually use.
Specific Example: Brightening a Subject Without Blowing Out the Background
Imagine you have a portrait where the subject’s face is too dark, but the background is already bright. If you increase brightness across the whole image, the background may become overexposed. Instead, select the face and upper body with the Object Selection Tool or Quick Selection Tool.
Next, create a Curves or Levels adjustment layer while the selection is active. Photoshop will use the selection as the mask. Brighten the midtones gently. Then click the mask and use a soft brush to blend the edges around the hair, shoulders, and neck. Lower the adjustment opacity if needed.
The result is controlled and natural. The subject becomes clearer, while the background stays balanced. This is the power of selecting and adjusting pixels: you solve the exact problem instead of attacking the entire image with a brightness hammer.
Specific Example: Changing the Color of an Object
Suppose you need to change a blue mug to green for a product mockup. Select the mug using the Object Selection Tool or Pen Tool if the shape needs precision. Create a Hue/Saturation adjustment layer. Shift the Hue slider until the mug turns green, then adjust Saturation and Lightness for realism.
If reflections or shadows look wrong, refine the mask and consider using Blend If, Curves, or a clipped adjustment layer for more control. Color changes work best when you preserve natural highlights and shadows. A flat color swap can look like digital paint. A careful color adjustment looks like the object was photographed that way.
of Practical Experience: What You Learn After Editing Pixels for Real
After working with Photoshop selections for a while, you start to realize that the best edits are usually quiet. Beginners often want dramatic changes because dramatic changes feel exciting. But experienced editors know that a clean selection, a soft mask, and a modest adjustment can do more than a wild filter or extreme slider movement. The goal is not to prove you edited the image. The goal is to make the image better while hiding your fingerprints.
One of the biggest lessons is to zoom out often. It is easy to zoom in to 300 percent and spend ten minutes fixing three pixels that no human being will ever notice. Precision matters, but context matters too. A selection edge that looks slightly imperfect up close may look completely natural at normal viewing size. On the other hand, a bright halo around a subject may jump out immediately when you zoom out. Move between close inspection and full-image review. Your eyes need both views.
Another lesson is that masks are your best friend. At first, masks feel like extra work. Why not just erase the background or apply the adjustment directly? Because future you will want options. Clients change their minds. Blog thumbnails need different crops. Product images may need new backgrounds. Personal projects evolve. A mask lets you return to the edit and adjust it without rebuilding everything from scratch. Non-destructive editing is not just a professional habit; it is a stress-reduction system.
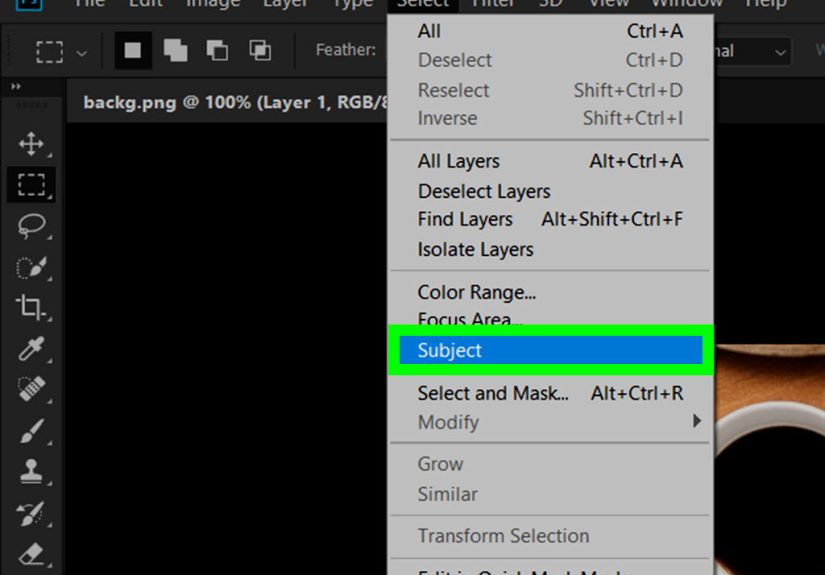
You also learn that selection tools are not enemies competing for your loyalty. You can combine them. Start with Select Subject, clean up with the Lasso Tool, refine with Select and Mask, then paint the final mask by hand. Use the Magic Wand for a flat background, then switch to Quick Selection for the object edge. Use Marquee tools for simple geometry and masks for soft transitions. The best tool is the one that gets you closer to a clean result with the least drama.
Color adjustments teach humility quickly. A Hue/Saturation change may look great for five seconds, then you notice the shadows are the wrong color or the highlights look plastic. Real objects have uneven color because light, texture, and reflection affect them. When changing object color, preserve detail. Avoid pushing saturation too far. Check edges carefully, especially where the object touches skin, glass, metal, or shadows. Photoshop can change pixels, but your eyes must judge whether the change makes sense.
Finally, save versions. Photoshop files can become complicated, and complicated files love surprises. Keep the original layer. Name important layers. Group related adjustments. Save a PSD for editing and export a separate JPEG, PNG, or WebP for publishing. A neat file structure may not feel glamorous, but neither does searching through twenty unnamed layers at midnight while your coffee gets cold and your deadline stares at you like a disappointed owl.
Conclusion: Master the Selection, Master the Edit
Photoshop basics begin with understanding pixels, but real control begins with selecting the right pixels. Once you can isolate an area, refine its edges, protect it with a mask, and apply non-destructive adjustments, you can handle a huge range of editing tasks. You can brighten faces, change colors, clean backgrounds, improve product photos, remove distractions, and create polished graphics without turning every image into a digital crime scene.
Start simple. Practice with Marquee, Lasso, Object Selection, Quick Selection, and Magic Wand. Learn feathering. Use Select and Mask when edges get complicated. Build adjustment layers instead of damaging originals. Most importantly, review your edits with fresh eyes. A good Photoshop edit should feel natural, clean, and intentionalas if the pixels politely agreed to behave that way all along.