Table of Contents >> Show >> Hide
- How Airless Spray Tip Numbers Work
- Quick Answer: Best Airless Spray Tip by Project
- Best Airless Spray Tip for Interior Walls
- Best Airless Spray Tip for Ceilings
- Best Airless Spray Tip for Trim, Doors, and Cabinets
- Best Airless Spray Tip for Exterior Paint
- Best Airless Spray Tip for Stain, Lacquer, and Thin Coatings
- Do You Need a Fine-Finish Tip?
- How to Match Tip Size to Paint Thickness
- Do Not Ignore Your Sprayer’s Maximum Tip Size
- What Filter Mesh Should You Use?
- Standard Tips vs. Low-Pressure Tips
- How to Test Your Spray Pattern
- When to Replace an Airless Spray Tip
- Common Airless Spray Tip Mistakes
- Real-World Examples
- of Practical Experience: What Actually Happens on the Job
- Final Verdict: What Airless Spray Tip Should You Use?
Choosing the right airless spray tip sounds like one of those tiny details only paint nerds argue about in the back aisle of a hardware store. Then you try spraying a wall with the wrong tip and suddenly your “quick weekend refresh” looks like a modern art experiment titled Orange Peel With Regret.
The truth is simple: the airless spray tip is not just an accessory. It controls the fan width, paint flow, spray pattern, finish quality, speed, overspray, and how hard your sprayer has to work. Pick the right one and you get smooth coverage, fewer clogs, less wasted paint, and a finish that makes you quietly proud every time sunlight hits the wall. Pick the wrong one and you may get tails, spits, runs, dry spray, uneven sheen, or a pump that sounds like it is reconsidering its career choices.
So, what airless spray tip should you use? For many interior wall and ceiling projects with standard latex paint, a 515 or 517 tip is a common starting point. For trim, doors, cabinets, and finer work, smaller fine-finish tips such as 210, 310, 312, or 410 are often better. For stains and thin clear finishes, go smaller, usually around .009 to .013. For heavy exterior latex, block filler, elastomeric coatings, and high-build materials, you may need larger orifices such as .019, .021, .023, or biggerassuming your sprayer can handle them.
That last phrase matters: assuming your sprayer can handle them. The best tip is always a match between the coating, the surface, the desired finish, and the sprayer’s maximum tip size. Let’s break it down without making it feel like a college course in paint hydraulics.
How Airless Spray Tip Numbers Work
Most airless spray tips use a three-digit number, such as 311, 515, 517, or 619. Once you know how to read that number, the mystery disappears.
The First Digit: Fan Width
The first digit tells you the approximate fan width when the gun is held about 12 inches from the surface. Multiply the first number by two.
- 211 means about a 4-inch fan pattern.
- 311 means about a 6-inch fan pattern.
- 515 means about a 10-inch fan pattern.
- 619 means about a 12-inch fan pattern.
A wider fan covers more area per pass, which is great for walls, ceilings, siding, fences, and large flat surfaces. A narrower fan gives more control, which is helpful for trim, doors, furniture, cabinets, railings, shutters, and other smaller surfaces where “oops” happens fast.
The Last Two Digits: Orifice Size
The last two digits tell you the size of the opening, or orifice, in thousandths of an inch. This controls how much material flows through the tip.
- 515 has a .015-inch orifice.
- 517 has a .017-inch orifice.
- 619 has a .019-inch orifice.
The larger the orifice, the more coating comes out. Thin materials usually need smaller orifices. Thick coatings need larger orifices so they can atomize properly instead of sputtering like a garden hose with attitude.
Quick Answer: Best Airless Spray Tip by Project
Here is a practical starting guide for common painting jobs. Always check the coating label or technical data sheet first, but these ranges will help you avoid guessing in the paint aisle like you are choosing lottery numbers.
| Project or Material | Common Tip Sizes | Why It Works |
|---|---|---|
| Interior walls | 515, 517 | Good balance of coverage and control for latex paint. |
| Ceilings | 515, 517, 519 | Wider coverage helps large surfaces go faster. |
| Exterior siding | 515, 517, 519, 521 | Handles thicker exterior paints and bigger areas. |
| Trim and baseboards | 210, 310, 312, 410 | Narrower fan gives better control and less overspray. |
| Doors | 310, 312, 410, 412 | Fine-finish tips help reduce heavy buildup. |
| Cabinets | 208, 210, 308, 310, 312 | Small fine-finish tips improve control and finish quality. |
| Fences | 515, 517, 619 | Larger fan patterns speed up repetitive surfaces. |
| Deck stain | 211, 311, 411 | Stain is thinner and usually needs a smaller orifice. |
| Lacquer or clear finish | 209, 211, 309, 311 | Thin coatings need controlled flow. |
| Primer | 515, 517, 519 | Many primers are thicker than finish paint. |
| Block filler or elastomeric | 521, 523, 525, 527+ | Heavy coatings need a large orifice and a capable pump. |
Best Airless Spray Tip for Interior Walls
For most interior walls, start with a 515 or 517. A 515 gives you a 10-inch fan with a .015 orifice. A 517 gives the same approximate fan width but increases the flow to .017. In plain English, the 517 puts out more paint.
If you are spraying a standard interior latex wall paint, a 515 is often easier for beginners because it gives more control and reduces the chance of runs. If the paint is thicker, the wall is large, or the 515 is struggling to atomize cleanly even after adjusting pressure, a 517 may be the better choice.
For large open rooms, ceilings, basements, garages, and new drywall, a 517 or 519 can save time. For occupied homes, small rooms, or tight spaces, a 515 may help keep overspray under control. Remember: faster is not always better. A tip that lays down too much paint can turn a simple wall into a saggy mess faster than you can say, “Maybe I should have rolled this.”
Best Airless Spray Tip for Ceilings
Ceilings are big, flat, and excellent at showing spray mistakes under harsh lighting. For ceiling paint, a 515, 517, or 519 is commonly used depending on the paint thickness and sprayer size.
If you are spraying a smooth ceiling, use a tip that atomizes well at the lowest effective pressure. If the pattern has heavy edges or “tails,” slowly raise the pressure until the pattern evens out. If the pump is working too hard or the pattern still looks poor, the tip may be too small, worn out, partially clogged, or not ideal for that coating.
For textured ceilings, you may need a larger orifice, but this depends heavily on the product. Always read the product data sheet. Some coatings are designed for airless spray; others are not. The sprayer does not care about your optimism.
Best Airless Spray Tip for Trim, Doors, and Cabinets
Trim, doors, and cabinets require more finesse than walls. A big 517 tip can work for some doors, but it can also dump too much paint too quickly, especially for beginners. For detailed work, consider a fine-finish tip with a smaller fan and lower flow.
Common choices include 210, 310, 312, 410, and 412. These tips help you control the film build and avoid flooding edges, profiles, corners, and panels. A 310 fine-finish tip is a popular choice for cabinet doors, trim pieces, and smaller furniture surfaces because it gives about a 6-inch fan with controlled output.
For cabinet painting, surface preparation matters as much as the tip. Clean, sand, prime, strain the coating, and test your spray pattern before touching the actual cabinet door. Cabinet finishes are unforgiving. They remember everything, including that one dusty fingerprint from 20 minutes ago.
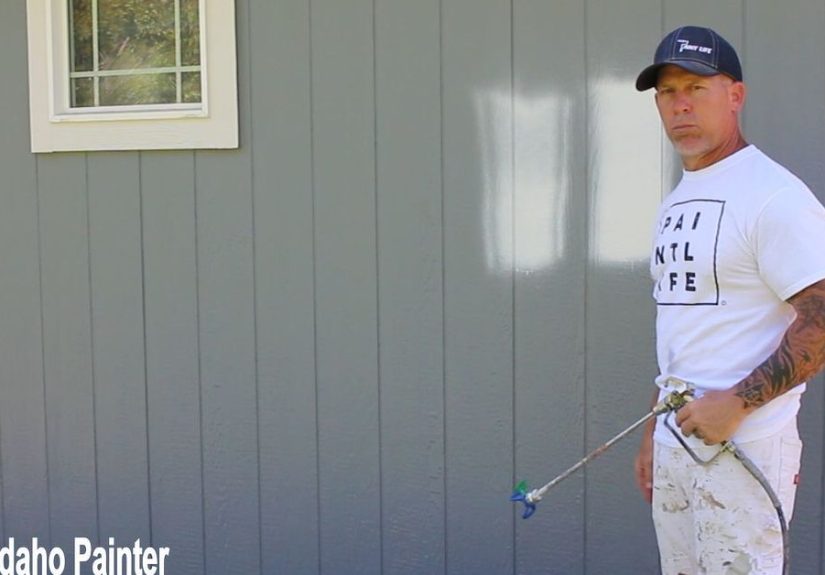
Best Airless Spray Tip for Exterior Paint
Exterior paints are often thicker than interior paints, and exterior surfaces are usually larger. For siding, stucco, masonry, and fences, common starting points include 515, 517, 519, and 521.
A 517 is a strong all-purpose tip for many exterior latex paints. A 519 or 521 can help with heavier coatings or faster production, but only if the sprayer has enough gallons-per-minute capacity. If your pump is too small for the tip, the coating will not atomize properly. You may see tails, uneven coverage, pressure drop, or a rough pattern.
Large exterior jobs are where matching the tip to the sprayer becomes especially important. A homeowner-grade sprayer may be excellent for fences and interior rooms but may not support very large tips used for thick masonry coatings or elastomeric products. Before buying a big tip, check your sprayer manual for the maximum supported orifice size.
Best Airless Spray Tip for Stain, Lacquer, and Thin Coatings
Thin coatings do not need a firehose. For stains, lacquers, varnishes, sealers, and clear finishes, smaller tips are usually better. Common choices include 209, 211, 309, 311, and 411.
The goal is control. If you use a large orifice with a thin stain, the material may hit the surface too heavily and run. A smaller tip lets you apply a lighter, more even coat. This is especially important on fences, decks, furniture, doors, and wood surfaces where uneven stain can look blotchy.
For transparent and semi-transparent stains, always test on scrap wood or an inconspicuous area. Wood absorbs stain differently depending on age, species, sanding, moisture, and previous coatings. In other words, the wood has opinions.
Do You Need a Fine-Finish Tip?
A fine-finish tip is designed to produce a softer, more controlled spray pattern, often at lower pressure. It is useful when appearance matters more than speed. Think cabinets, built-ins, furniture, metalwork, doors, trim, shutters, and other surfaces where you want a smoother finish.
Fine-finish tips are not magic, but they are very helpful. They can reduce overspray, improve control, and help avoid heavy film build. However, they still need the right coating, pressure, filter, and technique. If your paint is too thick for the tip, you may get clogs or poor atomization. If the coating manufacturer recommends a .015 to .017 tip, trying to force it through a .010 tip may produce frustration instead of a furniture-grade finish.
How to Match Tip Size to Paint Thickness
Here is a simple rule: thin coating, small orifice; thick coating, larger orifice.
- .009 to .013: stains, lacquers, sealers, varnishes, and thin clear finishes.
- .013 to .015: enamels, some oil-based paints, and lighter interior coatings.
- .015 to .019: common latex paints, acrylic paints, primers, and many interior or exterior coatings.
- .021 to .025: thicker latex paints, heavy primers, and some high-build coatings.
- .025 and above: elastomeric coatings, block fillers, and very heavy materials.
This is only a starting point. Paint formulas vary. A premium acrylic latex, a contractor-grade flat, a bonding primer, and an exterior elastomeric coating may all behave differently. The coating’s technical data sheet is your friend. Unlike some friends, it actually tells you the recommended tip size.
Do Not Ignore Your Sprayer’s Maximum Tip Size
Every airless sprayer has a maximum tip size. This is not a suggestion written by someone trying to ruin your day. It tells you the largest orifice the pump can support while maintaining proper pressure and flow.
If the sprayer is rated for a maximum .017 tip, do not expect it to perform beautifully with a .021 tip. The pump may not keep up. The pattern may look weak, uneven, or streaky. You may compensate by moving slower, which can create heavy spots and runs.
It is smart to stay one size below the sprayer’s maximum tip size, especially if you will spray for long periods or use a coating that is thick. Also remember that tips wear. A worn .019 tip may behave more like a larger tip, which can push a small sprayer beyond its comfort zone.
What Filter Mesh Should You Use?
The filter helps catch particles before they clog the tip. The general pattern is simple: the smaller the tip, the finer the filter. The thicker the coating, the coarser the filter.
- 200 mesh: very thin materials such as stains, dyes, varnishes, and polyurethane.
- 100 mesh: lacquers, enamels, solvent-based coatings, and fine-finish work.
- 60 mesh: latex paints, acrylic paints, primers, and many common architectural coatings.
- 30 mesh: heavy latex, block filler, and high-build coatings.
Using a filter that is too fine for thick paint can restrict flow and cause clogs. Using a filter that is too coarse for a small tip can let particles reach the orifice. Neither situation is fun. Strain the paint when needed, keep filters clean, and do not treat yesterday’s dried paint flakes as “texture.”
Standard Tips vs. Low-Pressure Tips
Standard reversible tips are common, reliable, and easy to clear when clogged. You rotate the tip, trigger the gun briefly to clear the blockage, turn it back, and continue spraying. They are workhorses.
Low-pressure tips and high-efficiency airless tips are designed to spray at lower pressure while still producing a good pattern. They can reduce overspray, improve control, and reduce wear on the pump. They are especially useful indoors, on trim, or anytime you want less paint floating around like a tiny decorative fog bank.
If you are new to spraying, a low-pressure tip can make the learning curve gentler. You still need proper masking, steady gun movement, correct overlap, and the right distance from the surface, but lower pressure can help reduce bounce-back and waste.
How to Test Your Spray Pattern
Before spraying the real surface, test on cardboard, masking paper, scrap drywall, or a hidden area. Hold the gun about 12 inches from the surface and make a quick pass. Look at the pattern.
- Even pattern: good atomization and pressure.
- Heavy edges or tails: pressure may be too low, tip may be too small, or coating may be too thick.
- Runs: too much paint, moving too slowly, or tip too large.
- Dry spray: gun too far away, moving too fast, pressure too high, or overspray drying before landing.
- Spitting: clog, worn tip, dirty filter, or pressure problem.
Adjust pressure gradually. Use the lowest pressure that gives a clean, even pattern. More pressure is not automatically better. Too much pressure creates more overspray, wastes paint, wears the tip faster, and may leave a rougher finish.
When to Replace an Airless Spray Tip
Airless spray tips wear out. As a tip wears, the orifice gets larger and the fan pattern becomes smaller. That means more paint lands in a narrower area. You move slower, use more paint, and may wonder why your once-perfect setup suddenly behaves like it drank too much coffee.
Signs of a worn spray tip include:
- The fan pattern is noticeably narrower than expected.
- You are using more paint than usual.
- The finish looks uneven even after cleaning filters.
- The pattern has heavy edges that pressure adjustment does not fix.
- The tip spits, streaks, or refuses to produce a clean fan.
Replacing a worn tip is cheaper than wasting gallons of paint. If you spray often, keep backups of your most-used sizes. For many painters, that means keeping extra 515, 517, and fine-finish tips on hand.
Common Airless Spray Tip Mistakes
Using One Tip for Everything
A 515 may be versatile, but it is not the answer to every project. It can work beautifully on walls and fences, but it may be too much for narrow trim or detailed cabinet doors. One-tip-fits-all thinking is how baseboards become puddles.
Choosing a Tip Too Large for the Sprayer
A large tip can spray faster only if the pump can supply enough material. If your sprayer cannot keep up, the finish suffers. Always check the maximum supported tip size.
Spraying Too Far From the Surface
Holding the gun farther away does not create better coverage. It usually creates more overspray and a drier, rougher finish. Choose the right fan width instead of backing up like the wall owes you money.
Ignoring the Coating Data Sheet
Many coatings list recommended spray tip sizes. That recommendation should be your starting point, especially for primers, industrial coatings, cabinet paints, specialty finishes, and heavy exterior products.
Cranking the Pressure Too High
High pressure may hide some problems temporarily, but it increases overspray and tip wear. Start low, increase slowly, and stop when the pattern is clean.
Real-World Examples
Example 1: Painting a Bedroom
You are spraying standard interior latex on drywall. Start with a 515 tip. Mask carefully, test the pattern, and adjust pressure until the fan is even. If the paint seems thick or the pattern tails at reasonable pressure, try a 517.
Example 2: Spraying Interior Doors
You want a smooth finish on six-panel doors. A 515 may apply too much paint, especially around profiles. Try a 310 or 410 fine-finish tip. Spray light, even passes and watch the edges carefully.
Example 3: Staining a Fence
For semi-transparent stain, use a smaller orifice such as 311 or 411. The narrower flow helps prevent runs and blotchy areas. Back-brushing may still be needed depending on the wood and stain type.
Example 4: Spraying Exterior Siding
For exterior acrylic latex, a 517 or 519 is a practical starting point. If the paint is heavy and your sprayer supports it, a 521 may improve production. If you see poor atomization, check pressure, filters, paint condition, and pump capacity.
of Practical Experience: What Actually Happens on the Job
After enough spraying, you learn that tip choice is half science and half “listen to what the wall is telling you.” The label may recommend a 515, the sprayer manual may approve it, and the weather may still decide to make the paint behave differently. Temperature, humidity, coating age, surface texture, and even how well you stirred the paint can change the way a tip performs.
One practical habit is to keep a small tip set rather than relying on one hero tip. For a homeowner or DIY painter, a useful starter set might include a 311 or 313 for stain and smaller work, a 515 for interior walls, a 517 for thicker latex or faster wall coverage, and a 310 or 312 fine-finish tip for doors and trim. Contractors often carry more, but those few sizes can handle a surprising amount of real-world painting.
Another lesson: the right tip can make you faster, but only if your technique keeps up. A 517 on a wall is efficient, but if you move too slowly, overlap too much, or pause at the end of each stroke, you will create heavy bands. Keep your wrist locked, move your whole arm, trigger before the pass begins, release after the pass ends, and overlap each pass by about 50 percent. The tip gives you the pattern; your hand decides whether that pattern becomes a nice finish or a crime scene.
When spraying doors, beginners often use too much material. A door looks flat, but the rails, stiles, panels, and edges collect paint quickly. If you are seeing sags near panel corners, the tip may be too large, your pressure may be too high, or you may be moving too slowly. A fine-finish 310 or 312 often feels calmer. It lets you build the coat instead of dumping it. That matters because a door lying flat can hide excess paint until it levels poorly, while a vertical door will immediately show runs like it is tattling on you.
On fences and rough siding, the opposite problem appears. A tiny tip can take forever and may not push enough material into texture. A 515, 517, or wider fan can be more productive. Still, rough wood often benefits from back-brushing or back-rolling so the coating gets into cracks, knots, and grain. Spraying is fast; brushing behind it is what makes the coating behave.
Tip wear is another jobsite lesson people learn late. A worn tip does not always look broken. It may simply start using more paint and producing a smaller, heavier fan. Many painters blame the paint, the pump, the moon, or Monday morning before realizing the tip is tired. If your favorite 515 suddenly feels like a 513 with commitment issues, replace it.
Finally, always test before spraying the actual surface. A scrap of cardboard can save a cabinet door, a wall, or your mood. Test the fan, adjust pressure, confirm coverage, and look for tails. The best painters do not skip testing because they are pros. They test because they are pros.
Final Verdict: What Airless Spray Tip Should You Use?
For a simple answer, use a 515 for many interior wall projects, a 517 for thicker latex or faster coverage, a 310 or 312 fine-finish tip for trim, doors, and cabinets, and a smaller .009 to .013 tip for stains, lacquers, and thin finishes. For heavy exterior coatings, move up to .019, .021, or larger only when the coating and sprayer both support it.
The best airless spray tip is not the biggest one, the newest one, or the one your neighbor swears changed his life. It is the one that matches the coating thickness, surface size, desired finish, filter mesh, and pump capacity. Get that match right and airless spraying becomes fast, clean, and satisfying. Get it wrong and you will spend the afternoon sanding your decisions.
Note: Always confirm the recommended spray tip size on the coating label or technical data sheet before spraying. Test your pattern first, use the lowest effective pressure, and replace worn tips before they waste paint and ruin your finish.