Table of Contents >> Show >> Hide
- Introduction: The Tool That Turns “Almost Straight” Into Actually Straight
- What Is a Wood Jointer?
- How a Wood Jointer Works
- What a Jointer Does Best
- Jointer vs. Planer: The Difference That Saves Projects
- Types of Wood Jointers
- Straight-Knife vs. Helical Cutterhead
- How to Use a Wood Jointer Safely
- Common Jointer Mistakes
- Buying a Wood Jointer: What to Look For
- Maintenance Tips for Better Results
- Do You Really Need a Jointer?
- Conclusion: A Jointer Is the Foundation of Flat, Square Lumber
- Experience Notes: Lessons From Using Wood Jointers in Real Shop Situations
Note: This article is general woodworking guidance based on established U.S. shop-safety practices, woodworking education resources, and manufacturer-style tool recommendations. Always read your specific machine manual before using a wood jointer.
Introduction: The Tool That Turns “Almost Straight” Into Actually Straight
A wood jointer is one of those woodworking machines that looks simple until it quietly exposes every lie a board has ever told. That piece of lumber you thought was straight? The jointer says, “Adorable.” That edge you planned to glue into a tabletop? The jointer gently suggests you stop trusting your eyeballs and start trusting flat reference surfaces.
In plain American English, a wood jointer is a woodworking machine used to flatten one face of a board and straighten one edge square to that face. It is one of the most important tools for preparing rough lumber, especially if you want tight glue joints, square furniture parts, smooth panels, and fewer mysterious gaps that appear only after the glue bottle is already open.
Wood jointers are commonly used in furniture making, cabinetmaking, trim work, cutting boards, tabletops, shelving, and any project where flat, square lumber matters. While beginners often confuse jointers with planers, table saws, or biscuit joiners, each tool has a different job. A jointer makes one face flat and one edge straight. A planer makes the opposite face parallel. A table saw rips the second edge parallel. Together, these tools turn rough boards into accurate, usable stock.
What Is a Wood Jointer?
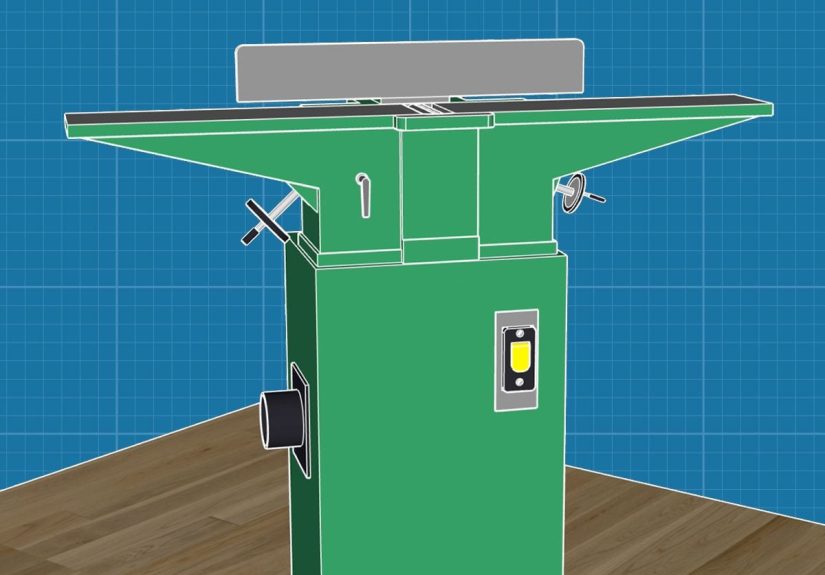
A wood jointer is a stationary or benchtop power tool with an infeed table, an outfeed table, a rotating cutterhead, a fence, and a safety guard. The board rides across the tables while the cutterhead removes small amounts of wood from the underside or edge of the board. The goal is not to make the board thinner in a uniform way. That is the planer’s job. The jointer’s job is to create a flat reference surface.
The name “jointer” comes from its purpose: preparing boards to be joined. When two boards need to be glued edge to edge, such as in a tabletop or cabinet panel, their mating edges must be straight and square. If the edges are bowed, twisted, or slightly wavy, the glue joint will have gaps. Wood glue is strong, but it is not a magician with a cape and emotional support clamps.
How a Wood Jointer Works
The Infeed Table
The infeed table is where the board begins its journey. This table is set slightly lower than the outfeed table. The difference between the two table heights determines the depth of cut. A shallow cut removes only a thin shaving, which is usually safer, cleaner, and easier to control than trying to remove too much material at once.
The Cutterhead
The cutterhead is the spinning part that holds knives or carbide inserts. Traditional straight-knife cutterheads use long blades. Helical or spiral cutterheads use many small carbide inserts arranged in a spiral pattern. Straight knives can produce excellent results when sharp and well adjusted, but they may be louder and more prone to tearout in difficult grain. Helical cutterheads tend to cut more quietly, handle tricky grain better, and allow individual inserts to be rotated when dull or nicked.
The Outfeed Table
The outfeed table supports the freshly cut surface. It must be aligned with the top cutting arc of the knives or inserts. If the outfeed table is too high, the board may stop or create a tapered cut. If it is too low, the jointer can produce snipe or an uneven surface. A properly tuned jointer depends on tables that are flat, coplanar, and correctly related to the cutterhead.
The Fence
The fence supports the board during edge jointing. For most work, it is set at 90 degrees to the tables. Some jointers allow the fence to tilt for bevel cuts, but the classic operation is squaring one edge to one flat face. A reliable fence is important because a board can only be as square as the surface guiding it.
What a Jointer Does Best
A wood jointer shines at three core tasks: flattening one face, straightening one edge, and squaring that edge to the flattened face. These operations are the foundation of accurate milling.
Imagine you buy a rough cherry board for a small coffee table. It looks beautiful, but it has a slight cup across the width and a gentle bow along the length. If you run it through a thickness planer first, the planer’s rollers may press the board flat temporarily, cut the top, and then let the board spring back into its original warped shape. Congratulations, you now own a thinner warped board.
The jointer solves this by removing the high spots until one face is truly flat. Once one face is flat, that face becomes the reference surface for the planer. Then the planer can make the opposite face parallel. After that, the jointer can straighten one edge, and the table saw can rip the opposite edge parallel. This is the basic milling sequence used by many woodworkers: jointer, planer, jointer, table saw.
Jointer vs. Planer: The Difference That Saves Projects
The jointer and planer are often mentioned together because they work as a team, but they do not do the same job.
A Jointer Makes a Board Flat and Square
A jointer creates a flat face and a straight edge. It removes cups, bows, and twist from one surface at a time. It does not guarantee consistent thickness from end to end.
A Planer Makes a Board Even in Thickness
A planer makes the top face parallel to the bottom face. It is excellent for reducing thickness and creating smooth, consistent boards. But a planer needs one flat reference face to work properly. Without that reference, it can copy the board’s existing warp.
A Biscuit Joiner Is Not a Jointer
A biscuit joiner, sometimes called a plate joiner, cuts small slots for oval wooden biscuits used to align parts during glue-up. It helps with assembly, but it does not flatten lumber. The names are similar enough to confuse beginners, but the tools are completely different. One prepares straight boards; the other cuts little football-shaped pockets. Woodworking names are not always generous to newcomers.
Types of Wood Jointers
Benchtop Jointers
Benchtop jointers are compact, portable, and popular in small garages or beginner shops. They usually have shorter beds and smaller cutting widths, often around 6 inches. Their biggest advantage is space savings. Their limitation is support: long or heavy boards can be harder to control because the tables are shorter.
Closed-Stand and Floor-Model Jointers
Floor-model jointers are larger, heavier, and more stable. They often have longer beds, stronger motors, and wider cutting capacities. A 6-inch floor jointer is common in hobby shops, while 8-inch models are popular among serious woodworkers because they can flatten wider boards. Professional shops may use 12-inch or larger machines.
Combination Jointer-Planers
A combination jointer-planer combines two machines into one. These tools can be attractive in small shops because they save floor space while offering both flattening and thicknessing. The tradeoff is changeover time: switching between jointing and planing modes can interrupt workflow. For some woodworkers, that is a fair bargain. For others, separate machines feel faster and more convenient.
Straight-Knife vs. Helical Cutterhead
The cutterhead is one of the most important buying decisions. A straight-knife jointer can produce excellent results and often costs less upfront. However, straight knives must be aligned carefully after sharpening or replacement. If one knife sits higher than the others, the cut quality suffers.
A helical cutterhead uses small carbide inserts. These inserts usually cut at a slight angle, which can reduce tearout in figured, curly, or reversing grain. They are also convenient because a damaged insert can often be rotated to a fresh edge instead of replacing or resetting an entire knife. The downside is cost. Helical cutterheads are typically more expensive, but many woodworkers consider them worth the upgrade for smoother cuts, quieter operation, and easier maintenance.
How to Use a Wood Jointer Safely
A jointer deserves respect. The cutterhead is exposed during operation, and the user’s hands guide the board near the cutting area. That means safety habits are not optional decorations; they are part of the tool.
Use Push Blocks
Push blocks help keep your hands away from the cutterhead while giving you better control over the board. They are especially important when face-jointing boards because your hands would otherwise be pressing down over the cutting area. Good push blocks grip the board securely and allow steady downward and forward pressure.
Keep the Guard Working
The cutterhead guard should return automatically over the cutterhead after the board passes. Do not remove it for ordinary jointing. If the guard sticks, drags, or fails to cover the cutterhead, fix the problem before using the machine.
Take Shallow Cuts
Small cuts are safer and cleaner. A heavy cut increases resistance, encourages tearout, and can make the board harder to control. For most jointing tasks, removing a small amount with multiple passes is better than treating the machine like it owes you money.
Watch the Grain Direction
Feed the board so the grain runs “downhill” into the cutter whenever possible. If the grain rises into the cutterhead, the knives may lift fibers and cause tearout. On boards with changing grain, use light passes and sharp cutters.
Avoid Unsafe Stock
Do not joint boards that are too short, too thin, badly cracked, loose-knotted, or full of metal. Check for nails, screws, staples, rocks, and other surprises. Reclaimed lumber can be beautiful, but it can also hide hardware like a tiny wooden crime scene.
Common Jointer Mistakes
Pressing in the Wrong Place
At the beginning of a cut, apply pressure on the infeed side. As the board moves forward and enough of it rests on the outfeed table, shift pressure to the outfeed side. Pressing too hard on the wrong part of the board can flex it, causing the jointer to cut a curve instead of removing one.
Trying to Flatten Long Boards on a Short Machine
Short-bed jointers struggle with very long boards. The longer the board, the more support it needs. If you only have a benchtop jointer, break rough lumber into shorter project parts before jointing, leaving a little extra length for trimming.
Skipping Machine Setup
A jointer must be tuned. The tables should be coplanar, the fence should be square, the cutterhead should be correctly set, and the knives or inserts should be sharp. If your jointer makes banana-shaped edges, tapered faces, or inconsistent cuts, the problem may be setup rather than technique.
Expecting the Jointer to Do Everything
A jointer is not a thickness planer, a table saw, or a therapist for lumber with deep emotional twist. It creates reference surfaces. After that, other tools finish the milling process.
Buying a Wood Jointer: What to Look For
When choosing a wood jointer, consider cutting width, bed length, cutterhead type, fence quality, dust collection, motor power, and available shop space.
Cutting Width
A 6-inch jointer can handle many small-shop projects, but it cannot face-joint boards wider than its capacity without special techniques. An 8-inch jointer gives more flexibility and is a popular upgrade for furniture makers. Wider machines are excellent but require more money, more space, and often more electrical planning.
Bed Length
Longer beds support longer boards and make it easier to produce straight edges. This is one reason floor-model jointers outperform many small benchtop machines for furniture work.
Fence Stability
A fence that flexes or slips will ruin accuracy. Look for a fence that locks firmly, adjusts smoothly, and can be set square without drama.
Dust Collection
Jointers create chips quickly. Good dust collection keeps the shop cleaner, improves visibility, and helps prevent chips from interfering with the cut. Connect the machine to a dust collector or shop vacuum system appropriate for its port size and chip volume.
Maintenance Tips for Better Results
Keep the tables clean and lightly waxed so boards slide smoothly. Check the fence for square regularly. Inspect knives or inserts for dullness, chips, resin buildup, or uneven height. Clean dust ports and keep the cutterhead area free from packed chips. If the machine vibrates, sounds different, burns wood, or suddenly produces rougher cuts, stop and inspect it.
Sharp cutters matter. Dull knives cause tearout, require more force, and increase the chance of poor control. In woodworking, sharp tools are not just about pretty shavings; they are safety tools.
Do You Really Need a Jointer?
If you mostly use plywood, pre-milled boards, or construction lumber for casual DIY projects, you may not need a jointer right away. You can straighten edges with a table saw jig, track saw, router sled, or hand plane. However, if you want to work with rough hardwood, build furniture, glue panels, or produce accurate parts consistently, a jointer becomes extremely useful.
The jointer saves time and improves precision. It also gives you more freedom when buying lumber because rough boards are often cheaper, thicker, and available in better species than pre-surfaced boards. Once you can mill your own stock, the lumberyard becomes less intimidating and more like a candy store with splinters.
Conclusion: A Jointer Is the Foundation of Flat, Square Lumber
A wood jointer is not the flashiest machine in the shop, but it may be one of the most important. It creates the flat face and straight edge that every accurate woodworking project needs. Without those reference surfaces, measurements drift, glue joints open, table legs wobble, and cabinet doors develop personalities.
The key is understanding what the jointer does and what it does not do. It flattens one face. It straightens one edge. It helps square lumber for the rest of the milling process. It does not make boards equal in thickness, and it does not replace a planer. Used with care, sharp cutters, proper setup, push blocks, and realistic expectations, a jointer can transform rough lumber into clean, reliable stock ready for fine woodworking.
Experience Notes: Lessons From Using Wood Jointers in Real Shop Situations
One of the first things people learn when using a wood jointer is that the machine rewards patience. Beginners often want to fix a warped board in one or two heroic passes. That usually leads to frustration, tearout, or a board that still refuses to sit flat. The better approach is slower: inspect the board, identify the cup or bow, place the concave side down when possible, and take light passes until the high spots disappear. The first clean shaving feels small, but it is the beginning of accuracy.
Another useful experience is learning to read the board before turning on the machine. A board with severe twist may waste too much material if you try to flatten it whole. In that case, cutting it into shorter project parts first can save wood and make jointing easier. For example, if you need four 24-inch rails from an 8-foot board, rough-cutting those pieces slightly oversized before jointing can reduce the amount of material removed. The shorter sections usually have less visible distortion, and the jointer has an easier job.
Feed pressure also takes practice. Many new users press down too hard directly over the cutterhead or keep all their pressure on the infeed table for the entire cut. Better results come from a smooth transfer of control. At the start, hold the board firmly on the infeed table. Once enough of the freshly cut surface rests on the outfeed table, shift pressure there. The outfeed table represents the new flat surface, so it should guide the cut. This small habit can dramatically improve consistency.
Edge jointing for glue-ups teaches another lesson: perfect-looking boards still need testing. After jointing two edges, place them together and look for gaps. Some woodworkers use the “book match” method for panel glue-ups, jointing one board face-up and the mating board face-down. If the fence is slightly off from 90 degrees, the two complementary angles may still close into a flat panel. This is not an excuse for a poorly set fence, but it is a practical trick that can help produce tighter glue lines.
Dust collection is another experience-based detail that becomes obvious quickly. A jointer can bury your feet in chips faster than expected. Without proper dust collection, chips can clog the chute, scatter across the floor, and occasionally interfere with smooth feeding. Keeping the dust path clear makes the machine feel more controlled and the shop less like a hamster cage after a tornado.
Finally, respect for the tool grows with use. A jointer is not scary when handled correctly, but it is never casual. The safest woodworkers develop rituals: check the guard, set the depth, confirm the fence, inspect the board, position push blocks, stand balanced, and make the pass with full attention. These habits may seem slow at first, but they become automatic. In return, the jointer gives you something every woodworking project needs: a trustworthy starting point.