Table of Contents >> Show >> Hide
- What Is an Automatic Timestamp in Google Sheets?
- Method 1: Insert a Manual Timestamp with Keyboard Shortcuts
- Method 2: Use NOW() for a Live Date and Time
- Method 3: Use TODAY() for a Live Date Only
- Method 4: Create a Timestamp with an IF Formula
- Method 5: Use Iterative Calculations for a Formula-Based Static Timestamp
- Method 6: Add Automatic Timestamps with Google Apps Script
- Method 7: Create a “Created At” Timestamp That Never Changes
- Method 8: Create a “Last Updated” Timestamp
- Method 9: Add Both “Created At” and “Updated At” Columns
- How to Format Timestamp Cells
- Common Problems and How to Fix Them
- Which Timestamp Method Should You Use?
- Practical Examples for Real Workflows
- Best Practices for Google Sheets Timestamps
- Experience Notes: What I’ve Learned from Using Google Sheets Timestamps
- Conclusion
Automatic timestamps in Google Sheets are one of those tiny spreadsheet tricks that feel oddly powerful. One minute you are manually typing dates like a very responsible data clerk. The next minute, your sheet is politely recording when tasks are completed, when orders arrive, when leads are updated, or when your coworker “definitely” made that change at 4:57 p.m.
The good news: adding timestamps to Google Sheets is not difficult. The slightly annoying news: there are several ways to do it, and each method behaves differently. Some timestamps update automatically, some stay fixed forever, and some require Google Apps Script. Choosing the wrong method can turn your “created date” column into a time-traveling gremlin that changes every time the sheet recalculates.
This guide explains how to add automatic timestamps to cells in Google Sheets using formulas, keyboard shortcuts, iterative calculations, and Apps Script. You will learn which method is best for static timestamps, last-edited timestamps, task trackers, CRM sheets, order logs, attendance sheets, and project management dashboards.
What Is an Automatic Timestamp in Google Sheets?
An automatic timestamp is a date, time, or date-and-time value that appears in a cell when something happens in your spreadsheet. For example, you may want column B to show the exact time when someone enters a customer name in column A. Or you may want a “Last Updated” column to change whenever a row is edited.
In Google Sheets, timestamps usually fall into two categories:
- Dynamic timestamps: These update whenever the spreadsheet recalculates. The
NOW()andTODAY()functions are common examples. - Static timestamps: These capture a moment and do not change later. Apps Script or keyboard shortcuts are the best options for this.
The distinction matters. If you are tracking when an invoice was submitted, you do not want that timestamp changing tomorrow just because someone sorted the sheet. That would be like a security camera that keeps replacing yesterday’s footage with today’s weather report.
Method 1: Insert a Manual Timestamp with Keyboard Shortcuts
Before getting fancy, start with the fastest built-in option: keyboard shortcuts. This is not fully automatic, but it is simple, stable, and perfect when you only need occasional timestamps.
Useful Google Sheets Timestamp Shortcuts
- Insert current date:
Ctrl + ;on Windows or ChromeOS - Insert current time:
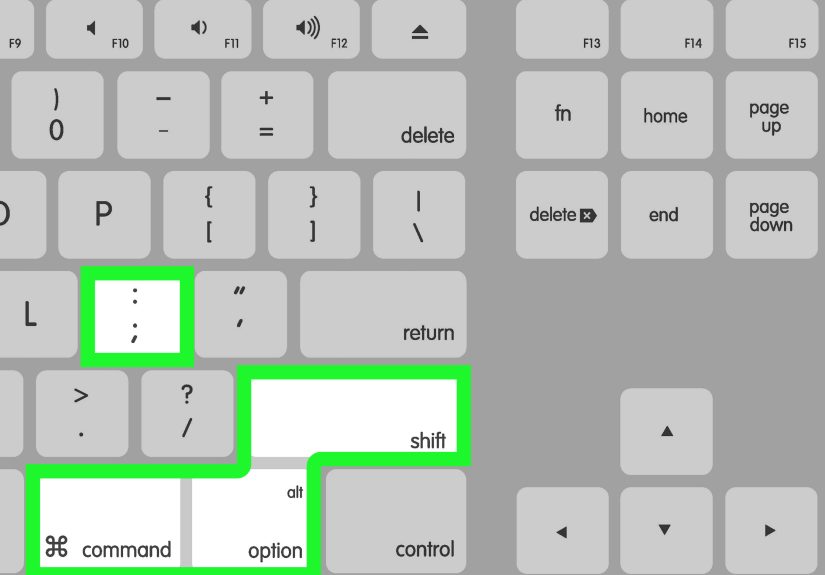
Ctrl + Shift + ; - Insert current date and time:
Ctrl + Alt + Shift + ; - On Mac: use
Commandinstead ofCtrlfor many shortcut combinations, though keyboard layouts may vary.
This method creates a static value. Once inserted, the timestamp stays put unless someone edits it manually. That makes it useful for quick logs, meeting notes, inspection checklists, and small tracking sheets.
Best Use Cases
Manual shortcuts are best when your sheet is handled by one person or when accuracy matters more than automation. For example, a small business owner tracking package drop-offs can click a cell, press the timestamp shortcut, and move on. No formulas. No scripts. No mysterious spreadsheet spirits.
Method 2: Use NOW() for a Live Date and Time
The easiest formula for showing the current date and time in Google Sheets is:
This formula returns the current date and time based on the spreadsheet’s recalculation. It is great for dashboards, countdowns, aging reports, and live status trackers. However, it is not ideal for permanent timestamps because it changes when the sheet recalculates.
Example: Show the Current Time in a Dashboard
You could place this formula at the top of a dashboard and label it “Last viewed at.” It gives users a quick sense of when the report refreshed.
Why NOW() Is Not a True Static Timestamp
The NOW() function is volatile. In plain English, it is restless. It recalculates when the sheet updates, depending on your spreadsheet settings. If you use NOW() as a “created at” timestamp, it may later show a newer time instead of the original entry time.
Use NOW() when you want the current moment. Avoid it when you need historical proof of when something happened.
Method 3: Use TODAY() for a Live Date Only
If you only need the current date, use:
This function returns today’s date without the time. Like NOW(), it is dynamic, meaning it updates as the spreadsheet recalculates. It is useful for due-date formulas, age calculations, task aging, and reports that should always compare data against the current date.
Example: Days Since a Task Was Created
If cell A2 contains a task creation date, this formula calculates how many days have passed. That is useful for overdue task lists, service tickets, and follow-up reminders.
Method 4: Create a Timestamp with an IF Formula
A common beginner approach is using IF with NOW(). For example:
This says: if A2 is not blank, show the current date and time; otherwise, show nothing.
At first glance, this looks perfect. Enter a value in A2, and a timestamp appears in B2. Unfortunately, the timestamp is still based on NOW(), so it can update later. It is more of a live status marker than a permanent record.
When This Formula Is Useful
This method is fine for temporary tracking, dashboards, and sheets where you simply need to know that a row currently has data. It is not the best choice for audit trails, order submission logs, or anything where the original timestamp must remain unchanged.
Method 5: Use Iterative Calculations for a Formula-Based Static Timestamp
If you want a mostly formula-based timestamp that stays fixed after the first entry, you can use iterative calculations. This method allows a circular reference to preserve the original timestamp.
Step 1: Turn On Iterative Calculation
- Open your Google Sheet.
- Click File.
- Select Settings.
- Go to the Calculation tab.
- Turn on Iterative calculation.
- Set Max number of iterations to
1. - Click Save settings.
Step 2: Add the Timestamp Formula
Suppose column A contains task names, and column B should show the timestamp when a task is entered. In B2, use:
Then copy the formula down the column.
How It Works
The formula checks whether A2 has data. If A2 is blank, B2 stays blank. If A2 has data and B2 is empty, the formula inserts NOW(). If B2 already has a timestamp, it keeps the existing B2 value.
This method can be useful, but it has a catch: circular references can confuse users, and iterative calculations affect the spreadsheet’s calculation behavior. In a large or business-critical sheet, Apps Script is usually cleaner and more reliable.
Method 6: Add Automatic Timestamps with Google Apps Script
For most serious workflows, Google Apps Script is the best way to add automatic timestamps to cells in Google Sheets. It can create a static timestamp whenever a user edits a specific column. Once written, the timestamp behaves like a normal cell value instead of a volatile formula.
Example: Timestamp Column B When Column A Is Edited
Here is a simple script:
How to Add the Script
- Open your Google Sheet.
- Click Extensions.
- Select Apps Script.
- Delete any placeholder code.
- Paste the script.
- Click Save.
- Return to your sheet and edit a cell in column A.
When you type something in column A, the script places a timestamp in column B on the same row. If you clear the value in column A, the timestamp is cleared too.
Method 7: Create a “Created At” Timestamp That Never Changes
Sometimes you want a timestamp to appear when a row is first created, but you do not want it to update every time the row changes. For that, modify the script so it only writes a timestamp if the timestamp cell is blank.
This is ideal for lead capture sheets, order logs, content calendars, support tickets, and inventory records. The timestamp appears once and then stays unchanged.
Method 8: Create a “Last Updated” Timestamp
A “Last Updated” timestamp should change whenever a row is edited. For example, if columns A through D contain task details, column E can show the most recent edit time.
This script watches columns A through D. Whenever one of those cells is edited, it updates column E with the current date and time.
Method 9: Add Both “Created At” and “Updated At” Columns
Many professional spreadsheets use two timestamp columns: one for when the row was created and another for when it was last updated. This is especially helpful for CRMs, project trackers, editorial calendars, hiring pipelines, and bug reports.
In this example, columns A through D contain editable data. Column E stores the original creation time, and column F stores the most recent update time.
How to Format Timestamp Cells
After adding timestamps, format them so they are easy to read. Select your timestamp column, then go to:
You can also create a custom format such as:
This format is excellent for databases, exports, and clean sorting. If your audience prefers a friendlier display, use something like:
Common Problems and How to Fix Them
The Timestamp Keeps Changing
You are probably using NOW() or TODAY(). Use Apps Script or keyboard shortcuts if you need a fixed timestamp.
The Script Does Not Run
Check that the sheet name in your script matches the actual tab name. "Sheet1" is not the same as "Orders", "Tasks", or "Sheet 1". Google Sheets is helpful, but it does not read minds. Yet.
The Timestamp Appears in the Wrong Column
In Apps Script, columns are counted by number. Column A is 1, B is 2, C is 3, and so on. If your timestamp is landing in the wrong place, check the number inside getRange(row, column).
The Timestamp Does Not Update for Formulas
The simple onEdit(e) trigger runs when a user edits a cell directly. It may not behave the same way when a value changes because of a formula, import, or external automation. For more advanced workflows, you may need an installable trigger or a scheduled script.
Which Timestamp Method Should You Use?
Use keyboard shortcuts when you want quick manual timestamps. Use NOW() or TODAY() when you want live dates that update automatically. Use iterative calculations when you want a formula-only solution and can tolerate circular references. Use Apps Script when you need reliable, static, automatic timestamps for real workflows.
For business sheets, Apps Script is usually the best choice. It is flexible, clean, and easier to control. You can decide which sheet, row, column, and condition should trigger the timestamp.
Practical Examples for Real Workflows
Task Tracker
Column A contains task names. Column B records when each task was added. Column C records the status. Column D records when the task was last updated. This setup helps teams see not only what needs doing, but also how long each item has been sitting around pretending to be “almost finished.”
Sales CRM
Column A contains lead names, column B contains email addresses, column C contains lead status, column D contains the created timestamp, and column E contains the last updated timestamp. This gives sales teams a simple way to track fresh leads and stale opportunities.
Inventory Log
When a product quantity changes, a timestamp can show when the inventory record was last updated. This is useful for small warehouses, school supply rooms, equipment checkouts, and retail stock sheets.
Content Calendar
Editors can use timestamps to record when a draft was added, when it was revised, and when it was approved. This makes the publishing process easier to audit without sending twelve “just checking in” messages.
Best Practices for Google Sheets Timestamps
- Use clear column names: Label columns as “Created At,” “Updated At,” or “Submitted At.”
- Freeze the header row: This keeps timestamp labels visible while scrolling.
- Protect timestamp columns: Prevent accidental edits by locking important timestamp columns.
- Use consistent formatting: Choose one date-time format and apply it to the whole column.
- Test scripts on a copy: Before using Apps Script on an important sheet, test it in a duplicate file.
- Keep scripts simple: A short, focused script is easier to troubleshoot than a giant automation monster wearing a spreadsheet costume.
Experience Notes: What I’ve Learned from Using Google Sheets Timestamps
After working with timestamp systems in Google Sheets, one lesson becomes obvious: the best method depends less on technical skill and more on the purpose of the data. People often start with =NOW() because it is easy, and at first it looks like magic. Then they open the sheet the next day and realize every timestamp has changed. That is usually the moment when the spreadsheet quietly loses trust.
For personal sheets, shortcuts are underrated. If you are tracking workouts, study sessions, small expenses, or personal reminders, pressing a keyboard shortcut is often faster than building automation. It is simple, dependable, and does not require debugging. Not every spreadsheet needs a tiny robot living inside it.
For team workflows, Apps Script is usually worth the setup. A static “Created At” timestamp helps everyone understand when a row first entered the system. A “Last Updated” timestamp shows whether a record is active or neglected. In sales, support, hiring, and project management, that information can be more useful than another color-coded status dropdown.
One practical tip is to avoid triggering timestamps from too many columns. For example, if your team frequently adds comments, formulas, or formatting changes, you may not want every edit to update the “Last Updated” field. Define the meaningful input columns and make the script watch only those. Cleaner rules create cleaner data.
Another lesson is to separate timestamps from human-entered dates. A due date is not the same as a created date. A meeting date is not the same as a last-edited timestamp. If those fields are mixed together, reports become confusing. Keep system-generated timestamps in their own columns and label them clearly.
Formatting matters more than people expect. A timestamp like 5/3/2026 9:04:22 may be fine for one team, while another team needs 2026-05-03 09:04:22 for sorting, exporting, or database imports. When in doubt, use a sortable format such as year-month-day followed by time. Future you will be grateful, and future you is already dealing with enough.
Finally, always test automation with real editing behavior. Try adding a row, clearing a cell, pasting multiple rows, editing the header, sorting the sheet, and changing a watched column. A timestamp script that works for one cell may need adjustments for bulk edits. Testing takes a few minutes, but it prevents confusion later when someone asks why 300 rows were stamped at midnight by “the spreadsheet ghost.”
Conclusion
Adding automatic timestamps to cells in Google Sheets is one of the most practical upgrades you can make to a spreadsheet. Whether you use keyboard shortcuts, NOW(), TODAY(), iterative calculations, or Google Apps Script, the goal is the same: make your data easier to trust.
For quick manual work, shortcuts are fast and reliable. For live dashboards, formulas are convenient. For permanent, automatic timestamps, Apps Script is the strongest option. Once you understand the difference between dynamic and static timestamps, you can build cleaner task trackers, better CRMs, smarter inventory logs, and more organized project sheets.
In other words, your spreadsheet can finally stop asking, “When did this happen?” and start answering with confidence.