Table of Contents >> Show >> Hide
- Why Cleaning a Reusable Coffee Filter Matters
- What You Need Before You Start
- How to Clean a Reusable Coffee Filter: 11 Steps
- 1. Let the Filter Cool Completely
- 2. Empty the Used Coffee Grounds
- 3. Rinse Immediately Under Warm Running Water
- 4. Wash with Mild Dish Soap
- 5. Use a Soft Brush for Mesh and Seams
- 6. Rinse Until the Water Runs Clear
- 7. Soak in Vinegar for Stubborn Coffee Oils
- 8. Use Baking Soda for Odor and Stains
- 9. Check Whether the Filter Is Dishwasher Safe
- 10. Dry the Filter Completely
- 11. Deep Clean Weekly or Monthly Depending on Use
- How Often Should You Clean a Reusable Coffee Filter?
- Common Mistakes to Avoid
- How to Remove a Bad Smell from a Reusable Coffee Filter
- How to Keep Coffee Tasting Fresh Longer
- Real-Life Experience: What Actually Works in a Busy Kitchen
- Conclusion
- SEO Tags
A reusable coffee filter is one of those tiny kitchen heroes that saves money, reduces paper waste, and quietly helps you brew cup after cup of coffee. But like every hero, it has a weakness: coffee oils. Those oils cling to metal mesh, nylon, gold-tone filters, and plastic frames like they signed a lease. Add fine grounds, hard-water minerals, and the occasional “I’ll clean it later” morning, and your filter can start making coffee taste bitter, muddy, or oddly stale.
The good news? Learning how to clean a reusable coffee filter is easy. You do not need a laboratory, a hazmat suit, or a mysterious bottle from the back of the cleaning aisle. Most of the time, warm water, mild dish soap, a soft brush, white vinegar, and patience will do the job beautifully. This guide walks you through 11 simple steps to clean your reusable coffee filter, remove coffee residue, prevent clogs, and keep your morning brew tasting fresh instead of “yesterday’s regret.”
Why Cleaning a Reusable Coffee Filter Matters
Reusable coffee filters are designed to let brewed coffee flow through while holding back grounds. Over time, the tiny holes in the mesh can trap oils and microscopic particles. When those deposits build up, water does not flow evenly. That can lead to weak coffee, bitter coffee, overflow in the brew basket, or sediment in your cup.
Cleaning also protects flavor. Coffee naturally contains oils, and while those oils contribute body and aroma, old oils can turn stale. A dirty filter may make even good beans taste flat, harsh, or sour. If you have ever bought a new bag of coffee and thought, “Why does this taste like an old diner napkin?” the filter may be the villain.
What You Need Before You Start
Gather a few basic supplies before cleaning. You will need warm water, mild dish soap, a soft sponge, a small soft-bristled brush or old toothbrush, white distilled vinegar, baking soda, a clean towel, and a bowl large enough for soaking. For stainless steel mesh or gold-tone reusable filters, avoid steel wool, harsh scouring pads, bleach, and strong chemical cleaners. They may damage the filter surface or leave unwanted residue.
Also check your coffee maker manual if you have one. Some permanent filters are top-rack dishwasher safe, while others should be hand-washed only. When in doubt, hand washing is the safest and gentlest option.
How to Clean a Reusable Coffee Filter: 11 Steps
1. Let the Filter Cool Completely
Before touching the filter, allow it to cool. Freshly brewed coffee grounds can hold heat longer than you expect, and hot metal mesh is not a fun surprise before breakfast. Wait a few minutes after brewing, especially if your filter sits inside a hot brew basket.
This step also prevents burns and makes the grounds easier to handle. Once the filter is cool enough to touch comfortably, remove it from the coffee maker carefully so you do not spill wet grounds all over the counter. Coffee grounds have a talent for reaching impossible places, including under appliances and into your soul.
2. Empty the Used Coffee Grounds
Dump the used coffee grounds into the trash, compost bin, or garden compost system if appropriate. Avoid rinsing large amounts of grounds down the sink. Coffee grounds can collect in pipes and contribute to clogs over time, especially when mixed with grease or food particles.
Tap the filter gently over the bin to release stubborn grounds. Do not bang it aggressively against the counter or trash can. Reusable filters often have fine mesh that can bend or warp. A light tap is enough. Think polite knock, not police raid.
3. Rinse Immediately Under Warm Running Water
Rinse the filter as soon as possible after brewing. Warm running water helps remove loose grounds before they dry and stick to the mesh. Hold the filter upside down first so water pushes grounds out of the holes instead of deeper into them.
Rotate the filter slowly under the faucet. Pay attention to the seams, bottom corners, handle area, and plastic rim if your filter has one. These little edges love collecting coffee sludge. A quick rinse after every use is the easiest way to avoid a dramatic deep-cleaning session later.
4. Wash with Mild Dish Soap
Add a drop or two of mild dish soap to a soft sponge or your fingertips and gently wash the filter. Focus on both the inside and outside of the mesh. Coffee oils can cling to either side, and cleaning only the inside is like washing one side of a window and calling it a lifestyle.
Use warm water rather than boiling water. Hot water helps dissolve oils, but extremely high heat is unnecessary and may not be ideal for plastic parts. Mild soap is usually enough for daily cleaning, especially when you rinse the filter immediately after brewing.
5. Use a Soft Brush for Mesh and Seams
If you see grounds lodged in the mesh, use a soft-bristled brush or clean toothbrush. Brush gently in small circular motions. For cone-shaped filters, work from the wider top area down toward the tip. For basket-style filters, brush around the base where residue tends to gather.
Do not use a wire brush or abrasive scrubber. Scratching the mesh can create rough spots that trap more residue later. The goal is to clean the filter, not exfoliate it into retirement.
6. Rinse Until the Water Runs Clear
After washing, rinse thoroughly under warm water. Soap residue can affect coffee flavor, so take your time here. If you still see bubbles, keep rinsing. If the filter smells like dish soap, keep rinsing. If your coffee later tastes like “lemon fresh sunrise,” you did not rinse enough.
Hold the filter up to the light after rinsing. You should be able to see through the mesh evenly. Dark patches may mean coffee oils or fine grounds are still stuck in the holes.
7. Soak in Vinegar for Stubborn Coffee Oils
For a deeper clean, mix one part white distilled vinegar with two parts warm water in a bowl. Place the reusable coffee filter in the solution and let it soak for 20 to 30 minutes. Vinegar helps loosen mineral deposits and coffee residue, making it useful for filters that look stained or smell stale.
If the filter is very dirty, you can use equal parts vinegar and water. However, do not soak delicate plastic parts for hours unless the manufacturer says it is safe. A short soak is usually enough. After soaking, scrub lightly with a soft brush and rinse well.
8. Use Baking Soda for Odor and Stains
If your reusable coffee filter still has brown stains or a lingering smell, make a gentle paste with baking soda and a small amount of water. Apply it to the stained areas and scrub lightly with a soft brush or sponge. Baking soda is mildly abrasive, so it can help lift residue without being as harsh as scouring powder.
Use a light touch, especially on gold-tone filters. You are not polishing a pirate coin. After scrubbing, rinse thoroughly until no baking soda remains in the mesh.
9. Check Whether the Filter Is Dishwasher Safe
Some reusable coffee filters can go on the top rack of the dishwasher. Others cannot. Always check the product instructions before using the dishwasher, especially if the filter has plastic parts, glued seams, or a delicate coating.
If your filter is dishwasher safe, place it on the top rack only. The bottom rack gets hotter and may warp plastic. Avoid running it with heavily greasy dishes because oils can redeposit on the filter. If the dishwasher leaves a detergent smell, return to hand washing. Your coffee deserves better than tasting like a plate cycle.
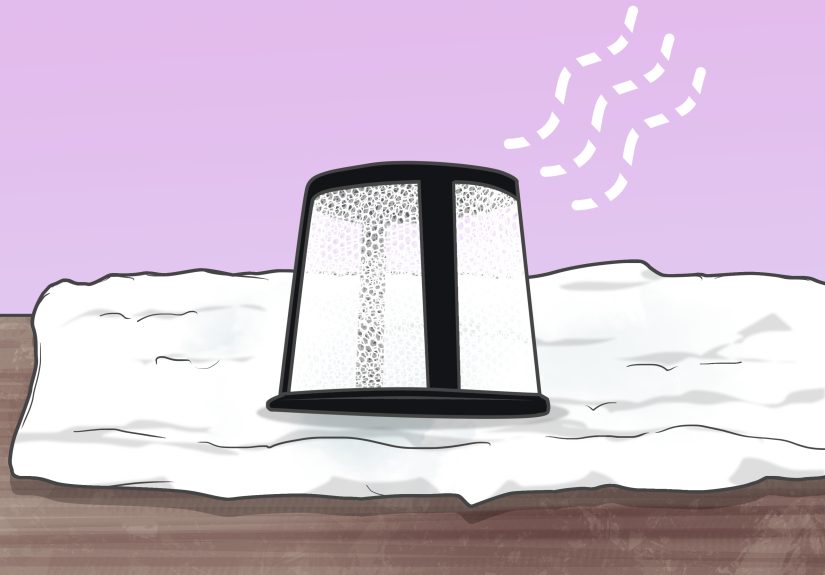
10. Dry the Filter Completely
After rinsing, shake off excess water and place the filter upside down on a clean towel or drying rack. Let it air dry completely before storing it or putting it back into the coffee maker. Moisture trapped in seams or mesh can encourage musty odors.
Do not store the filter while it is still damp inside a closed brew basket. That dark, cozy environment is exactly where stale smells love to move in, hang curtains, and invite friends.
11. Deep Clean Weekly or Monthly Depending on Use
If you brew coffee daily, give your reusable filter a deeper clean once a week. That may mean a vinegar soak, baking soda scrub, or dishwasher cycle if approved by the manufacturer. If you brew only occasionally, a deep clean every few weeks or once a month may be enough.
Pay attention to warning signs. If your coffee maker overflows, coffee drains slowly, the filter smells sour, or your brew tastes bitter despite fresh beans, it is probably time for a deeper cleaning. A clean reusable coffee filter improves water flow, flavor clarity, and the general emotional stability of your morning routine.
How Often Should You Clean a Reusable Coffee Filter?
For best results, rinse your reusable coffee filter after every brew. Wash it with soap daily if you use it every day. Deep clean it weekly if you drink coffee often, especially if you use oily dark roasts or finely ground coffee. Dark roast beans tend to leave more visible oil on equipment, while fine grounds can clog mesh faster.
If you live in an area with hard water, you may notice chalky buildup on your coffee maker and filter. In that case, vinegar soaks can help reduce mineral residue. Just remember to rinse thoroughly afterward so the next cup does not taste like salad dressing’s ambitious cousin.
Common Mistakes to Avoid
Using Bleach or Harsh Chemicals
Do not clean a reusable coffee filter with bleach unless the manufacturer specifically recommends a safe method. Strong chemicals can damage materials and leave odors or residue. A filter touches the water that becomes your coffee, so keep cleaning products gentle and food-safe.
Scrubbing with Steel Wool
Steel wool can scratch metal mesh, damage coatings, and weaken the filter. Once the mesh is scratched or bent, it may trap grounds more easily. Use a soft brush instead.
Letting Grounds Dry Overnight
Dried coffee grounds are stubborn. They harden in the mesh and make cleaning more annoying than it needs to be. Empty and rinse the filter soon after brewing, even if you plan to wash it properly later.
Forgetting the Brew Basket
The reusable filter is not the only part that gets dirty. The brew basket, lid, and drip area can also collect coffee oils and residue. Wash removable parts with warm, soapy water and wipe the surrounding area regularly.
How to Remove a Bad Smell from a Reusable Coffee Filter
If your reusable coffee filter smells sour, stale, or musty, start with a warm soap wash. Then soak it in a vinegar-water solution for 20 to 30 minutes. Rinse thoroughly and let it dry in open air. If the odor remains, use a baking soda paste and scrub gently around the seams and mesh.
Persistent odors usually mean residue is hiding somewhere. Look closely at the rim, handle, bottom seam, and any plastic support pieces. Those spots are tiny coffee caves. Clean them well and dry them completely.
How to Keep Coffee Tasting Fresh Longer
A clean filter is only one part of better coffee. Use fresh beans, store coffee in an airtight container away from light and heat, and grind only what you need when possible. Also clean your carafe, grinder, water reservoir, and brew basket regularly. Coffee flavor depends on the whole system, not just the beans.
If your reusable filter is old, torn, warped, or permanently clogged, replacement may be the best solution. Even a well-cleaned filter has a lifespan. When water no longer flows evenly or coffee tastes off no matter what you do, your filter may be ready to retire with honor.
Real-Life Experience: What Actually Works in a Busy Kitchen
In real life, cleaning a reusable coffee filter is less about perfection and more about building a habit that survives sleepy mornings. The best routine is the one you will actually do before your brain fully loads. For many people, that means three simple moves: dump the grounds, rinse immediately, and leave the filter upside down to dry. That alone prevents most problems.
One common experience is the “slow drip mystery.” The coffee maker seems fine, the beans are fresh, and the water reservoir is full, but the coffee takes forever to brew. Often, the reusable filter is clogged with invisible oil and fine particles. A quick rinse will not always fix this. A vinegar soak followed by a soft toothbrush scrub usually brings the filter back to life. The difference can be surprisingly dramatic. Coffee flows faster, tastes cleaner, and stops leaving that swampy layer of grit at the bottom of the mug.
Another lesson: oily beans are delicious but messy. Dark roasts, flavored coffees, and some freshly roasted beans can leave a shiny film on reusable filters. If you love bold coffee, you may need to clean the filter more often than someone who drinks a lighter roast. This is not a moral failing. It is just coffee being coffeedramatic, aromatic, and slightly high-maintenance.
Many people also discover that the dishwasher is convenient but not magical. A dishwasher-safe filter may come out cleaner, but detergent scent can cling if the cycle is heavy or the rinse is weak. If your coffee suddenly tastes floral and suspicious, hand rinse the filter again before brewing. Your mug should smell like coffee, not “mountain breeze dishwasher tablet.”
The most helpful trick is keeping a small brush near the sink. When the brush is nearby, cleaning takes less than a minute. When it is hidden in a drawer behind birthday candles, rubber bands, and one lonely chopstick, the filter gets ignored. Convenience wins. Put the brush where you brew, and your future self will feel unusually responsible.
Finally, do not underestimate drying. A reusable coffee filter can be perfectly washed and still smell odd if it is stored damp. Air drying upside down makes a major difference. If your coffee maker has a closed lid, leave it open for a while after cleaning so the basket can dry too. This one small habit helps prevent musty odors and keeps the entire coffee station fresher.
Conclusion
Cleaning a reusable coffee filter is simple, but it has a big impact on flavor, flow, and freshness. Rinse it after every brew, wash it with mild soap, use a soft brush for trapped grounds, and deep clean it with vinegar or baking soda when oils and stains build up. Avoid harsh chemicals, rough scrubbers, and damp storage. With a few consistent habits, your reusable coffee filter will stay clean, your coffee will taste brighter, and your mornings will involve fewer bitter surprises.
Note: Always follow the care instructions for your specific reusable coffee filter. If the manufacturer says hand wash only, skip the dishwasher. If the mesh is damaged, warped, or permanently clogged, replace the filter for better brewing performance.