Table of Contents >> Show >> Hide
- Why Make a Personalized Stamped Tablecloth?
- Best Fabric for a Stamped Tablecloth
- Supplies You’ll Need
- Step 1: Prewash and Dry the Tablecloth
- Step 2: Pick a Design Style
- Step 3: Plan the Layout
- Step 4: Test the Stamp
- Step 5: Stamp the Tablecloth
- Step 6: Let the Paint Dry Completely
- Step 7: Heat-Set or Cure the Design
- Step 8: Wash and Care for Your Stamped Tablecloth
- Color Combinations That Look Expensive
- Common Mistakes to Avoid
- Creative Variations for a Truly Personalized Look
- Experience Notes: What Actually Makes the Project Look Better
- Conclusion
A personalized stamped tablecloth is one of those DIY projects that looks like it came from a boutique home store, but secretly starts with a plain piece of fabric, a little paint, and the courage to press a stamp down without whispering, “Please don’t ruin everything.” The good news? Fabric stamping is surprisingly beginner-friendly. You do not need a printmaking studio, a mysterious art degree, or a drawer full of expensive tools. With the right tablecloth, fabric paint, a simple pattern plan, and a bit of patience, you can create custom table linens that feel handmade in the best possible way.
This project is perfect for holidays, birthdays, weddings, dinner parties, family brunches, or everyday dining when your table deserves more personality than “laundry-day beige.” A stamped tablecloth can be elegant with soft botanicals, playful with polka dots, modern with geometric blocks, or sentimental with initials, dates, hand-carved motifs, or family symbols. Better still, once you learn the technique, you can use it on napkins, runners, placemats, aprons, tote bags, and even gift wrap fabric.
Why Make a Personalized Stamped Tablecloth?
Store-bought tablecloths are convenient, but they often fall into two categories: too plain or too “grandma’s formal dining room in 1987.” Creating your own stamped tablecloth lets you control the color, scale, layout, and mood. You can match your dining room, coordinate with seasonal dishes, or create a one-of-a-kind piece for a special celebration.
Stamped fabric also has a charm that digital printing cannot fully imitate. Slight variations in pressure, texture, and paint coverage make the design feel warm and human. Those tiny imperfections are not mistakes; they are proof that a real person made it. In a world full of identical décor, that is a quiet little luxury.
Best Fabric for a Stamped Tablecloth
The best fabric for a DIY stamped tablecloth is usually cotton, linen, or a cotton-linen blend. These natural fibers absorb fabric paint well, hold detail nicely, and feel appropriate for dining. Cotton is affordable and easy to wash. Linen has a relaxed, upscale texture that makes even simple stamped shapes look sophisticated. A cotton-linen blend offers a good balance of softness, durability, and easier care.
Avoid very slick polyester, heavily coated stain-resistant tablecloths, or textured fabrics with deep ridges. Paint may sit on the surface instead of bonding properly, and stamped lines can blur or skip. If you already have a tablecloth, check the care label and test your paint on a hidden corner before committing to the full design.
Choosing the Right Size
Before stamping, make sure the tablecloth fits your table. For casual dining, a drop of about 6 to 10 inches on each side usually looks relaxed and practical. For formal settings, a longer drop can feel more elegant. Measure your table length and width, then add twice the desired drop to each measurement. For example, a 36-by-72-inch table with a 10-inch drop needs a tablecloth around 56 by 92 inches.
If your tablecloth is too short, the design may look cramped. If it is too long, guests may accidentally tug it every time they sit down. A beautiful tablecloth should decorate the table, not start a tiny wrestling match with everyone’s knees.
Supplies You’ll Need
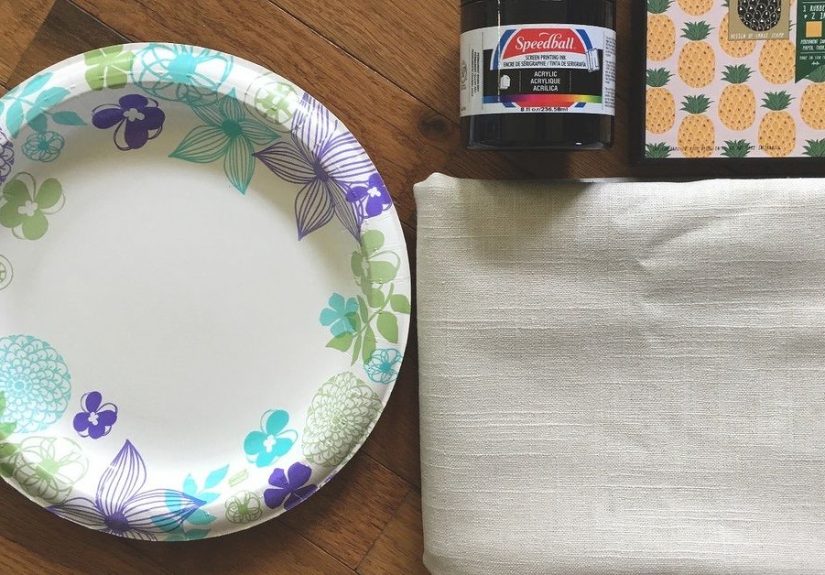
Gather your materials before you begin so you are not sprinting around the house with paint on your fingers. For a basic personalized stamped tablecloth, you will need:
- Plain cotton, linen, or cotton-linen tablecloth
- Fabric paint, fabric ink, or acrylic paint mixed with fabric medium
- Rubber stamps, foam stamps, carved blocks, potatoes, corks, pencil erasers, or sponges
- Foam brush, brayer, or small paintbrush
- Paper plate or paint palette
- Cardboard, plastic sheet, or drop cloth to protect the work surface
- Painter’s tape, ruler, washable fabric pencil, or chalk
- Scrap fabric or paper for testing
- Iron and pressing cloth if your paint requires heat-setting
Fabric-specific paint is the simplest option because it is made to remain flexible on textiles. If you use regular acrylic craft paint, mix it with fabric medium according to the product instructions. Fabric medium helps the paint bond to cloth and reduces stiffness, which matters when your tablecloth needs to drape instead of behaving like a painted pizza box.
Step 1: Prewash and Dry the Tablecloth
Always prewash the tablecloth before stamping. New fabric often contains sizing, softeners, dust, or manufacturing finishes that can interfere with paint adhesion. Wash it in warm water with mild detergent and skip fabric softener. Fabric softener can leave a coating that makes paint less willing to bond. Dry the tablecloth completely, then iron it smooth.
This step may not feel glamorous, but it is the difference between “heirloom handmade table linen” and “why did my beautiful pattern fade after one wash?” A smooth, clean surface gives your stamp the best chance to create crisp, consistent impressions.
Step 2: Pick a Design Style
Before opening the paint, decide what kind of finished tablecloth you want. A full repeating pattern creates a bold, wallpaper-like effect. A border design around the edges feels refined and leaves the center calm for dishes, flowers, and serving platters. A scattered pattern looks casual and forgiving, which is great for beginners. A centered monogram or family motif can make the tablecloth feel special for holidays, weddings, anniversaries, or housewarming gifts.
Easy Pattern Ideas
For a modern look, try simple circles, arches, stripes, diamonds, stars, checkerboard blocks, or abstract brush-stamped marks. For a farmhouse or cottage look, use leaves, herbs, flowers, fruit shapes, vines, or tiny birds. For a festive tablecloth, stamp snowflakes, pumpkins, citrus slices, hearts, or fireworks-inspired dots. For a personalized design, add initials, a family name, a meaningful date, or tiny symbols connected to the people who will use it.
If you are nervous, start with a forgiving design. Polka dots, scattered leaves, and imperfect geometric shapes are wonderfully low-pressure. Nobody expects a hand-stamped dot to have the precision of a NASA launch sequence.
Step 3: Plan the Layout
Spread the tablecloth over a protected surface. If your table is not large enough, use the floor, but make sure it is clean and covered. Place cardboard or a plastic drop cloth underneath to prevent paint from bleeding through. Smooth the fabric, but do not stretch it aggressively. Stretched fabric can shrink back later and distort the pattern.
Use a ruler and washable fabric pencil to mark guide points if your pattern needs spacing. For a border, measure the same distance from the edge all the way around. For an allover repeat, lightly mark a grid. For a random layout, place a few small pieces of painter’s tape where you want larger motifs, then fill in between them as you go.
Planning does not remove creativity; it simply keeps your tablecloth from slowly drifting diagonally across the fabric like it has somewhere else to be.
Step 4: Test the Stamp
Never stamp directly onto the tablecloth without testing first. Apply a thin, even layer of paint to your stamp using a foam brush or brayer. Press it onto scrap fabric, lift straight up, and check the result. If the print looks blotchy, add a little more paint. If it looks smeared or heavy, use less paint. If the edges are fuzzy, the stamp may be overloaded or the fabric may be too textured.
Testing also helps you learn how much pressure to use. Too little pressure creates pale missing spots. Too much pressure squashes the paint outward. Aim for firm, even pressure, then lift the stamp straight up without twisting. Think of it as a handshake with fabric: confident, brief, and not weirdly aggressive.
Step 5: Stamp the Tablecloth
Once your test prints look good, begin stamping the tablecloth. Work from one section to another so you do not accidentally rest your hand in wet paint. Reload the stamp between impressions for consistent color. If you want a faded handmade effect, stamp two or three times before reloading. That creates a charming variation that looks intentional, especially with botanical and block-print designs.
For borders, start at the corners or center points and work outward. This helps keep the pattern balanced. For an allover repeat, begin in the middle and move toward the edges, or start from one corner and follow your marked grid. If your design includes multiple colors, allow the first color to dry before adding the next to avoid smudges.
How to Create a Custom Monogram
A monogram is one of the easiest ways to personalize a stamped tablecloth. Use alphabet stamps, stencil letters, or a hand-carved block. Place the monogram in one corner for a subtle designer look, at the center for a statement, or at each corner for symmetry. Keep the lettering simple if your tablecloth will also have a busy pattern. A single initial surrounded by small leaves or dots can look more elegant than a giant name shouting across the dinner table.
Step 6: Let the Paint Dry Completely
Drying time depends on the paint, fabric, humidity, and thickness of application. Some fabric paints feel dry to the touch within an hour, while others need a full day or longer before curing or heat-setting. Follow the label directions. Do not fold, stack, or iron the tablecloth while the paint is still damp.
Patience is not the most exciting craft supply, but it is one of the most important. If you rush this stage, you can smear the pattern or transfer paint to another section of fabric. Let it rest flat in a safe spot away from pets, toddlers, snack crumbs, and anyone who says, “I just want to see if it’s dry.”
Step 7: Heat-Set or Cure the Design
Many fabric paints and inks require heat-setting to become washable and durable. Others cure over time and do not need heat. Always follow the instructions on your specific paint bottle. If heat-setting is required, place a pressing cloth over the stamped area and use a dry iron on the highest setting safe for the fabric. Do not use steam unless the product directions say to do so. Move the iron carefully from section to section until every painted area has been set.
If you are working with linen or cotton, iron temperature is usually less of a concern than with synthetics, but scorching is still possible. Keep the iron moving and test first. After heat-setting, allow the tablecloth to cool completely before folding or washing.
Step 8: Wash and Care for Your Stamped Tablecloth
After the paint has cured or been heat-set, wash the tablecloth gently. Use cold or warm water, mild detergent, and a gentle cycle. Avoid bleach unless your paint specifically allows it. Line drying is often safest, though some paints tolerate low dryer heat after curing. Iron from the reverse side when needed, or use a pressing cloth over the design.
For food stains, treat the stain carefully instead of scrubbing the printed design like you are trying to erase a bad decision. Blot first, wash gently, and avoid harsh stain removers directly on the paint. A handmade tablecloth should be usable, not locked away like a museum artifact, but gentle care will help it look beautiful longer.
Color Combinations That Look Expensive
One of the secrets to a gorgeous personalized stamped tablecloth is choosing a restrained color palette. Two or three colors are usually enough. Navy on white cotton feels crisp and timeless. Terracotta on natural linen looks warm and earthy. Sage green with soft cream creates a garden-inspired look. Charcoal gray on oatmeal linen feels modern without being cold. Burgundy and dusty pink can feel romantic for weddings or holiday dinners.
If you want a seasonal tablecloth that still works year-round, avoid overly literal colors. For example, instead of bright orange pumpkins for fall, try rust-colored leaves or warm brown block prints. Instead of red and green Christmas motifs, use deep green botanicals with gold accents. This makes the finished piece more versatile and less likely to spend eleven months hiding in a closet.
Common Mistakes to Avoid
Using Too Much Paint
Too much paint causes smudged edges, stiff fabric, and longer drying times. Apply a thin, even coat to the stamp. You can always stamp again, but removing a paint blob from fabric is not a hobby anyone recommends.
Skipping the Test Print
A test print helps you catch problems before they land in the middle of your tablecloth. Test every stamp, every color, and every new technique.
Stamping on Wrinkled Fabric
Wrinkles interrupt the stamp surface and create broken prints. Iron the tablecloth first and smooth each section as you work.
Forgetting About the Table Setting
The tablecloth should complement plates, glasses, flowers, and serving dishes. If the design is very bold, keep the place settings simple. If the design is subtle, you can add more colorful napkins or centerpieces.
Creative Variations for a Truly Personalized Look
Once you understand the basics, experiment with more personal details. Stamp each family member’s initials near their usual seat. Add a small date in one corner for a wedding, anniversary, or first holiday in a new home. Create a border using a child’s simple drawing turned into a stamp. Use herbs from your garden as inspiration for rosemary, basil, or lavender motifs. Make a travel-themed tablecloth with tiny icons representing favorite cities, beaches, mountains, or road trips.
You can also create matching napkins using the same stamp in a smaller layout. A single motif in one corner of each napkin looks polished and intentional. If you are hosting a dinner party, stamp each guest’s first initial on a napkin and use it as a place card. Suddenly, your table looks custom-designed, and all you did was press paint onto fabric. That is the kind of magic we support.
Experience Notes: What Actually Makes the Project Look Better
After making a few stamped table linens, one lesson becomes clear: the simplest designs often look the most professional. It is tempting to use every stamp, every color, and every clever idea in one project, but restraint usually wins. A white cotton tablecloth with navy dots can look chic. A natural linen cloth with one leafy border can look expensive. A soft gray tablecloth with ivory block prints can make a weeknight dinner feel like it has a reservation.
The most reliable method is to start with a small repeat. For example, a half-inch dot stamped every three inches creates a pattern that feels airy instead of crowded. A simple leaf stamped around the border gives the eye a place to rest in the center. If the tablecloth will be covered with plates and serving dishes, remember that the middle design may disappear during dinner. Borders, corners, and edge details often get noticed more than a busy center.
Another helpful experience tip is to mix slightly more paint than you think you need. Matching a custom color halfway through the project can be surprisingly difficult. That “soft clay pink” you mixed may become “confused salmon” on the second attempt. If you are blending acrylic paint with fabric medium, measure the ratio carefully and write it down. A paper plate palette is fine, but a small lidded container is better if the project will take more than one session.
When stamping large tablecloths, comfort matters. Work at a height that does not destroy your back. If you use the floor, take breaks. If you use a dining table, rotate the fabric instead of leaning across wet paint. Keep a damp rag nearby for wiping your fingers, but keep it away from the stamped areas. Accidental water drops can blur fresh paint.
For beginners, pencil eraser dots, cork circles, and simple foam shapes are less intimidating than detailed carved blocks. Detailed stamps are beautiful, but they demand even pressure and careful paint loading. A basic shape repeated confidently usually looks better than an intricate stamp applied unevenly. If you want a hand-blocked look, embrace tiny variations. The goal is not factory perfection; the goal is rhythm, balance, and personality.
One of the best finishing tricks is to style the table before judging the final result. A stamped tablecloth may look plain when lying flat on the floor, but once it is layered with plates, candles, flowers, glassware, and napkins, it comes alive. The pattern becomes background music for the meal. It should support the atmosphere, not compete with the lasagna.
If you are making the tablecloth as a gift, include a small care card. Write the fabric content, paint type, washing instructions, and whether it has been heat-set. This makes the gift feel thoughtful and helps the recipient care for it properly. You can also stamp a tiny symbol or date on the underside of one corner like an artist’s signature. It is a sweet detail that turns a DIY project into a keepsake.
Most importantly, use the tablecloth. Do not save it only for perfect occasions with perfect lighting and perfectly behaved guests. Handmade table linens become more meaningful when they collect memories: birthday cake crumbs, Sunday breakfast, holiday soup, card games, late-night tea, and all the ordinary meals that become special because someone took the time to make the table beautiful.
Conclusion
Creating a gorgeous personalized stamped tablecloth is a satisfying way to turn plain fabric into meaningful home décor. With the right tablecloth, washable fabric paint, a thoughtful layout, and proper curing or heat-setting, you can make a custom piece that looks stylish, feels personal, and works for real meals. Start simple, test before stamping, let the paint dry fully, and care for the finished tablecloth gently. The result is more than a craft projectit is a table-ready conversation starter made by your own hands.
Note: This article is written for web publishing and is based on established best practices for fabric painting, textile stamping, table-linen sizing, and washable DIY home décor projects.