Table of Contents >> Show >> Hide
- What You Need Before You Start
- Step 1: Choose the Style of Pleated Skirt You Want
- Step 2: Take Three Measurements
- Step 3: Calculate Your Fabric Width
- Step 4: Prewash, Dry, and Press Your Fabric
- Step 5: Cut the Skirt Panels and Waistband
- Step 6: Sew the Side Seams
- Step 7: Mark the Pleats
- Step 8: Fold, Pin, and Baste the Pleats
- Step 9: Press the Pleats Like You Mean It
- Step 10: Attach the Waistband
- Step 11: Add the Closure
- Step 12: Finish the Inside of the Waistband
- Step 13: Hang the Skirt and Check the Length
- Step 14: Hem the Pleated Skirt Properly
- Step 15: Final Press and Styling Check
- Common Mistakes to Avoid When Making a Pleated Skirt
- What Fabric Works Best for a Pleated Skirt?
- Real Sewing Experiences: What Making a Pleated Skirt Actually Feels Like
- Conclusion
If you have ever looked at a pleated skirt and thought, “That looks expensive, mysterious, and probably made by a wizard,” I have good news: it is absolutely something you can make at home. Better news: you do not need a fashion degree, a couture atelier, or a dramatic soundtrack. You need fabric, a few basic sewing tools, a little patience, and a healthy respect for your iron.
A pleated skirt is one of those rare sewing projects that feels both classic and practical. It can look preppy, vintage, polished, edgy, school-uniform-inspired, or very “I made this and now I am unstoppable.” Whether you want a crisp midi skirt for everyday wear or a swishy statement piece that makes staircases more fun, this project gets you there.
This guide walks you through how to make a pleated skirt in 15 clear steps. It is written for beginners, but it includes enough technique to help intermediate sewists avoid the usual heartbreaks: uneven pleats, bulky waistbands, weird zipper drama, and hems that behave like they are holding a grudge.
What You Need Before You Start
Gather your supplies before you dive in. For the easiest version of a DIY pleated skirt, use a woven fabric with some body, such as cotton poplin, cotton twill, lightweight suiting, linen blends, or plaid. Slippery satin can look gorgeous, but it also likes to test your character.
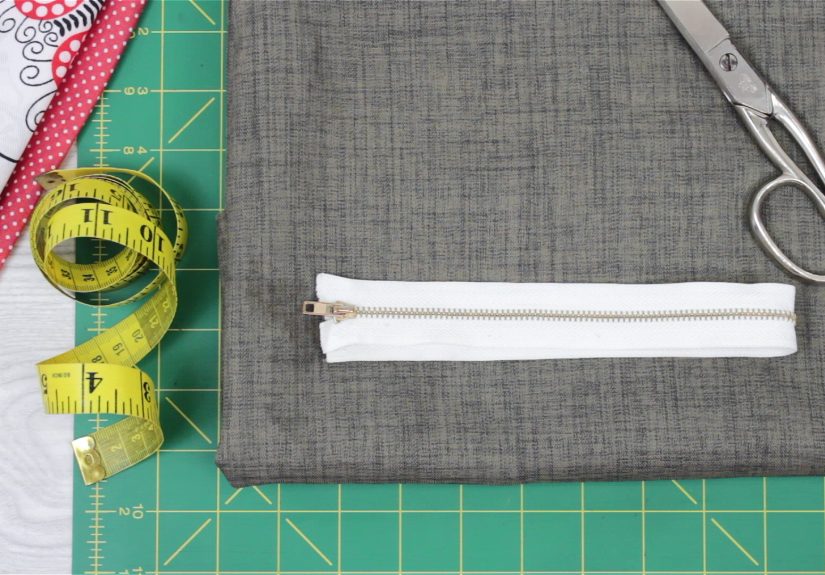
You will need fabric, matching thread, a sewing machine, scissors or a rotary cutter, pins or clips, a measuring tape, a ruler, chalk or a fabric marker, an iron, ironing board, lightweight interfacing for the waistband, and either an invisible zipper or elastic depending on your finish. A seam ripper is also wise because confidence is wonderful, but reality exists.
Step 1: Choose the Style of Pleated Skirt You Want
Before you cut anything, decide what kind of pleats you want. Knife pleats all fold in the same direction and create that classic uniform-style look. Box pleats fold away from each other and feel a little more architectural. Inverted box pleats fold toward each other and create fullness with a cleaner front.
If this is your first pleated skirt tutorial, knife pleats are the simplest place to start. They are easy to mark, easy to press, and forgiving if you are still learning how much volume you want.
Step 2: Take Three Measurements
You only need a few numbers to make a custom skirt: your waist, your hip, and your desired finished length. Measure your waist where you want the waistband to sit. Then measure the fullest part of your hips. Finally, measure from that waist point down to where you want the skirt to end.
Add seam allowance and hem allowance to your length. A simple rule is to add about 1/2 inch at the waist seam and 1 to 2 inches at the bottom for hemming. If you want a deeper hem, add more. If you want a tiny, light hem on a soft fabric, add less.
Step 3: Calculate Your Fabric Width
This is where pleat math enters the chat. Do not panic. For a pleated skirt, the fabric width needs to be much wider than your waist because the folds eat fabric for breakfast.
A good beginner shortcut is to cut a rectangle that is roughly 2 to 3 times your waist measurement, depending on how full you want the skirt. A softer, everyday pleated skirt may look great at 2 times the waist. A fuller skirt with deeper pleats may need closer to 2.5 or 3 times the waist.
If you want to be more exact, decide on your visible pleat width and pleat depth first. For example, if each pleat shows 2 inches on the outside and folds under by 2 inches on each side, each finished pleat uses 6 inches of fabric. Multiply that by the number of pleats you want, then add seam allowances. That is the kind of math that makes a skirt feel tailored instead of accidental.
Step 4: Prewash, Dry, and Press Your Fabric
Yes, you really should do this. If your fabric is washable, wash it the way you plan to wash the finished skirt. Then dry it and press it well. This helps prevent surprise shrinkage later, which is a fancy way of saying, “Why is my beautiful midi skirt now auditioning as a mini?”
Pressing also gives you a flat, honest surface for measuring and cutting. Sewing on wrinkled fabric is like trying to decorate a cake in the back of a moving truck.
Step 5: Cut the Skirt Panels and Waistband
Cut one long rectangle for the skirt body if your fabric is wide enough, or two rectangles if you need front and back panels. Your total width should match the calculation from Step 3, and your length should include seam and hem allowances.
Then cut your waistband. A traditional waistband should be the length of your waist plus overlap and seam allowances. The width should be double the finished waistband width plus seam allowances because it will fold in half. Fuse lightweight interfacing to one waistband piece or to one half of the waistband if you are cutting a single folded strip. This gives the waist structure without turning it into cardboard.
Step 6: Sew the Side Seams
If you are using two skirt panels, sew one side seam completely. Leave the other side partially open if you plan to insert a zipper. Finish the raw edges with a serger, zigzag stitch, or another seam finish that works for your machine and fabric.
If you are making a simple elastic-waist version, you can sew both side seams now. If you are making a skirt with a side or back zipper, decide where the zipper will go and keep that opening unsewn above the zipper point.
Step 7: Mark the Pleats
Lay the skirt fabric flat and mark your pleat lines across the top edge. Accuracy matters here, so slow down. Use a ruler and chalk or a washable marker. Mark the fold lines and placement lines, not just random hopeful dashes.
For knife pleats, each pleat has one fold line and one placement line, all moving in the same direction. For box pleats, the folds mirror each other. It helps to mark the center front and center back first, then work outward so the pleats stay balanced and the skirt does not look like it got dressed in a hurry.
Step 8: Fold, Pin, and Baste the Pleats
Now fold each pleat along the marked lines and pin it in place. Check the waist measurement as you go. The top edge of the skirt should reduce to match your waistband length, minus seam allowances. This is the moment when your rectangle starts becoming an actual garment instead of “craft supplies with ambition.”
Once the pleats are even, baste across the top edge to hold them in place. You can also baste vertically a few inches down from the waist if your fabric is shifty or if you want extra control before attaching the waistband.
Step 9: Press the Pleats Like You Mean It
A pleated skirt lives or dies by pressing. Set the pleats with steam and a press cloth if your fabric is delicate. Press each fold carefully without stretching the fabric underneath. Think “press and lift,” not “scrub the iron around like you are polishing a pirate coin.”
If you want crisp, long-lasting pleats, you can even baste them deeper down the skirt before final construction, then remove that basting after everything is sewn and pressed.
Step 10: Attach the Waistband
Pin the pleated top edge to the interfaced waistband, matching centers, side seams, and any important markings. Sew the waistband to the skirt with the right sides together. Press the seam allowance up toward the waistband.
Then fold the waistband in half lengthwise, wrong sides together, and press the fold. Turn under the inner raw edge so it will neatly cover the waist seam on the inside. At this point, the skirt suddenly looks very official, which is a terrific morale boost.
Step 11: Add the Closure
If you are making a polished skirt, install an invisible zipper in the open side seam or center back. Invisible zippers are popular for pleated skirts because they keep the focus on the folds instead of shouting, “HELLO, I AM HARDWARE.” Sew the zipper carefully, then finish the rest of the seam below it.
If you prefer a beginner-friendlier option, you can make an elastic waistband pleated skirt instead. In that version, create a casing at the top, thread the elastic through, and distribute the fullness evenly. It is not as tailored, but it is comfortable, fast, and very forgiving after lunch.
Step 12: Finish the Inside of the Waistband
Turn the waistband to the inside and pin the folded edge over the waist seam. You can stitch in the ditch from the right side for a neat machine finish, or hand-stitch the inside edge with a slip stitch if you want a cleaner couture-style result.
Do not rush this part. A tidy waistband is one of the details that makes a handmade skirt look expensive rather than homemade in the “my cat helped” sense.
Step 13: Hang the Skirt and Check the Length
Before hemming, let the skirt hang for a bit if your fabric has any drape or bias movement. Then try it on and check the length. Measure from the waist down at several points to make sure the hem is even. Mark the finished hemline carefully.
This step matters more than people think. A pleated skirt can look perfectly even on the table and mysteriously uneven on an actual human body, which feels rude but is common.
Step 14: Hem the Pleated Skirt Properly
Hemming a pleated skirt is not quite the same as hemming a plain rectangle. If you simply fold up the hem and stitch, the lower edge can become bulky and refuse to lie flat. The better approach is to open or flatten the pleats near the hem, mark and sew the hem, and then re-press the pleats into place.
For a lightweight skirt, a narrow double-fold hem works well. For a more tailored skirt, you can use a hand-sewn blind hem. Press carefully after hemming so the pleats continue cleanly all the way to the bottom.
Step 15: Final Press and Styling Check
Give the whole skirt a final press from waistband to hem. Remove visible basting stitches, trim stray threads, and make sure your pleats all face the right direction. That last point sounds obvious, but every sewist has had a moment where one rebellious pleat decides it is an independent artist.
Try the skirt on with the shoes you will actually wear. A pleated midi can look very different with sneakers, loafers, boots, or heels. Congratulations: you now know how to sew a pleated skirt without surrendering halfway through.
Common Mistakes to Avoid When Making a Pleated Skirt
The biggest mistake is using fabric that is either too stiff or too limp for the style you want. Crisp cottons make defined pleats. Fabrics with more drape make softer folds. Another common issue is inaccurate marking. A difference of even a quarter inch can throw off the entire waistline by the time you reach the final pleat.
Skipping interfacing is another classic mistake. Without support, the waistband may stretch, wrinkle, or collapse. Poor pressing can also sabotage a beautiful skirt. Pleats need shaping and heat; they do not arrange themselves out of politeness.
What Fabric Works Best for a Pleated Skirt?
If you want a beginner-friendly project, choose cotton poplin, shirting, chambray, broadcloth, lightweight wool blends, or plaid suiting. These fabrics press well and hold shape. If you want more flow, try rayon blends or soft polyester, but be ready for more pinning and more pressing.
Plaid is especially satisfying because the lines help you keep pleats straight, and the finished skirt has major classic-schoolgirl energy in the best way. Satin and chiffon can also create stunning pleated skirts, but they are better once you have a little more confidence and fewer trust issues.
Real Sewing Experiences: What Making a Pleated Skirt Actually Feels Like
The first time I made a pleated skirt, I was wildly optimistic. I had fabric, matching thread, a fresh needle, and the kind of confidence that usually appears right before a very educational mistake. I assumed the skirt would be “basically just a rectangle.” That sentence should be printed on a warning label and pinned to every beginner’s ironing board.
What I learned almost immediately is that a pleated skirt is not difficult in a dramatic, impossible way. It is difficult in a quiet, sneaky way. The kind of project that looks simple until you realize each pleat has opinions. One fold behaves beautifully, the next shifts by an eighth of an inch, and suddenly the waistband is no longer matching the waist. You stare at it. It stares back. Character development begins.
But that is also what makes this project satisfying. A pleated skirt teaches patience faster than a motivational poster ever could. You learn to measure twice, mark carefully, and check your work before charging ahead like a caffeinated raccoon with scissors. You also learn that pressing is not optional. It is the secret handshake of good sewing. The moment I stopped treating the iron like a side character and started treating it like the co-star, everything improved.
I also discovered that fabric choice changes the entire mood of the experience. Cotton felt cooperative. It listened. It stayed where I pinned it. A slippery synthetic, on the other hand, behaved like it had a legal right to slide off the table and onto the floor every three minutes. Beautiful? Yes. Respectful? Absolutely not. After that, I understood why experienced sewists keep saying to start with stable woven fabric. They are not trying to ruin anyone’s fun. They are trying to protect your weekend.
Another memorable lesson was the hem. I once folded up the bottom of a pleated skirt the way I would hem almost anything else and then wondered why it looked bulky and grumpy. That was the day I learned pleated hems need a little strategy. Flattening the lower section first, then hemming, then re-pressing the pleats made all the difference. It felt like discovering the secret level in a video game, except the reward was a skirt that finally hung correctly.
The best part, though, was wearing the finished piece. Handmade pleated skirts have movement. They swish. They catch the light. They make you want to walk slightly faster just to see them work. And because you made it yourself, you notice every detail: the line of the waistband, the way the pleats open when you sit, the hem that finally behaves. It is one of those projects that builds skill and confidence at the same time. By the end, you do not just have a skirt. You have proof that with a ruler, an iron, and enough determination, you can absolutely make something classic and wearable from a pile of fabric and a mildly unreasonable amount of pins.
Conclusion
Learning how to make a pleated skirt is one of the most useful sewing skills you can add to your wardrobe-building toolkit. It teaches measuring, marking, pressing, waistband construction, and careful hemming in one stylish project. More importantly, it leaves you with a garment you will actually want to wear.
Start with a simple woven fabric, take your time with the pleats, and do not skip the pressing. Whether you choose a tailored waistband and invisible zipper or a more relaxed elastic finish, the result can look polished, personal, and far more expensive than it really was. In other words, it is the kind of sewing project that makes you feel clever every time you put it on.