Table of Contents >> Show >> Hide
- Introduction: The Tiny Skin Seal That Runs the Nail Show
- What Are Cuticles, and Why Should You Be Gentle?
- Tools You Need Before You Start
- How to Push Back Your Cuticles: 14 Steps
- Step 1: Check Your Nails First
- Step 2: Wash Your Hands
- Step 3: Clean Your Tools
- Step 4: Remove Old Polish Carefully
- Step 5: Trim and File the Nail Edge
- Step 6: Soften the Cuticles
- Step 7: Apply Cuticle Oil or Cream
- Step 8: Choose the Right Pusher
- Step 9: Hold the Tool at a Low Angle
- Step 10: Push Gently in Small Motions
- Step 11: Work Around the Nail Corners Carefully
- Step 12: Wipe Away Loose Skin, Do Not Cut the Cuticle
- Step 13: Rinse, Dry, and Moisturize Again
- Step 14: Finish With Polish or Leave Nails Bare
- Common Mistakes to Avoid
- How Often Should You Push Back Cuticles?
- Best Cuticle Care Tips for Healthy Nails
- When Not to Push Back Your Cuticles
- Signs You Should Get Professional Help
- Experience Section: What Real Cuticle Care Feels Like in Everyday Life
- Conclusion: Gentle Cuticle Care Wins Every Time
Note: This article is for general nail-care education, not medical diagnosis. If the skin around your nail is painful, swollen, red, warm, bleeding, draining pus, or not healing, skip the at-home manicure moment and contact a licensed healthcare professional. Your cuticles may be tiny, but they do not enjoy being treated like an overgrown hedge.
Introduction: The Tiny Skin Seal That Runs the Nail Show
Learning how to push back your cuticles sounds simple enough: soften, nudge, moisturize, admire. But healthy cuticle care is less about “removing” something and more about respecting a small protective barrier that works harder than it gets credit for. The cuticle helps seal the space between your skin and nail plate, reducing the chance that bacteria, yeast, fungi, and everyday grime can sneak into the nail fold and start drama.
That is why dermatology guidance generally recommends leaving cuticles alone when possible and never cutting them aggressively. Still, many people like the tidy look of a gentle at-home manicure. The safest approach is not to clip, rip, scrape, or force the cuticle. Instead, you soften the area, gently push back only the loose, softened edge, and finish with hydration. Think “polite suggestion,” not “demolition project.”
This guide explains how to push back your cuticles in 14 careful steps, with practical examples, common mistakes, and a longer real-life experience section at the end. Whether you are preparing for polish, trying to reduce hangnails, or simply giving your hands a small spa day without turning the bathroom into a salon crime scene, these cuticle care tips will help you keep your nails neat, clean, and comfortable.
What Are Cuticles, and Why Should You Be Gentle?
Your cuticle is the thin layer of skin that sits at the base of the nail and helps protect the nail matrix, where new nail cells form. When this area is damaged, germs can enter more easily, which may lead to irritation or infection around the nail. That infection is often called paronychia, and it can cause redness, swelling, tenderness, and sometimes pus. Not exactly the glossy manicure finish anyone ordered.
The goal of pushing back cuticles is to create a cleaner-looking nail surface while keeping the protective seal as intact as possible. You are not trying to erase your cuticles from existence. They are not unwanted guests; they are security guards wearing skin-colored uniforms.
Tools You Need Before You Start
Before you push back cuticles, gather everything first. A calm setup prevents you from improvising with questionable items like paper clips, tweezers, or that mystery tool from the bottom of the drawer. Your nails deserve better, and frankly, so does the drawer.
Basic Supplies
- A bowl of warm water
- Mild soap
- A clean towel
- Cuticle oil or a rich hand cream
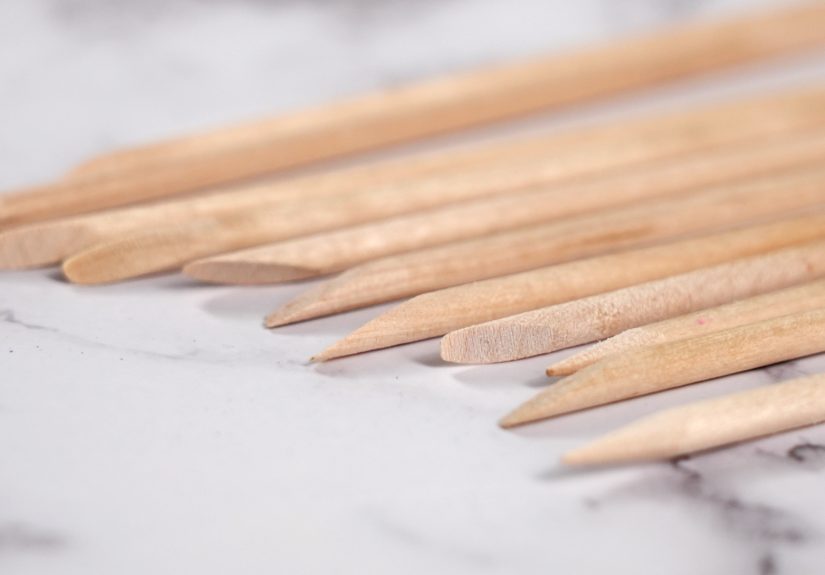
- A wooden orange stick or a rubber-tipped cuticle pusher
- Nail clippers for hangnails only
- A nail file
- Rubbing alcohol or soap and water for cleaning tools
Optional Supplies
- Cuticle remover gel or cream, used exactly as directed
- A soft nail brush
- Base coat and polish
- Petroleum jelly for very dry skin around the nails
How to Push Back Your Cuticles: 14 Steps
Step 1: Check Your Nails First
Before you touch a tool, inspect your nails and the skin around them. Look for redness, swelling, soreness, cuts, bleeding, lifting nails, greenish discoloration, or pus. If anything looks irritated or infected, do not push back the cuticle. Give the manicure a rain check and get professional advice if symptoms are concerning. Pushing irritated skin can make a small problem louder, like handing a microphone to a toddler.
Step 2: Wash Your Hands
Wash your hands with mild soap and warm water. This removes dirt, oil, and germs before you start working near the nail fold. Clean hands are the easiest safety step in cuticle care, and they also help your tools glide more smoothly. Dry your hands with a clean towel, but do not scrub the cuticles harshly.
Step 3: Clean Your Tools
Wash reusable tools with soap and water, then wipe them with rubbing alcohol if appropriate for the material. If you use a wooden orange stick, make sure it is clean and smooth. Avoid sharing nail tools with other people unless they have been properly sanitized. Nail tools are not friendship bracelets; sharing is not always caring.
Step 4: Remove Old Polish Carefully
If you are wearing nail polish, remove it gently. Use a remover that suits your nails, and avoid soaking your fingertips in harsh remover for too long. If your nails are already dry or brittle, choose a gentler remover and moisturize afterward. Polish residue can hide the cuticle line, so starting with a clean nail makes the process easier.
Step 5: Trim and File the Nail Edge
Trim nails only if needed, then file in one direction to smooth the edge. Avoid sawing back and forth aggressively because that can weaken the nail tip. Shaping the nail before working on the cuticle helps you see the full nail clearly and reduces the temptation to overwork the base of the nail later.
Step 6: Soften the Cuticles
Soak your fingertips in warm, not hot, water for about five to ten minutes. You can add a small amount of mild soap if your hands need extra cleaning. Another easy option is to push back cuticles after a shower, when the skin is naturally softened. Softened cuticles move more easily, which means less pressure and less risk of injury.
Step 7: Apply Cuticle Oil or Cream
After soaking, pat your hands dry and apply cuticle oil or a rich cream around each nail. Let it sit for a minute. Hydration makes the skin more flexible and reduces the chance of tiny cracks. Jojoba oil, vitamin E oil, mineral oil, and fragrance-free creams are common options. If your skin is sensitive, avoid heavily scented products that may irritate the nail fold.
Step 8: Choose the Right Pusher
Use a wooden orange stick or a rubber-tipped cuticle pusher. Metal pushers can work, but they require a very light hand and are less forgiving. For most at-home nail care, softer tools are smarter. The best cuticle pusher is one that lets you guide the skin gently without scraping the nail plate or digging under the fold.
Step 9: Hold the Tool at a Low Angle
Place the rounded end of the tool at the base of the nail. Hold it at a low angle, almost flat against the nail surface. This position helps you guide the softened cuticle backward without poking downward into the skin. If the tool feels sharp, rough, or uncomfortable, stop and switch tools.
Step 10: Push Gently in Small Motions
Using light pressure, push the cuticle back in tiny, controlled motions. Start at the center of the nail base, then move toward each side. Do not force skin that does not want to move. A healthy cuticle should never feel like a wrestling match. If you need strength, you are doing too much.
Step 11: Work Around the Nail Corners Carefully
The sidewalls of the nail are easy to irritate, so slow down near the corners. Use the tool only on softened, loose skin. Do not dig into the sides of the nail, and do not try to “clean out” deep spaces. That area is delicate and can become sore quickly. Gentle grooming is the goal; excavation belongs at archaeological sites.
Step 12: Wipe Away Loose Skin, Do Not Cut the Cuticle
Use a damp towel or cotton pad to wipe away loosened residue. If you have a hangnail, clip only the loose, dead piece with clean nail clippers. Do not cut the living cuticle or trim the entire seal around the nail. Cutting cuticles can create tiny openings where germs may enter, increasing the risk of tenderness and infection.
Step 13: Rinse, Dry, and Moisturize Again
Rinse your hands to remove any leftover oil, soap, or cuticle remover. Dry thoroughly, especially around the nail folds. Then apply another thin layer of cuticle oil or hand cream. Moisture is one of the most useful cuticle care habits because dry skin is more likely to crack, peel, and form hangnails.
Step 14: Finish With Polish or Leave Nails Bare
If you plan to paint your nails, wipe the nail plate gently with a clean pad first so polish can adhere. Keep moisturizer on the surrounding skin, but remove excess oil from the nail surface. Apply base coat, polish, and top coat as desired. If you prefer bare nails, congratulations: you are finished, hydrated, and unlikely to smudge anything while reaching for snacks.
Common Mistakes to Avoid
Cutting Too Much
The biggest mistake is cutting the cuticle instead of gently pushing it back. A neatly trimmed manicure might look nice for a day, but damaged cuticles can lead to redness, peeling, or infection. If a salon technician reaches for the cuticle nippers, it is okay to ask for gentle pushing only.
Pushing Dry Cuticles
Dry cuticles are stubborn. Pushing them without soaking or moisturizing increases friction and can cause tiny tears. Always soften first. Your cuticles should be relaxed, not ambushed.
Using Dirty Tools
Unclean tools can transfer germs to the nail fold. Clean tools before every manicure, store them in a dry place, and replace disposable items regularly.
Ignoring Pain
Pain is not part of a good manicure. If pushing back your cuticles hurts, stop. Healthy cuticle care should feel mild and comfortable. Soreness afterward means you may have used too much pressure or worked on irritated skin.
How Often Should You Push Back Cuticles?
For most people, once every one to two weeks is enough. Daily pushing is unnecessary and may irritate the nail fold. Daily moisturizing, however, is a great idea. Keep cuticle oil near your bed, desk, or sink so you can apply it after handwashing or before sleep. This tiny habit can make nails look smoother with almost no effort, which is the kind of beauty math everyone can support.
Best Cuticle Care Tips for Healthy Nails
Moisturize After Washing Hands
Frequent handwashing, cleaning products, cold weather, and dry indoor air can all dry out the skin around your nails. Apply hand cream after washing when possible. At night, use a thicker cream or ointment around the nail folds for extra support.
Wear Gloves for Wet or Chemical Work
Dishwashing, cleaning, gardening, and repeated water exposure can weaken the skin barrier. Wear gloves when your hands will be wet for a long time or exposed to detergents. Your cuticles will thank you quietly, because cuticles are professional and do not make speeches.
Do Not Bite or Pick
Nail biting and cuticle picking can create small openings in the skin. If you struggle with picking, keep nails short, use a bitter nail product if appropriate, or apply cuticle oil when you feel the urge. Replacing the habit with care can be more effective than simply telling yourself to stop.
Be Careful With Gel, Acrylic, and Artificial Nails
Gel polish, acrylics, and extensions can look beautiful, but removal and repeated filing may stress the nail plate and surrounding skin. If you use these services, choose a licensed salon with clean tools, avoid aggressive cuticle removal, and give your nails breaks when they feel thin, sore, or brittle.
When Not to Push Back Your Cuticles
Skip cuticle pushing if you have signs of infection, cracked skin, eczema flare-ups around the nails, psoriasis affecting the nails, diabetes-related circulation concerns, or a recent injury near the nail fold. Also avoid pushing cuticles before activities that expose hands to dirt, chemicals, or prolonged moisture. The goal is healthy nails, not creating a VIP entrance for germs.
Signs You Should Get Professional Help
Contact a healthcare professional if the skin around your nail becomes increasingly painful, red, swollen, warm, or filled with pus. Also get help if the nail changes color, lifts from the nail bed, develops a strong odor, or does not improve after basic care. People with diabetes, poor circulation, or immune system concerns should be especially cautious with nail problems.
Experience Section: What Real Cuticle Care Feels Like in Everyday Life
The first time many people try to push back their cuticles, they approach the task with the confidence of a professional nail tech and the technique of someone opening a stubborn jar. They soak their hands for thirty seconds, grab the nearest tool, push too hard, and then wonder why the skin feels tender the next day. The lesson arrives quickly: cuticle care is not about force. It is about patience.
A better experience starts after a warm shower. The skin is already soft, the nails are clean, and the whole process feels less like a chore. You place a towel on the table, add a drop of cuticle oil to each nail, and wait a minute while pretending you are in a luxury spa instead of sitting beside a laundry basket. Then you use a wooden stick and gently guide the softened edge backward. The movement is small. Almost boring. That is exactly the point.
People with dry hands often notice the biggest improvement when they stop focusing on pushing and start focusing on moisturizing. A nightly routine can make a surprising difference. Apply hand cream, massage a little oil into the nail folds, and let the product sit while you read, watch a show, or scroll through your phone with the seriousness of a detective investigating celebrity pets. After a week, the skin around the nails may look smoother, hangnails may appear less often, and pushing the cuticles back becomes easier because the area is not dry and tight.
Another common experience is realizing that less looks better. Overworked cuticles can look red and uneven, while lightly maintained cuticles look clean and natural. If you polish your nails, a gentle push can help create a neater polish line. If you keep nails bare, the same routine can make hands look more groomed without needing color. It is the nail-care version of making the bed: simple, small, and oddly satisfying.
Salon visits teach useful lessons, too. A good technician will work gently, use clean tools, and respect your comfort. If something hurts, speak up immediately. You can say, “Please do not cut my cuticles; just gently push them back.” That is not being difficult. That is being the responsible adult in the room, even if you still choose glitter polish named something like “Space Mermaid Brunch.”
People who cook, clean, play sports, garden, wash dishes, or use hand sanitizer often may need more hydration than they expect. Cuticle oil in a purse, backpack, desk drawer, or bedside table makes the habit easier. The best product is not always the fanciest one; it is the one you actually use. A tiny bottle of oil used three times a week beats an expensive jar sitting untouched like a museum artifact.
The most important experience-based tip is to watch how your skin responds. If your cuticles look calmer, smoother, and more comfortable, your routine is working. If they become sore, shiny, swollen, or ragged, scale back. Healthy cuticle care should leave your nails looking tidy and your skin feeling normal. No burning, no throbbing, no heroic suffering required. Beauty routines should not need a dramatic soundtrack.
Conclusion: Gentle Cuticle Care Wins Every Time
Pushing back your cuticles safely is all about restraint. Soften the skin, use a clean and gentle tool, apply light pressure, avoid cutting the living cuticle, and moisturize afterward. The cleaner look is nice, but the real prize is keeping the nail barrier healthy. When in doubt, do less, hydrate more, and remember that cuticles are not the enemy. They are tiny bodyguards with a tough job and very little applause.
With these 14 steps, you can create a neat at-home manicure routine that protects your nails while giving them a polished, healthy appearance. Be patient, stay gentle, and save the heavy-duty tools for things that actually need them, like assembling furniture or opening impossible snack packaging.