Table of Contents >> Show >> Hide
- Why 1970s Stone Fireplaces Look So Dated
- 1. Deep Clean the Stone Before You Do Anything Else
- 2. Whitewash the Stone for a Softer, Brighter Look
- 3. Try Limewash for an Old-World Finish
- 4. Use a German Smear Technique for Rustic Character
- 5. Paint the Surrounding Wall a Strategic Color
- 6. Install a Floating Wood Mantel
- 7. Replace Brass Fireplace Doors and Screens
- 8. Add a Hearth Cap or Update the Hearth Surface
- 9. Frame the Fireplace with Built-Ins
- 10. Add Shiplap, Paneling, or Drywall Above the Mantel
- 11. Style the Mantel and Hearth Like a Designer
- 12. Update Lighting Around the Fireplace
- Bonus Planning Tips Before You Start
- Real-Life Experience: What Actually Works When Updating a 1970s Stone Fireplace
- Conclusion
There is a special kind of confidence in a 1970s stone fireplace. It does not politely sit in the corner. It arrives wearing earth tones, rough mortar, oversized rocks, and the energy of a mountain lodge that may or may not have hosted a fondue party. The good news? You do not have to demolish it, drain your renovation budget, or pretend “rustic cave wall” is your lifelong design dream.
Updating a 1970s stone fireplace is one of the most satisfying DIY home projects because the fireplace already has what designers love: texture, scale, and personality. The trick is not always to hide the stone. Sometimes the smartest move is to clean it, soften it, frame it, balance it, or style the room around it so the whole wall feels intentional instead of inherited from a shag-carpet time capsule.
This guide covers 12 creative DIY ideas for giving an outdated stone fireplace a fresh, modern look. Some projects are beginner-friendly, like styling the mantel or painting the surrounding wall. Others, such as limewashing, installing a floating mantel, or adding a hearth cap, require more patience and prep. Either way, you can turn a heavy 1970s fireplace into a focal point that feels warm, current, and charming without losing the character that made it worth saving.
Note: Before making cosmetic changes, inspect the fireplace carefully. If it is wood-burning, schedule a professional chimney inspection and cleaning, especially if you recently bought the home or have not used the fireplace in a while. Keep combustible decor, furniture, curtains, and wood trim at safe distances, and always follow local building codes for mantel height, hearth materials, and fireplace clearance.
Why 1970s Stone Fireplaces Look So Dated
Most 1970s stone fireplaces were designed to feel earthy, solid, and natural. That was not a bad idea. In fact, many modern homes are circling back to organic materials, textured walls, and cozy gathering spaces. The problem is usually not the stone itself. The problem is the combination of dark mortar, bulky proportions, brass fireplace doors, orange-toned paneling, low ceilings, and wall colors that make the whole room feel like it needs a lava lamp permit.
Before choosing a DIY fireplace makeover, identify what bothers you most. Is the stone too dark? Is the mantel too chunky? Does the hearth take up too much floor space? Are the brass doors stealing the show in the worst possible way? Once you know the real issue, you can choose the right update instead of throwing paint at the wall and hoping for emotional closure.
1. Deep Clean the Stone Before You Do Anything Else
Best for: Every fireplace makeover, even if you plan to paint or limewash.
Old stone fireplaces collect soot, dust, candle residue, pet hair, and mystery grime from several decades of family life. Cleaning may not sound glamorous, but it can change the color of the stone more than you expect. Start with a vacuum and a brush attachment to remove dust from crevices. Then use warm water, a mild detergent, and a stiff nylon brush. Avoid harsh acids unless the product is specifically rated for your stone type.
For soot near the firebox, use a fireplace-safe cleaner and test a small hidden spot first. Natural stone can be porous, and aggressive scrubbing may leave uneven patches. Let the surface dry completely before applying any paint, limewash, mortar, sealer, or adhesive. Moisture trapped under finishes can cause peeling, cloudy marks, or poor adhesion.
2. Whitewash the Stone for a Softer, Brighter Look
Best for: Dark, heavy stone fireplaces that make the room feel smaller.
Whitewashing is one of the most popular ways to update a 1970s stone fireplace because it brightens the stone while letting some natural variation show through. Instead of creating a flat painted surface, whitewash gives the fireplace a soft, layered finish. Think “cozy modern cottage,” not “someone spilled primer and called it a design movement.”
To whitewash stone, mix latex paint with water until you get a translucent consistency. Common starting ratios range from one part paint to one part water for stronger coverage, or one part paint to two parts water for a lighter wash. Apply it with a brush, working it into crevices, then blot with a rag before it dries. The goal is to build color gradually. You can always add more, but removing too much coverage after it cures is a less delightful weekend activity.
Choose warm white, soft cream, greige, or pale stone gray instead of stark white if your room has warm wood floors or beige walls. A too-bright white can make natural stone look chalky and disconnected from the rest of the space.
3. Try Limewash for an Old-World Finish
Best for: Homeowners who want texture, movement, and a breathable mineral finish.
Limewash is different from standard paint. It creates a mineral-based, matte finish that can look beautifully aged when applied over masonry. On a 1970s fireplace, limewash can soften busy stone colors and give the whole wall a European cottage feel. It works especially well when the stone has strong brown, orange, or red undertones that clash with your current furniture.
Apply limewash in thin coats, using a masonry brush and working in random, natural strokes. Keep a spray bottle nearby to mist areas and blend edges. The finish should look organic, not like a perfectly frosted cake. For a more dimensional result, use two related tones, such as warm white and light taupe, so the stone keeps depth.
Limewash is not ideal for every stone type or every fireplace condition, so test first. If your stone is sealed, glossy, crumbling, or unusually smooth, the finish may not bond properly without additional prep.
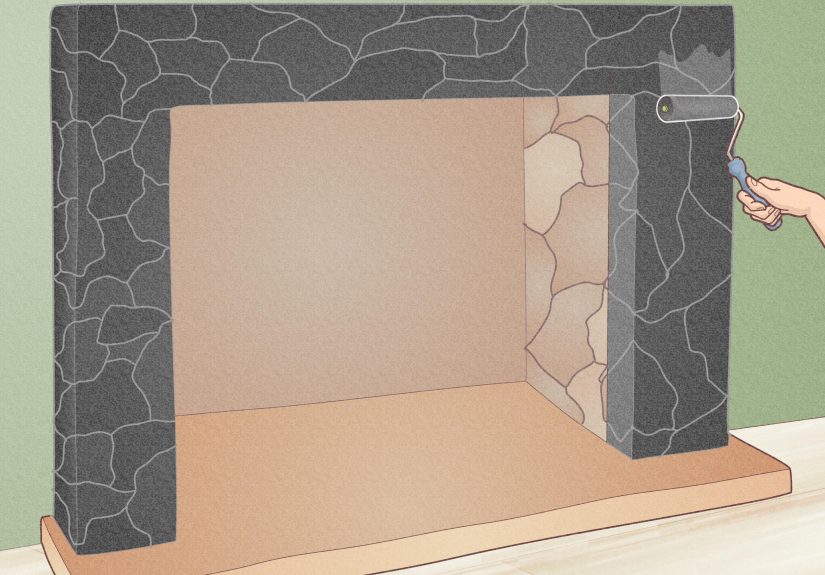
4. Use a German Smear Technique for Rustic Character
Best for: Fireplaces with deep mortar joints, irregular stone, or a farmhouse-style room.
German smear is often used on brick, but it can also work on some stone fireplaces when applied carefully. Instead of thinning paint, you spread mortar or a mortar-like product over the surface, then wipe portions away so the original stone peeks through. The result is rustic, imperfect, and full of texture.
On a 1970s stone fireplace, German smear can tone down strong color variation while preserving the rugged shape of the stones. It is especially useful if the mortar joints are dark and visually choppy. The smear creates a more unified look, which can make a massive fireplace feel less chaotic.
The key is restraint. Do not bury every rock under thick mortar unless your goal is “ancient castle wall discovered behind a suburban sectional.” Work in small sections, step back often, and wipe more than you think you need to at first. Once the mortar sets, the look is not easy to reverse.
5. Paint the Surrounding Wall a Strategic Color
Best for: Homeowners who like the stone but hate how it dominates the room.
Sometimes the fireplace is not the villain. Sometimes the wall color is making it look guilty. A 1970s stone fireplace surrounded by builder beige, mustard, or dark wood paneling can feel heavy because there is no visual balance. Painting the surrounding walls can instantly modernize the fireplace without touching the stone.
If the stone has warm brown or tan tones, try creamy white, mushroom, warm gray, olive, or a soft clay color. If the stone is cooler gray, consider crisp white, charcoal, slate blue, or muted sage. For a bold update, paint the entire fireplace wall a deep neutral like charcoal or espresso so the stone blends into a moody, modern backdrop.
This is a low-risk DIY update because wall paint is easier to change than stone finishes. It is also a smart first step if you are unsure whether you want to paint or whitewash the fireplace itself.
6. Install a Floating Wood Mantel
Best for: Adding warmth, structure, and a modern horizontal line.
A floating mantel can completely change the proportions of a 1970s stone fireplace. Many older stone fireplaces either have no mantel or have a heavy slab that feels more “frontier saloon” than “inviting living room.” A clean wood beam introduces warmth and gives the eye a place to rest.
For a DIY-friendly version, build a hollow box mantel from pine, poplar, oak plywood, or reclaimed boards. A hollow mantel looks substantial but weighs much less than a solid beam. Stain it in a tone that relates to your flooring, ceiling beams, or furniture legs. White oak, walnut, and medium brown stains tend to look timeless. Avoid orange stain unless you are trying to make the fireplace and the 1970s shake hands again.
Installation matters. A mantel must be securely attached to framing, masonry anchors, or a proper cleat system. It also must meet clearance requirements for combustible materials. If you are unsure about spacing from the firebox opening, ask a local fireplace professional before drilling into stone.
7. Replace Brass Fireplace Doors and Screens
Best for: Fast visual improvement with minimal construction.
Brass fireplace doors were everywhere in older homes, and they can instantly date a room. Replacing them with black steel, matte bronze, or simple glass doors can make a dramatic difference. If the existing doors are in good condition but the brass finish is the problem, consider removing them, cleaning them thoroughly, and using high-heat spray paint rated for fireplace use.
A simple black fireplace screen is another easy upgrade. It hides a dark firebox, adds clean lines, and makes the fireplace look finished even when no fire is burning. Choose a screen that fits the scale of the fireplace. A tiny screen in front of a huge stone wall looks like a postage stamp trying to guard a castle.
8. Add a Hearth Cap or Update the Hearth Surface
Best for: Fireplaces with bulky, uneven, or discolored hearths.
The hearth often gives away the age of a 1970s fireplace. It may be too tall, too wide, too dark, or made from the same rough stone as the wall. If removing it is not practical, consider adding a hearth cap. A slab of honed granite, limestone, slate, concrete, or porcelain tile can create a cleaner line while leaving the original structure intact.
A dark slate cap can make the fireplace feel modern and grounded. A light limestone or concrete-look surface can brighten the room. Large-format porcelain tile is another practical option because it comes in many stone-like finishes and is easier to clean than rough masonry.
Use materials rated for hearth applications, and avoid combustible finishes near the firebox. If the hearth is cracked, loose, or uneven, repair the structure before adding a decorative cap.
9. Frame the Fireplace with Built-Ins
Best for: Large stone fireplaces that overpower a blank wall.
A massive stone fireplace can feel out of place when it stands alone on a wall with no supporting elements. Built-ins solve that problem by giving the fireplace architectural context. You can install bookcases, lower cabinets, floating shelves, or a combination of closed storage and display space on both sides.
For a DIY approach, use ready-made cabinets as bases and build simple open shelving above them. Paint the built-ins the same color as the wall for a calm look, or use a contrasting color like deep green, navy, or warm charcoal for a custom feel. The shelves help balance the rough stone with books, pottery, framed photos, and baskets.
Keep proportions in mind. If the fireplace is very wide, skinny shelves may look nervous. If the room is small, closed lower cabinets with open shelves above can add storage without crowding the space.
10. Add Shiplap, Paneling, or Drywall Above the Mantel
Best for: Floor-to-ceiling stone fireplaces that feel too busy.
If your stone runs from the hearth all the way to the ceiling, you may not need to cover the whole fireplace. Sometimes updating only the upper portion creates a cleaner, more modern composition. Adding drywall, vertical paneling, shiplap, or simple trim above the mantel can break up the stone and create space for artwork, a mirror, or a TV.
Vertical paneling can make low ceilings feel taller. Smooth drywall gives the fireplace a more minimalist look. Shiplap can work well in cottage, coastal, or farmhouse rooms, but use it carefully. Too much shiplap around rough stone can feel like two design trends arguing in the living room.
This project requires attention to fire safety and ventilation. Materials near the firebox must comply with code, and you should never cover vents, heat outlets, or required access panels.
11. Style the Mantel and Hearth Like a Designer
Best for: A quick update with no permanent changes.
Decor can modernize a 1970s stone fireplace more than people expect. The secret is scale. A big stone fireplace needs decor with enough size to stand up to it. One tiny framed print and two lonely candlesticks will not do the job.
Try a large round mirror above the mantel to soften the hard edges of the stone. Use oversized artwork for a modern focal point. Add a tall vase with branches on one side and a stack of books or a low bowl on the other. Asymmetry often looks more relaxed than perfectly matching pairs.
On the hearth, use a woven basket for blankets, a simple log holder, or a sculptural fireplace tool set. Choose fewer, larger pieces instead of many small objects. The stone already has visual texture, so your decor should calm the scene rather than start a tiny accessories parade.
12. Update Lighting Around the Fireplace
Best for: Making stone texture look intentional instead of gloomy.
Lighting can turn a rough 1970s fireplace from dark and bulky into dramatic and architectural. Add wall sconces on either side if there is room and wiring access. Picture lights above artwork, recessed ceiling lights, or plug-in uplights can highlight the stone texture and make the fireplace glow in the evening.
Warm white bulbs are usually more flattering than cool blue-white bulbs. Cool lighting can make beige stone look gray-green and can make mortar shadows harsher. If you have built-ins, add LED strip lighting under shelves to balance the fireplace with soft ambient light.
This is also a good time to rethink the room layout. Pull seating toward the fireplace, add a rug, and create a conversation zone. A fireplace looks more modern when the furniture acknowledges it instead of fleeing to the far wall.
Bonus Planning Tips Before You Start
Choose a Direction Before Buying Supplies
Fireplace makeovers go sideways when homeowners collect random ideas without choosing a clear style. Decide whether you want your fireplace to feel modern rustic, organic contemporary, cottage, traditional, or minimalist. A limewashed stone fireplace with a reclaimed beam mantel creates a different mood than a charcoal-painted wall with a black screen and abstract art.
Test Finishes in Hidden Areas
Stone varies widely. Some types absorb paint instantly. Others resist finishes because they have been sealed. Test whitewash, limewash, or sealer in a low-visibility spot and view it in morning, afternoon, and evening light before committing.
Respect the Firebox
Decorative paint and standard wall products do not belong inside the firebox unless they are specifically rated for high heat. If the firebox looks tired, use products designed for fireplace interiors or hire a professional for repairs.
Real-Life Experience: What Actually Works When Updating a 1970s Stone Fireplace
The most important lesson from updating a 1970s stone fireplace is that the room changes before the fireplace does. Homeowners often stare at the stone for years, convinced it is the one thing ruining the living room. Then they clean it, paint the walls, remove the brass doors, and suddenly the stone looks less like a problem and more like a feature. That is why the best first step is observation, not demolition.
One practical experience is to take photos of the fireplace at different times of day. Natural light can make the stone look warm and charming in the morning but dark and heavy by evening. If the fireplace only looks bad at night, lighting may be the missing piece. A pair of sconces, a floor lamp, or warm recessed lighting can do more than a gallon of paint. Stone needs shadows to show texture, but it does not need to look like a cave entrance after sunset.
Another useful lesson is to work with undertones instead of fighting them. Many 1970s fireplaces have tan, rust, brown, cream, gray, and charcoal stones all mixed together. If you choose a wall color that relates to one of the softer tones in the stone, the whole fireplace calms down. For example, if the stone includes warm beige, a creamy off-white wall can make it feel intentional. If it includes smoky gray, a soft greige or muted charcoal can modernize it without requiring a single brushstroke on the stone itself.
Whitewashing also teaches patience. The first coat may look uneven, streaky, or slightly terrifying. That is normal. The finish usually improves as you blot, blend, and layer. The mistake is applying one heavy coat because you want instant results. A better method is to thin the paint, apply a small amount, step back, and repeat. Keep a damp rag nearby and work stone by stone. The beauty of whitewash is variation, so do not chase perfect uniformity.
Installing a mantel is another project where planning pays off. A mantel that is too thin can disappear against chunky stone, while one that is too thick can make the fireplace feel even heavier. Blue painter’s tape is your best friend here. Tape the proposed mantel size on the stone before building or buying anything. Live with it for a day. If it looks balanced from the sofa, the kitchen, and the room entrance, you are probably close.
Styling is where many fireplace makeovers finally click. After the paint dries or the mantel goes up, the fireplace may still feel unfinished until you add scale. A large mirror, oversized art, tall branches, and a few grounded accessories can make the makeover look designed rather than merely repaired. Avoid cluttering every ledge. Rough stone already brings a lot of movement, so simple decor usually wins.
The final experience-based tip is to keep one original feature if possible. A 1970s stone fireplace has history, texture, and handmade irregularity that newer builder-grade fireplaces often lack. You do not have to preserve every dark rock and chunky mortar joint, but keeping some natural variation gives the room soul. The best fireplace updates do not erase the past completely. They give it better lighting, cleaner lines, and a much-needed break from the avocado-green era.
Conclusion
Updating a 1970s stone fireplace does not have to mean ripping out a wall of masonry or spending like you accidentally wandered into a luxury showroom. The smartest fireplace makeovers begin with cleaning, safety checks, and a clear design direction. From there, you can brighten dark stone with whitewash, add depth with limewash, create rustic charm with German smear, install a floating mantel, replace dated brass doors, update the hearth, build surrounding shelves, or simply style the space with better lighting and larger decor.
The goal is not to make your fireplace look like every other fireplace online. The goal is to make it feel connected to your home today. A 1970s stone fireplace already has texture and presence. With the right DIY updates, it can become the warm, character-filled focal point your living room deservesminus the time-machine vibes.